Do you have a question about the Philips 43BDL4050D and is the answer not in the manual?
Guidelines for safe operation, handling, and maintenance of the display to prevent hazards.
Instructions for operating the display, including placement, ventilation, and power management.
Procedures for cleaning and maintaining the display to protect it from damage and ensure longevity.
Information on when and how to contact service personnel for repairs or assistance.
Essential safety guidelines for connecting and operating the display to prevent hazards and ensure proper function.
Statements of compliance with EU, FCC, and other regional regulations.
Regulations for low-power radio frequency devices in Taiwan.
Industry Canada compliance statement for license-exempt radio apparatus.
Statements regarding RF exposure limits and restricted radiation equipment in Brazil.
Requirements for electrical installation, power supply, and protection marks in Poland.
Philips' commitment to EMF safety standards and product development for consumer products.
Specific instructions for UK users regarding earthing the appliance and changing the fuse.
Detailed guide on connecting the power plug, including wire colors and terminal connections.
Information for Nordic countries regarding placement and ventilation.
Information on recycling and proper disposal of the product according to local regulations.
Disposal instructions for customers in Canada and the USA, mentioning lead and mercury.
Instructions for EU households on disposing of the product as household waste.
Instructions for US users on proper disposal methods and recycling information sources.
Compliance statement for India's E-waste rule, restricting hazardous substances.
Instructions for proper disposal of used batteries according to EU and Swiss regulations.
Instructions for unpacking the product, checking contents, and handling the display safely.
List of items included in the package, such as the LCD display, remote control, and accessories.
Important notes for installing the display, including power consumption, ventilation, and altitude considerations.
Step-by-step guide on how to install and remove the table stands for the display.
Instructions for mounting the display on a wall using a standard wall-mounting kit.
Specifications for the VESA mounting interface, including dimensions for wall mounting.
Guidelines for ensuring adequate space around the display for proper heat dissipation.
Instructions for installing the display in a portrait orientation, including logo placement.
Guide on using the logo sticker and guider for correct placement in portrait mode.
Steps for carefully removing the logo sticker from the display.
Instructions for using the edge alignment kit for video wall installations.
Steps for installing the edge alignment kit onto the displays for video wall setup.
Overview of the display's physical control buttons, including power, input, volume, and menu navigation.
Detailed description of all input and output ports on the display for connecting external devices.
Explanation of the remote control layout and general functions of its buttons.
Detailed description of the primary functions of the remote control buttons.
Instructions for setting the remote control ID for managing multiple displays.
Description of remote control buttons specific to the Android source mode.
Step-by-step guide on how to install or replace batteries in the remote control.
Precautions and guidelines for safely handling and maintaining the remote control.
Information on the effective range and angles for operating the remote control.
Instructions for connecting external video equipment like DVD players, VCRs, and VCD players.
Guide for connecting external video devices using the HDMI input port.
Instructions for connecting a personal computer to the display.
Guide for connecting a PC using the DVI-I input port for video and audio.
Instructions for connecting a PC using the DVI input port for video output.
Guide for connecting a PC using the HDMI input port for video and audio.
Instructions for connecting a PC using the DisplayPort input for video and audio.
Instructions for connecting external audio devices to the display.
Detailed steps for connecting external audio devices, such as a stereo amplifier.
Instructions for connecting multiple displays in a daisy-chain setup for video walls.
Connecting displays for control purposes using RS232 cables in a daisy-chain.
Connecting displays for digital video signals using DVI cables in a daisy-chain.
Connecting displays for analog video signals using DVI-I cables in a daisy-chain.
Connecting external IR receivers for remote control signals in a daisy-chain setup.
Setting up IR pass-through for remote control signals in a daisy-chain configuration.
Instructions on how to view content from connected external video sources.
Guide on adjusting the picture format to suit different video sources.
Introduction to the Android launcher interface, including admin mode and application pages.
Overview of the Media Player application, including its home page and functions.
Explanation of hotkeys for media playback, pause, fast forward, rewind, and zoom functions.
Guide to using the web browser application, including settings and navigation.
Instructions for playing PDF files using the PDF reader application.
Guide to configuring and using the SmartCMS application for content management.
Instructions for setting up and using custom applications on the display.
Steps to operate the custom app feature through the OSD menu.
Explanation of the Save, Forget, and Cancel functions for custom applications.
Overview of the main setting categories for signage display configuration.
Instructions for enabling, disabling, and connecting to Wi-Fi networks.
Guide for configuring Ethernet connection types (DHCP/Static IP).
Details on DHCP mode for network configuration, including limitations.
Instructions for configuring static IP addresses, netmask, DNS, and gateway.
Settings related to the signage display, including general, server, and source configurations.
Configuring display name, boot logo, and screenshot settings.
Setting up email notification, FTP server, and remote control configurations.
Configuring settings for Media Player, Browser, SmartCMS, and PDF Player sources.
Tools for managing storage, resetting the device, and importing/exporting settings.
Procedures for clearing Philips folders and user data from internal, USB, or SD card storage.
Steps to reset the display to its factory default settings.
Information on internal, SD card, and USB storage capacity and availability.
Displaying information about installed applications on the device.
Adjusting the display's internal clock, including auto sync and time zone settings.
Accessing and configuring Android developer options for advanced settings.
Displaying device information such as system updates, Android version, and kernel version.
Procedure for automatically searching and applying system updates via USB or SD card.
Additional settings and features, including system updates and rotation.
Instructions for rotating the display orientation via OSD menu settings.
How to navigate the On-Screen Display (OSD) menu using the remote control or display buttons.
Detailed steps for using the remote control to navigate and adjust OSD menu options.
Steps for using the physical control buttons on the display to navigate the OSD menu.
An overview of the OSD menu structure, detailing the Picture, Screen, Audio, PIP, and Configuration menus.
Settings for adjusting picture properties like brightness, contrast, sharpness, black level, tint, color, and gamma.
Settings for adjusting screen properties like H/V position, clock, zoom mode, and overscan.
Settings for adjusting audio properties such as balance, treble, bass, volume, and audio source.
Configuration options for Picture-in-Picture (PIP) mode, including sub mode, size, and position.
Settings for display status, panel saving, RS232 routing, and other configurations.
Advanced OSD settings including OSD turn off, position, transparency, and logo display.
Setting the unique ID number for controlling displays via RS232C connection.
Configuring DisplayPort support mode for optimal connectivity.
Selecting the window for display setting adjustments, including Main and PIP modes.
Setting the rotation for Main, Sub, and OSD elements.
Selecting the preferred language for the On-Screen Display (OSD) menu.
Resetting all settings within the Configuration2 menu to factory default values.
Advanced display settings including input resolution, IR control, and tiling.
Setting the VGA input resolution when automatic detection fails.
Configuring remote control operation modes (Normal, Primary, Secondary) for multiple displays.
Enabling or disabling the display's physical control buttons.
Creating large screen matrices (video walls) by configuring display arrangements.
Adjusting image settings to compensate for bezel width in tiled displays.
Adjusting the display's internal clock, including auto sync and time zone settings.
Programming scheduled time intervals for display activation and input source selection.
Enabling or disabling CEC control for HDMI connections.
Configuring the display to automatically detect and switch to available signal sources.
Selecting power saving modes to reduce energy consumption.
List of supported video, audio, and image codecs for USB device playback.
Details on supported input resolutions, refresh rates, and aspect ratios for VGA, SDTV, and HDTV.
Explanation of pixels, sub-pixels, and how they form an image on the display.
Definition of pixel defects and sub-pixel defects, including the concept of a 'dot'.
Description and examples of bright dot defects where pixels or sub-pixels are always lit.
Description and examples of dark dot defects where pixels or sub-pixels are always off.
Tolerances for pixel defects, considering their proximity and how it affects visibility.
Acceptable levels for pixel and sub-pixel defects to qualify for warranty repair.
Explanation of Mura (unevenness) on LCD panels and methods to minimize its appearance.
Instructions for safely cleaning the display screen, front panel, and cabinet.
Common display issues, their possible causes, and recommended solutions.
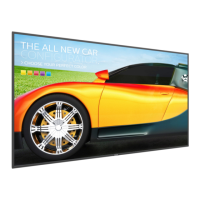
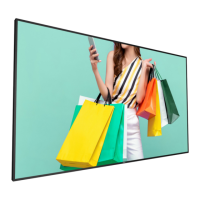
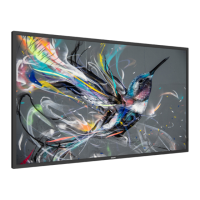
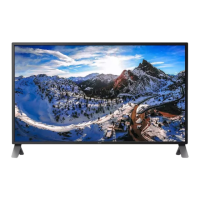
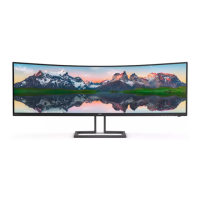
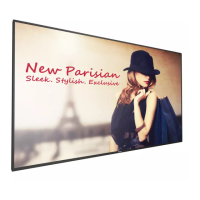
Key display characteristics like screen size, aspect ratio, resolution, brightness, and viewing angle.
Details on the display's input and output connectors, including types and specifications.
Specifications for internal memory, power supply, consumption, dimensions, and weight.
Information on energy efficiency class, screen size, power consumption, and display resolution.
Operating and storage conditions for temperature, humidity, and altitude.
Specifications for the built-in speaker, including type, input, impedance, and frequency response.
| Panel life | - h |
|---|---|
| Pixel pitch | 0.4902 x 0.4902 mm |
| Response time | 12 ms |
| Display diagonal | 42.5 \ |
| Display brightness | 450 cd/m² |
| Display technology | LED |
| Supported video modes | 480i, 480p, 576i, 576p, 720p, 1080i, 1080p |
| Contrast ratio (dynamic) | 500000:1 |
| Contrast ratio (typical) | 1100:1 |
| Display number of colors | 16.78 million colors |
| Display diagonal (metric) | 108 cm |
| Supported graphics resolutions | 640 x 480 (VGA), 800 x 600 (SVGA), 1024 x 768 (XGA), 1280 x 768, 1280 x 800, 1360 x 768 (WXGA), 1366 x 768, 1440 x 900, 1920 x 1080 (HD 1080) |
| AUX in | Yes |
| RS-232 input ports | 1 |
| Compatible memory cards | MicroSD (TransFlash) |
| VGA (D-Sub) input ports | 0 |
| Orientation | Horizontal/Vertical |
| Product color | Black |
| Product design | Digital signage flat panel |
| Bezel width (side) | 9.5 mm |
| Bezel width (bottom) | 15.6 mm |
| Panel mounting interface | 400 x 400 mm |
| AC input voltage | 100 - 240 V |
| AC input frequency | 50 - 60 Hz |
| Power consumption (standby) | 0.4 W |
| Power consumption (typical) | 59 W |
| Operating altitude | 0 - 3000 m |
| Storage temperature (T-T) | -20 - 60 °C |
| Operating temperature (T-T) | 0 - 40 °C |
| Operating relative humidity (H-H) | 20 - 80 % |
| RMS rated power | 20 W |
| Cables included | AC, RS-232 |
| Multi-display supported | - |
| On Screen Display (OSD) languages | ARA, CHI (SIMPL), CHI (TR), DAN, DEU, DUT, ENG, ESP, FIN, FRE, ITA, JPN, NOR, POL, POR, RUS, SWE, TUR |
| Sustainability certificates | RoHS, ENERGY STAR |
| Internal memory | 2 GB |
| Processor cores | 4 |
| Processor family | ARM Cortex |
| Processor frequency | 1.8 GHz |
| Audio formats supported | AAC, AIFF, ASF, LPCM, M4A, MP3, MP4, WAV, WMA |
| Image formats supported | BMP, GIF, JPG |
| Video formats supported | M2TS, M4V, MKV, MP4, MPEG, MPG, MTS, TS, VOB, WMV |
| Internal storage capacity | 16 GB |
| Operating system installed | Android |
| Certification | CE, FCC, Class B, UL/cUL, CCC, C-Tick, GOST, BSMI, CB, J-Moss, PSE, VCC |
| Depth | 45.72 mm |
|---|---|
| Width | 965.2 mm |
| Height | 558.8 mm |
| Weight | 10700 g |