EasyManuals Logo

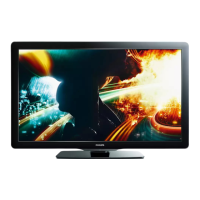
Philips 55PFL5706 User Manual

Philips 55PFL5706
10 pages
To Next Page IconTo Next Page
To Previous Page IconTo Previous Page
Page #4 background imageLoading...
Page #4 background image
Wireless LAN network setu
p
FR
P
aramétrage réseau LAN sans
l
ES
Instalación de la red L
A
N inalámbrica
P
lease make a note o
f
the name o
f
your wireless network, its security type and
s
ecurit
y
code be
f
ore
p
roceedin
g
with the setu
p
5b.
I
n t
h
e
p
rocess
b
e
l
ow, use e
i
t
h
er
5
a followed b
y
6
a
o
r
5
b followed b
y
6b
.
Veuillez noter le nom de votre réseau sans l, son t
yp
e de sécurité et code de
s
écur
i
té avant
d
e poursu
i
vre avec
l
e paramétrage
5
b
.
D
ans
l
e processus qu
i
su
i
t
,
ut
ili
sez
5
a su
i
v
i
d
e6a ou
5
b su
i
v
i
d
e
6
b.
A
note el nombre de su red inalámbrica, el tipo de seguridad y el código de seguridad
a
ntes
d
e cont
i
nuar con
l
a actua
li
zac
i
ón
5
b.
E
n e
l
p
roce
di
m
i
ento s
ig
u
i
ente, ut
ili
ce
5
a
s
e
g
uido de
6
a o 5b
y
6
b
.
Picture
Sound
Features
Installation
Software
Language English
Channels Autoprogram
Preferences
Network
Location
Clock
Reset AV settings
IP configuration
Auto clock mode
Start now
Network setting assi..
Manual network sett..
Network selection
Start now
Information
Start now
Connection test
Start now
Setting status
Reset network set..
Language
Channels
Preferences
Network
Reset AV settings
Clock
Ɣ
Ɣ
Ɣ
Ɣ
Ɣ
Ɣ
Ɣ
Ɣ
Ɣ
Ɣ
Ɣ
Ɣ
Ɣ
Ɣ
Ɣ
Watch TV
Browse USB Browse PC
Net TV
Add new devices
Setup
Before scanning, please make sure
your wireless router is turned on.
If your router has Wi-Fi protected
Setup(WPS), select Easy connect
and press OK.
If you have non-WPS type devices
in your router network, select
Scan and press OK.
Cancel
This TV can be connected to
your home network.
Select your connection type.
Wireless
Wired
Cancel
On your router, press the WPS button. Return to the TV
within 2 minutes, select Connect and press OK.
Connect
Back
Easy connect
Scan
Manual entry
Ɣ
e
make sure
u
rne
d
on
.
ttd
Easy
Easy
y
y
y
conne
conne
co e
ct
ct
S
ca
n
M
anual ent
ry
Before scanning, please make sure
your wireless router is turned on.
If your router has Wi-Fi protected
Setup(WPS), select Easy connect
and press OK.
If you have non-WPS type devices
in your router network, select
Scan and press OK.
Cancel
Easy connect
Scan
Manual entry
e
make sure
u
rned on
.
p
rotected
y
connec
t
E
as
y
connec
t
Scan
Scan
Scan
Network connection test:
Status : Testing...
Cancel
Network connection test:
Status : Pass
Network connection succeeds.
Network connection test:
Status : Fail
The wireless LAN adapter is not connected.
Connect wireless adapter to the Wireless LAN
port.
Select your network.
Cancel
Rescan
Router 1
w
ork
.
Route
Route
Route
r1
r1
r 1
Router 2
Router 3
Router 4
Router 5
3
5a
5b
2
4
6b
6a
7
8
1
Cance
Cance
Cance
l
l
l
ngs
atio
n
IP co
nfigu
r
mode
Auto
clock
S
tart now
Ɣ
Ɣ
Ɣ
i
Network
k
Reset
A
V settings
A
A
Clock
N
e
t
T
V
A
A
If your router has Wi
-
Fi p
an
d
p
ress
OK.
If you have non-WPS type devices
in your router network, select
Scan and press OK
C
a
n
ce
l
prote
cted
c
t
di
If your router has Wi Fi p
protected
and press OK.
If you have non-WPS typ
ne
Scan and press OK.
C
a
n
ce
l
pe devices
M
anua
l
en
t
ry
p( ) y
dOK
y
M
lt
P
lease veri
f
y your wireless settings and try again. Re
f
er to page
14 of the User Manual for detailed instructions.
Veuillez véri er les paramètres sans l et réessayer. Pour obteni
r
d
es instructions su
pp
lémentaires, consultez la
p
a
g
e 14 du
Manuel d’Utilisation
.
Veri que su con guración inalámbrica e intente nuevamente.
Re érase a la página 14 del Manual del Usuario para
i
nstrucciones detalladas
.
P
ress
MENU
,
se
l
ect [Setup
]
.
A
pp
u
y
ez sur
MEN
U
, sélectionnez
[
C
o
on guration
N
e
e
t
T
V
]
.
P
ulsar MEN
U
,
selecciona
r
[Con
g
g
uraci
ó
n]
.
Press
Press
Press
MENU
MENU
MENU
to exit.
to
e
to e
A
ppuyez su
r
NU
ME
N
N
pour quitte
r
.
P
res
i
one
MENU
p
ara sa
lir
.
p
p
Select
[N
etwor
k
setting assistant
]
.
S
électionnez
[
Assistant de paramét
rage réseau]
t
rag
er
ése
au]
RtR
A
V tti
A
A
Clock
.
S
eleccionar [Asistente para la con gu
ración en red]
ración en red]
Resetes
A
V settingsV settings
A
.
S
elect
el
ess
]
[
e
[Wi
re
[Wire
.
S
électi
o
nnez
onne
[
Sans l
]
.
S
elecci
o
onar
ona
I
na
l
am
b
rico
]
I
[
I
.
S
Sel
ect
Sel
S
ect
S
Sel
ect
S
ion
]
nstallat
nstallat
[In
[In
[In
g
g
mode
ock
oc
, t
h
en
[N
etwor
k]
.
nez
nez
Sél
ect
ion
Sélect
ion
s
tallation
]
[Ins
[In
p
uis
[
R
é
seau
]
.
nar
n
ar
Selecc
ion
Selecc
ion
t
alaci
ó
n
]
[Inst
[Inst
, y
l
uego
[R
e
d]
.
S
elect [Easy Connect
]
if
yo
o
ur rout
e
o
er has Wi-Fi Prote
e
e
If
your
router
has
Wi Fi
pf your router has Wi Fi
S
etup
(
WPS
)
, select Eas
ySetup(WPS), select Easy
dOK
ected
protected
tecte
y c
onne
c
yc
onnec
S
etu
p
(
WPS
)
with its butt
o
n.
o
S
électionnez
[
Easy Conne
c
c
t]
c
s
i
vo
t
tre routeur a un
t
t
If
you
have
non WPS
t
i
n
y
our router networ
k
in your router network
P
aramétrage Wi-Fi Protég
é
(WPS)
é
avec son bouton.
Scan
and
press
OK.
Scan and press OK.
S
eleccione
[
Easy Connect
]
]
s
i
su r
o
uter t
i
ene un
b
otón
d
e
o
o
Con
g
uración Prote
g
ida
W
W
i-Fi
(
W
W
P
S
)
.
P
P
t
on rst within 2 minutes.
t
tt
P
ress
W
ut
WP
S bu
WPS bu
n WPS d'abord dans un délai de 2 minutes.
to
o
Appuyez su
r
t
r le bout
r le bout
n
WPS primero antes de 2 minutos
.
ón
n
Presione e
ó
el botó
el b
botó
el botó
ne
S
elect the desired network. I
f
the
network with
netw
icon is selected,
e
r the security code.
e
nt
e
page 15 on the manual.
pa
pa
p
p
p
S
See
S
See
See
See
onnez le réseau désiré.
S
i le
t
i
t
c
ct
Sélec
é
u
avec
au
u
a
a
a
rése
a
s
l’icône est sélectionné,
e
z
l
e co
d
e
d
e sécur
i
té.
se
e
s
ss
s
saisis
i
t
ez-vous à la
p
a
g
e 15 du
r
rt
o
o
o
Repo
e
el.
ue
e
u
manu
anu
man
a
ionar la red deseada. Introduzca
c
c
Sele
c
elec
igo de seguridad una vez
d
di
d
el c
ód
cód
onada la red con
c
i
c
sele
cc
se
lecc
lecc
el icono.
u
lte la
p
á
g
ina 15 del manual.
u
u
s
Cons
Co
ons
ons
S
elect
e
e
p
[Scan]
have non
have non
. The
u
k
s
.
rk
k
r
etwor
unit searches for available n
etwor
c
yy
S
électionnez
é
é
y
i
n
y
our router
n
in your router n
Sd
Sd
[Balayage]
yp
e
twor
k
,
setwork, s
OK
OK
yag
e]
p
s
e
l
ect
select
pp
les
. L'
appa
reil recherche
a
r
é
éseaux disponibles.
é
é
Scan
and
press
OK.
press OK
S
e
leccione
e
e
[
Exploraci
ó
n
]
s
e
e
. Esta unidad busca la
as
red
as r
red
as red
ca l
E
d
isponibles.
di
C
C
a
a
n
n
ibles.

Questions and Answers:

Question and Answer IconNeed help?

Do you have a question about the Philips 55PFL5706 and is the answer not in the manual?

Philips 55PFL5706 Specifications

General IconGeneral
Audio systemDolby Digital, SRS TruSurround HD
RMS rated power20 W
Number of speakers2
Comb filter3D
Response time6 ms
Display diagonal55 \
Progressive scanYes
Display brightness450 cd/m²
Display technologyLCD
Native aspect ratio16:9
Native refresh rate120 Hz
Supported video modes1080i, 1080p, 480i, 480p, 720p
Viewable size diagonal1400 mm
Contrast ratio (typical)5000:1
Screen format adjustments4:3, 14:9, 16:9
Supported graphics resolutions1024 x 768 (XGA), 1280 x 1024 (SXGA), 1280 x 768 (WXGA), 1360 x 768 (WXGA), 1440 x 900 (WXGA+), 1680 x 1050 (WSXGA+), 1920 x 1080 (HD 1080), 640 x 480 (VGA), 800 x 600 (SVGA)
Operating temperature (T-T)5 - 35 °C
HDMI ports quantity4
USB 2.0 ports quantityUSB 2.0 ports have a data transmission speed of 480 Mbps, and are backwards compatible with USB 1.1 ports. You can connect all kinds of peripheral devices to them.
Digital audio coaxial out1
Sustainability certificatesENERGY STAR
Product colorBlack
Panel mounting interface400 x 400 mm
BacklightNo
Product weight57.98 lbs
Set depth (inch)4.33 \
Set width (inch)51.65 \
Set height (inch)31.37 \
Box depth (imperial)8.78 \
Box width (imperial)62.8 \
Box height (imperial)34.25 \
Package weight (imperial)82.01 lbs
Set depth (with stand) (inch)11.33 \
Set height (with stand) (inch)32.78 \
Weight (with stand) (imperial)66.58 lbs
Audio formats supportedMP3
Image formats supportedJPG
Video formats supportedAVI, H.264, MPEG1, MPEG2, MPEG4, WMV
Supported TV bandsUHF, VHF
Analog signal format systemNTSC
Digital signal format systemATSC
AC input voltage120 V
AC input frequency60 Hz
Power consumption (standby)0.15 W
Power consumption (typical)297 W

Related product manuals