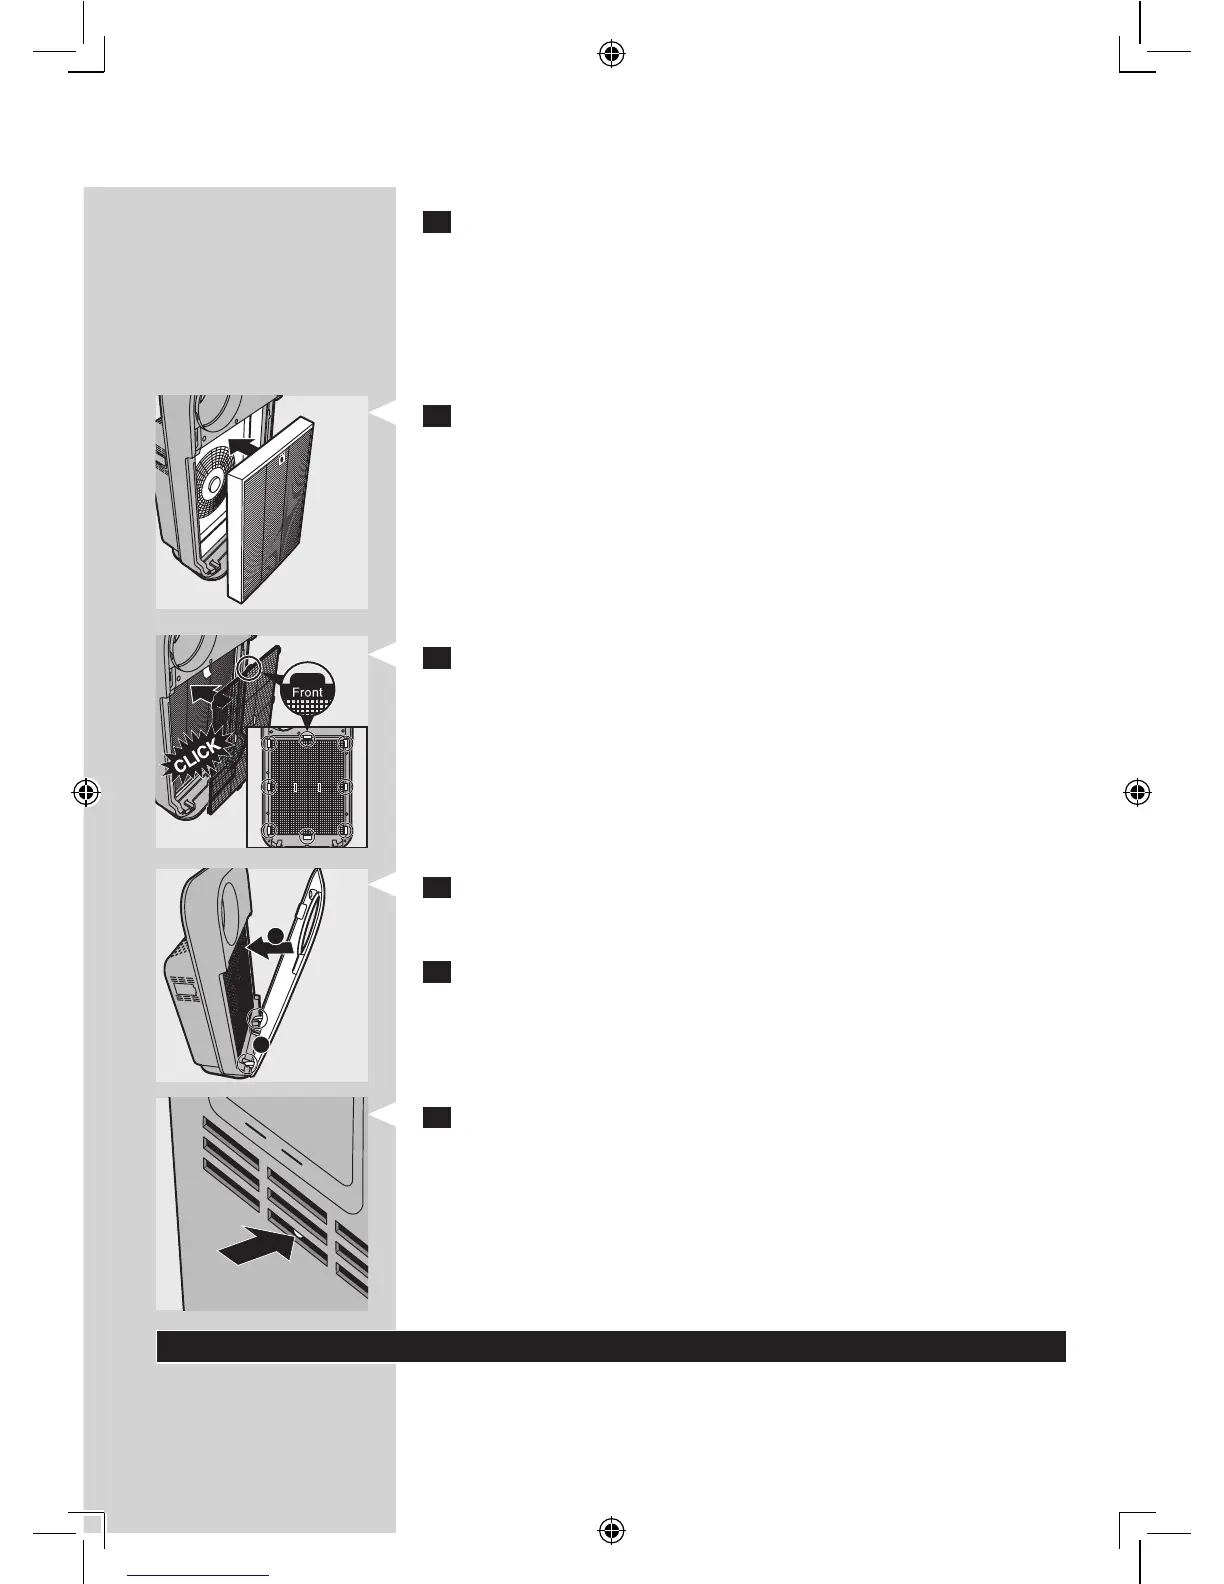
5 Discardthelterthatneedstobereplacedandunpackthenew
lter.
Note: Do not touch the pleated lter surface, or smell the lter as it has
collected pollutants from the air.
Note: Wash your hands after disposing of the used lters.
6 Putlter2(multi-layerlter)backintotheappliance.
Note: Make sure that the side with the tag is pointing towards you.
7 Putlter1(pre-lter)backintotheappliance.
Note: Make sure that the side with the two projections is pointing towards you.
Note: Make sure that all hooks are properly attached to the appliance.
8 Toreattachthefrontpanel,insertthebottomhooksintothebottom
oftheappliancerst(1).Thenpushthepanelagainstthebodyofthe
appliance(2).
9 Putthepluginthewallsocketandswitchontheapplianceagain.
10 Pressthelterresetbuttonwithathintool.
Note: You do not need to press the lter reset button after cleaning lter 1
(pre-lter).
Note: You cannot reset the appliance when you replace a lter before its lter
replacement light starts ashing.
Note: You cannot reset the appliance if it is not plugged in and switched on.
Storage
To store the mains cord, wind it round the cord storage facility at the
bottom of the appliance.
1
2