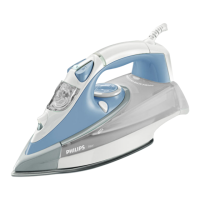
This document describes the Philips GC4500 series steam iron, a device designed for efficient and effective garment ironing.
Function Description
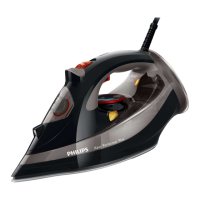
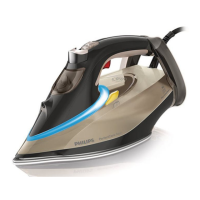
The Philips GC4500 series steam iron is designed to provide powerful steam for wrinkle removal and smooth ironing. It features a spray button for targeted moisture, a steam slider with ECO and Auto steam settings, and a steam boost trigger for stubborn creases. The iron also includes a safety auto-off function for specific types, a temperature indicator light, a temperature dial with Auto steam control, and a Calc Clean button with a Quick Calc Release lock and tray for easy maintenance.
Important Technical Specifications
The iron is designed to be used with tap water, but for prolonged appliance lifetime, distilled or demineralized water is recommended, especially in areas with hard water. It is crucial not to add perfume, vinegar, starch, descaling agents, ironing aids, or other chemicals to the water tank, as these can damage the appliance.
The temperature settings are adjustable via a dial and correspond to different fabric types:
- Linen: MAX temperature setting, with Auto steam control and Steam boost.
- Cotton: High temperature setting, with Auto steam control and Steam boost.
- Wool: Medium temperature setting, with Auto steam control, but no Steam boost.
- Silk: Medium temperature setting, with Auto steam control, but no Steam boost.
- Synthetic fabric (e.g., acrylic, nylon, polyamide, polyester): Low temperature setting, with no Auto steam control and no Steam boost.
The steam settings include:
- Auto steam: Automatically adjusts steam output to the selected temperature for optimal ironing results.
- ECO: Reduces steam output to save energy while still providing sufficient steam.
- Dry: No steam output, suitable for garments that do not require steam.
- Iron with extra steam: Activates the steam boost trigger for powerful steam to remove stubborn creases.
The safety auto-off function automatically switches off the iron if it has not been used for 30 seconds resting on its soleplate or 8 minutes resting on its backplate. The auto-off light will illuminate when the iron is heating up and turn off when the iron moves or is picked up.
Usage Features
Quick Start Guide - Start here:
- Plug in the iron.
- Fill the water tank (do not exceed MAX).
- Select the desired temperature setting based on the fabric type.
- Wait for the temperature indicator light to turn off, indicating the iron is ready.
- Use the spray button for targeted moisture.
- Adjust the steam slider for continuous steam or ECO mode.
- Press the steam boost trigger for extra steam.
- Iron your garments.
- When finished, unplug the iron.
- Empty the water tank.
Quick Start Guide - Storage:
- Unplug the iron.
- Ensure the iron is cool.
- Store the iron upright.
- Wrap the cord around the cord wrap.
Filling the water tank:
- Open the Quick Calc Release lock.
- Remove the Quick Calc Release tray.
- Fill the water tank with tap water (or distilled/demineralized water).
- Reinsert the Quick Calc Release tray.
- Close the Quick Calc Release lock.
Emptying the water tank:
- Unplug the iron.
- Ensure the iron is cool.
- Open the Quick Calc Release lock.
- Remove the Quick Calc Release tray.
- Pour out excess water from the water tank.
- Clean the tray using tap water.
- Reinsert the Quick Calc Release tray.
- Close the Quick Calc Release lock.
Maintenance Features
Cleaning and maintenance:
- Unplug the iron and let it cool down.
- Empty any remaining water from the water tank.
- Wipe flakes and any other deposit off the soleplate with a damp cloth and a non-abrasive (liquid) cleaning agent.
- Do not use scouring pads, vinegar, or other chemicals to clean the soleplate, as these can damage the metal objects.
Quick Calc Release:
This feature is crucial for prolonging the life of your appliance and maintaining good steaming performance. It is recommended to use Quick Calc Release once every 1 month, or more frequently in hard water areas.
To perform Quick Calc Release:
- Put the iron on a levelled surface and push up the Quick Calc Release lock at the back of the iron.
- Take out the Quick Calc Release tray.
- Pour out scales in the tray into a sink or dustbin. Clean the tray using tap water. Remove any excess water from the tray.
- Do not pour water, vinegar, descaling agents, or other chemicals into the iron from the opening of the Quick Calc Release.
- Do not use vinegar, descaling agents, or other chemicals to wash the tray.
- Wipe off the scales in the opening of the Quick Calc Release tray with a damp cloth.
- Insert the tray back into the iron.
- Push down the Quick Calc Release lock.
- Do not use the iron when the Quick Calc Release tray is not locked.
Calc-clean function:
This function should be performed once every 1 month to prolong the life of your iron, especially in hard water areas.
To perform Calc-clean:
- Make sure the iron is unplugged and the steam slider is set to dry setting.
- Fill the water tank to the MAX indication.
- Do not pour vinegar or other descaling agents into the water tank.
- Plug in the iron and set the temperature dial to MAX.
- Unplug the iron when the temperature light goes out.
- Hold the iron over the sink. Keep pushing the calc clean button and gently shake the iron forth and back until all water in the water tank has been used up.
- Scales are flushed out, steam and boiling water also come out of the soleplate. Repeat steps 2 to 5 if the water that comes out of the iron still contains scale particles.
- Plug in the iron and let the iron heat up to dry the soleplate.
- Unplug the iron when the temperature indicator light goes out.
- Move the iron gently over a piece of cloth to remove any water stains on the soleplate.