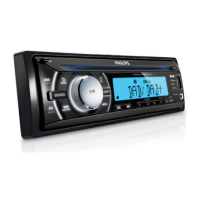
Overview of parts 1
These are the supplied parts needed to connect
and install this unit:
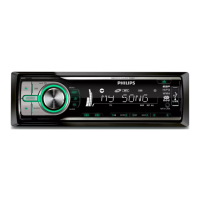
a
In-car audio system
b
Sleeve
c
Front panel
d
ISO connector
e
Trim plate
f
Rubber cushion
g
Disassembly tools
h
Screws (4 pieces)
Connect wires
Caution
Ensure that all loose leads are insulated with
•
electrical tape.
For cars with ISO connectors
2 3
1
Pull out the ISO connectors from car
dashboard and connect them to the bigger
end of the supplied standard connector.
2
Connect the other end of the supplied
standard connector to the unit.
3
Connect the antenna and amplier as
illustrated, if applicable. You can connect the
car audio to the amplier through RCA-TO-
RCA cables (not supplied).
Connector Connect to
1 ANTENNA Antenna
2 REAR LINE OUT R Rear right speaker
3 REAR LINE OUT L Rear left speaker
For cars without ISO connectors
3 4
Caution
Be sure to connect the black ground (earth)
•
lead rst.
1
Connect the antenna and amplier as
illustrated, if applicable.
2
Cut off the bigger end of the supplied
standard connector.
3
Check the car’s wiring carefully and connect
them to the supplied standard connector.
4
Connect the supplied standard connector to
the unit.
1 Green/black strip Left speaker (Rear)
2 White/black strip Left speaker (Front)
3 Gray/black strip Right speaker (Front)
4 Purple/black strip Right speaker (Rear)
e RED Ignition key +12V DC when
ON/ACC
f BLUE Motor/electric antenna relay
control lead/Amplier relay
control lead
g BLACK Ground
h Orange Illumination switch
i YELLOW To the +12V car battery which is
energized at all times
Note
Check wire connection before you mount the
•
unit into a car.
If preset radio stations are lost when the
•
ignition key is turned OFF and then back
ON, reconnect the red leads crosswise to the
yellow ones.
Attach the front panel 5
1
Attach the trim plate.
2
Insert the right side of the panel in the
chassis until it is correctly engaged.
3
Press the left side of the panel and point the
left hole at the left pillar.
4
Release the panel to engage the left side.
Mount in the dashboard 5
1
If the car does not have an on-board drive or
navigation computer, disconnect the negative
terminal of the car battery.
If you disconnect the car battery in a car •
that has an on-board drive or navigation
computer, the computer may lose its
memory.
If the car battery is not disconnected, •
to avoid short-circuit, ensure that bare
wires do not touch each other.
2
Remove the two screws on the top of the
unit.
3
Remove the mounting sleeve with the
supplied disassembly tools.
4
Ensure that car dashboard opening is within
these measurements:
5
Install the sleeve into the dashboard and
bend the tabs outward to x the sleeve.
6
Place the supplied rubber cushion over the
end of the mounting bolt.
7
Slide the unit into the dashboard until you
hear a click sound.
8
Reconnect the negative terminal of the car
battery.
Turn on
1
Press
z
to turn on the unit.
• To turn off the unit, press
z
for 3
seconds.
Set clock
1
Press MENU/DISP for 3 seconds.
2
Press
3
or
4
repeatedly to until the
currently time is displayed.
3
Turn
z
clockwise to set hour.
4
Press
z
to conrm.
5
Turn
z
anti-clockwise to set minute.
6
Press
z
to conrm.
View clock
1
Press MENU/DISP repeatedly until the clock
is displayed.
Listen to radio
1
Press SOURCE repeatedly to select Tuner.
2
Press
3
or
4
to select band: [FM1], [FM2],
[FM3], [AM1], or [AM2] .
3
Press
∞
or
§
to tune to a radio station
manually.
To search for a radio station •
automatically, press
or
for 3
seconds.
Play audio les
1
Press on the front panel to release the
panel.
2
Insert a CD with the printed side facing up.
3
Close the panel.
Play starts automatically.
»
To pause CD play, press 1 •
.
To resume CD play, press•
1
again.
Insert the USB device
1
Open the cover marked on the front
panel.
2
Insert the USB device into the USB socket.
The unit star ts playing from the USB
»
device automatically.
© 2009 Koninklijke Philips Electronics N.V.
All rights reserved.
CEM210_51_UM_V1.1