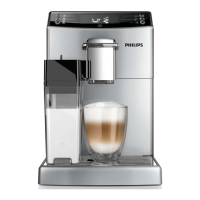
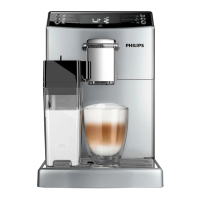
Machine overview
1
User interface (EP4050 only) 12 Drip tray release button
1A ESPRESSO button 13 Cord
1B CAPPUCCINO button 14 Grind setting knob
1C LATTE MACCHIATO button 15 Cover of bean hopper
1D Standby button 16 Bean hopper
1E CLASSIC COFFEE button 17 Brew group
1F AROMA STRENGTH button 18 Inside of service door with contact information
1G MENU button 19 Coffee exit duct
2 User interface (EP4051 only) 20 Coffee residues drawer
2A ESPRESSO button 21 Coffee grounds container
2B CAPPUCCINO button 22 Drip tray cover
2C AROMA STRENGTH button 23 Hot water dispensing spout
2D Standby button 24 Opening for hot water dispensing spout
2E CLASSIC COFFEE button 25 CoffeeSwitch
2F CAFÉ AU LAIT button 26 Water tank
2G MENU button 27 AquaClean filter
3 Adjustable coffee dispensing spout 28 Milk container
4 Lid of water tank 29 Milk dispensing unit
5 Lid of bean hopper 30 Lid of milk dispensing unit
6 Lid of pre-ground coffee compartment 31 Milk dispensing spout
7 Main switch 32 Grease tube with application tip and cap
8 Socket for cord 33 Cleaning brush
9 Service door 34 Measuring scoop
10 'Drip tray full' indicator 35 Water hardness test strip
11 Drip tray
Introduction
Congratulations on your purchase of a Philips full-automatic coffee
machine! To fully benefit from the support that Philips offers, please register
your product at www.philips.com/coffee-care.
Read the separate safety booklet carefully before you use the machine for
the first time and save it for future reference.
5
English