FC8451/01
2-8
DISASSEMBLY- AND RE-ASSEMBLY ADVISE
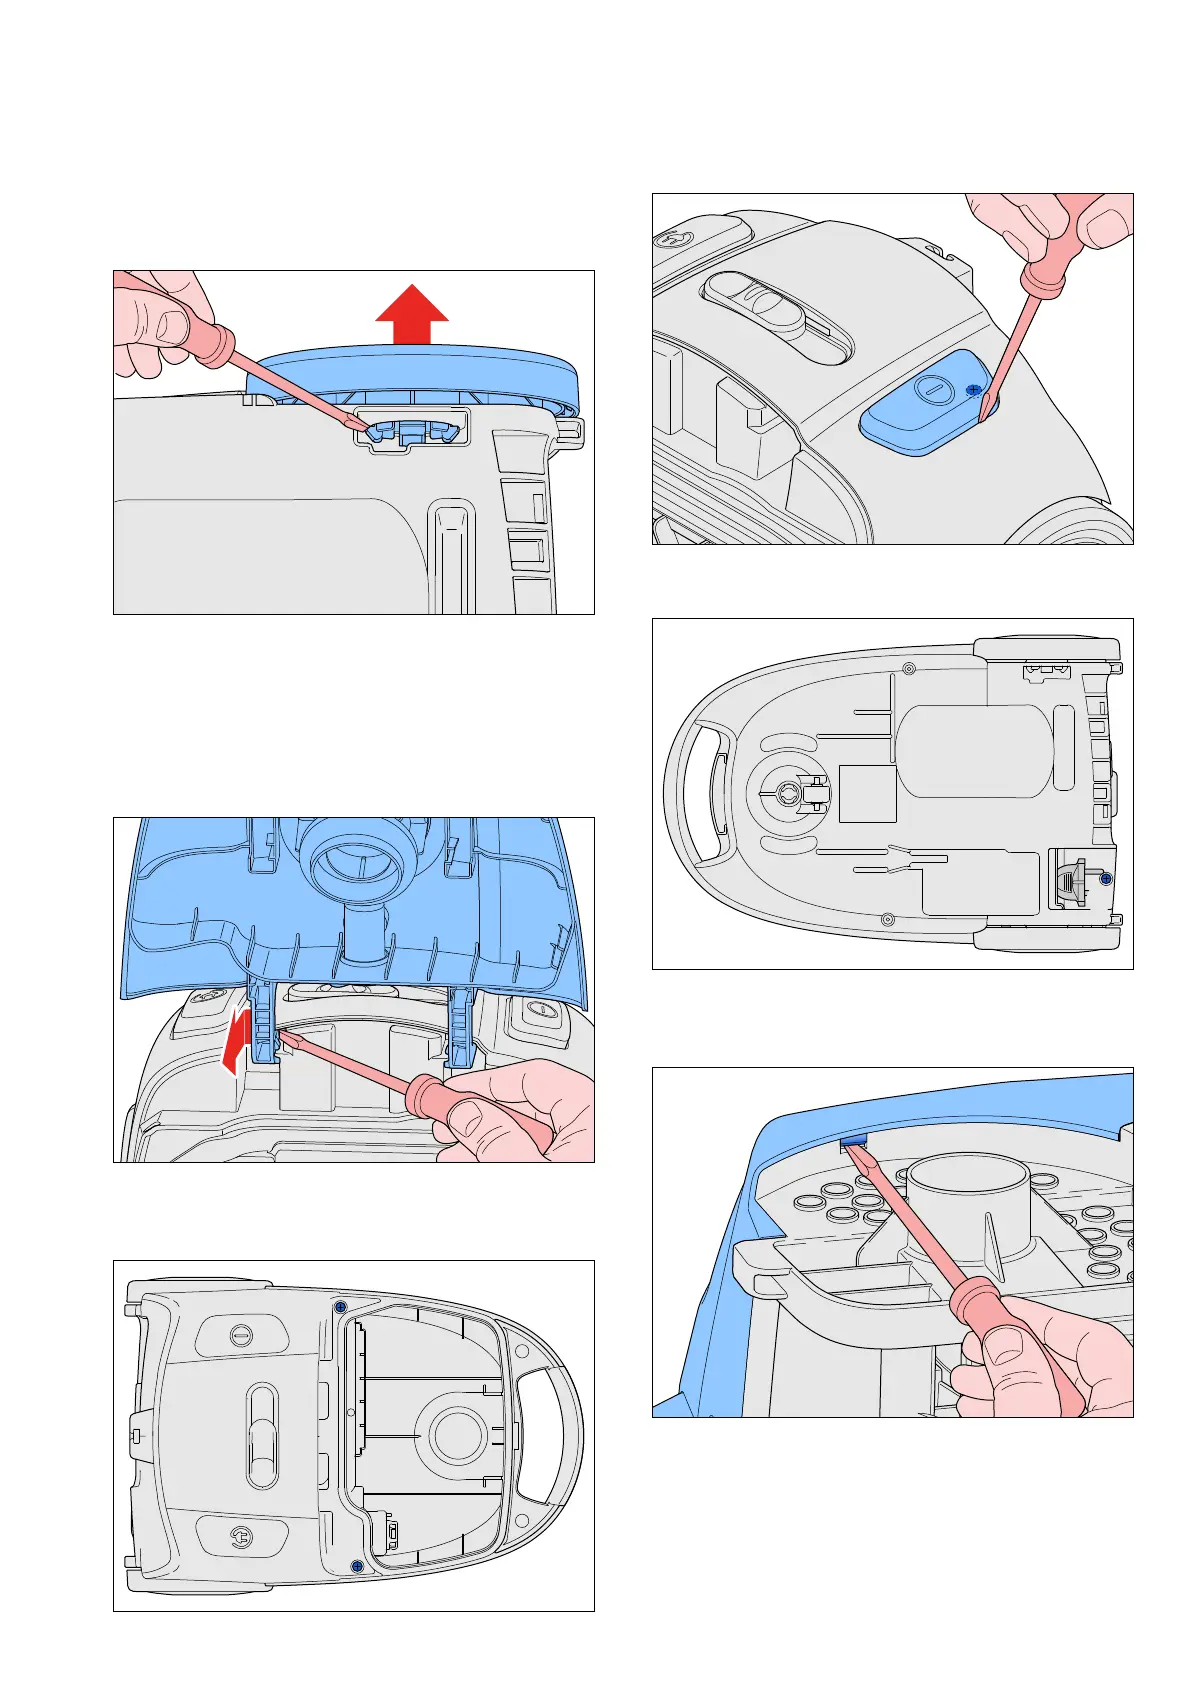
• First remove the dust bag.
• To replace the wheels (10), first turn the appliance
upside down. To remove the wheel on the left side (seen
from the backside), push with a screwdriver the nocks
from the inside out, and pull the wheel out (see picture).
• To remove the wheel on the cordwinder side, pull the
wheel with great force from the lower housing.
To place a wheel, click the wheel into the lower housing.
• To reach te inner parts for repair, the top housing (15)
has to be removed.
• Remove the dustcover assy (1) using a screwdriver
(see picture).
• When the dustcover has been removed, 2 of the 4
screws B that need to be unscrewed to disassemble the
tophousing (15) are accessible (see picture).
B
B
• The 3
th
screw B is hidden under the On/Off pedal (12),
to remove the pedal use a screwdriver (see picture).
B
• Finally the last screw B that need to be removed is
situated at the bottom side of the appliance (see picture).
B
• To separate the top housing from the bottom housing
release the snap connection behind the wheel at the
cordwinder side (see picture).