Do you have a question about the Philips SmartPro FC8794/01 and is the answer not in the manual?
Key performance metrics including battery, charging, runtime, suction power, and sensors.
Physical specifications detailing product dimensions and weight.
Features related to scheduling, cleaning modes, and compatible floor types.
Details about the dust capacity and the type of exhaust filter used.
List of accessories included with the robot, such as adapters and pads.
Part number for the brush accessory.
Part number for the remote control.
Part numbers for switching adapters with various plug types (EU, China, Taiwan).
Part number for the docking station.
Part number for a pair of side brushes.
Part number for mop pads.
Part number and capacity for the rechargeable battery assembly.
Part number for the dustbin assembly.
Part number for the main printed circuit board assembly.
Part number for the bumper printed circuit board assembly.
Part numbers for left and right side brush motor assemblies.
Part number for the suction motor assembly.
Part numbers for side cliff sensor assemblies.
Part number for the front cliff sensor assembly.
Part number for the left wheel assembly.
Part number for the right wheel assembly.
Instructions on how to remove and replace the dustbin assembly.
Guidance on how to easily pull off and replace the brushes.
Steps to remove the wheel assembly by unscrewing cover and disconnecting.
Instructions for replacing the cliff sensor by unscrewing a screw.
Steps to remove the nozzle strip by unscrewing screws.
Procedure to remove the battery cover and disconnect the battery.
Steps to remove the suction motor assembly by unscrewing and disconnecting.
Procedure to remove the top cover assembly by unscrewing screws.
Instructions to replace the side brush motor assembly by unscrewing and disconnecting.
Diagram showing connections to the Main PCBA from sensors and motors.
Diagram showing connections to the Power PCBA from docking station and battery.
Diagram showing connections for the docking station power and infrared signals.
Illustration of wiring connections to the main PCB, including sensors and motors.
Visual indicators for correct ('OK!') and incorrect ('Not OK!') connector states.
Overview of sensor types, their locations, and quantities on the robot.
Table listing each sensor type and its total number on the robot.
Solutions for robot not starting or responding to buttons.
Causes and solutions for the robot beeping and stopping.
Solutions for robot not cleaning properly due to brushes, filter, or suction.
Solutions for battery issues and robot moving in circles (spot-cleaning).
Solutions for the robot failing to find the docking station.
Guidance on responding to alarm signals and solving related problems.
Comparison of specifications for FC8794/01, FC8794/31, and FC8794/82 models.
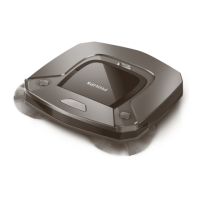
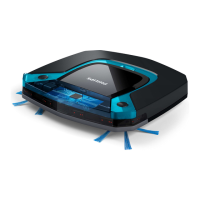
This document describes the Philips SmartPro Easy Robot, a robotic vacuum cleaner designed for automated floor cleaning. It covers various aspects of the device, including its function, usage, maintenance, and repair.
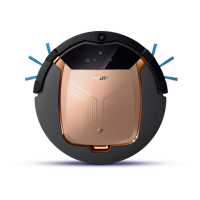
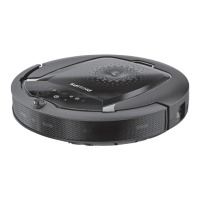
The Philips SmartPro Easy Robot is an autonomous cleaning device that navigates and cleans various floor types without direct human intervention. It is equipped with multiple sensors to detect its surroundings, avoid obstacles, and prevent falls. The robot utilizes a combination of brushes and suction to effectively pick up dust and debris. Its core function is to provide a convenient and efficient solution for maintaining clean floors in a home environment. The device is powered by a rechargeable Li-ion battery, allowing for cordless operation and automatic return to a docking station for recharging. Different models of the robot are available, distinguished by their color and regional accessories, but they share the same fundamental cleaning technology and operational principles.
The SmartPro Easy Robot offers several features designed to enhance its usability and adaptability to different cleaning needs. Users can schedule cleaning sessions up to 24 hours in advance, allowing the robot to clean at preferred times, even when no one is home. The robot supports multiple cleaning modes, enabling it to tackle various cleaning challenges, from general maintenance to more focused cleaning tasks. It is designed to operate on both carpeted and hard floor surfaces, making it versatile for homes with mixed flooring.
The robot's smart detection system, comprising 23 sensors, allows it to intelligently navigate around furniture, along walls, and avoid dropping down stairs. This sensor array ensures comprehensive coverage and safe operation. For user convenience, the robot comes with a remote control, enabling manual steering and selection of cleaning modes. It also includes essential accessories such as an AC power adaptor, a charging base for automatic recharging, micro fiber pads for mopping functions, side brushes for edge cleaning, and an exhaust filter to maintain air quality. Optional accessories like additional filter and brush sets, as well as mop pads, are available to extend the robot's functionality and lifespan.
Maintaining the SmartPro Easy Robot is straightforward, with several user-serviceable components designed for easy replacement or cleaning. Regular maintenance ensures optimal performance and extends the device's operational life.
Dustbin and Filter Maintenance: The dustbin assembly is easily removable for emptying. The cover of the dustbin can be unlocked to access and replace the HEPA filter inside. The filter castor, a component of the filtration system, can also be replaced. Regular cleaning of the dust filter and EPA filter with a small brush is recommended. The dust filter can be rinsed under a tap and must be completely dry before reinstallation. The EPA filter should be replaced at least once a year, or more frequently if cleaning no longer restores its effectiveness.
Brush and Wheel Maintenance: The side brushes are designed for easy removal and replacement. They can be pulled off and clicked back into place. If the bristles become crooked or bent, soaking them in warm water can help restore their shape; otherwise, they should be replaced. The wheel assembly also requires attention. To remove or replace a wheel assembly, two screws on the cover plate must be removed. The wheel assembly can then be unplugged by disconnecting its connector. It's important to check for the presence of a spring beneath the left and right wheel assemblies during reassembly. The front wheel can become jammed with hair or dirt and should be cleaned regularly.
Sensor and Nozzle Strip Maintenance: The cliff sensors, which prevent the robot from falling, can be replaced by unscrewing them. The nozzle strip, located in the middle part of the robot, can be removed by unscrewing three screws. Regular cleaning of the suction opening in the bottom of the dust container is also crucial to prevent clogging.
Battery Replacement: The rechargeable Li-ion battery is a user-replaceable component. To access the battery, two screws on the cover plate must be removed. Once the cover plate is off, the battery can be replaced by disconnecting its connector. If the battery can no longer be charged or runs out quickly, it indicates that it has reached the end of its life and needs replacement, ideally by a Philips service center.
Troubleshooting and Repair: The service manual provides a comprehensive troubleshooting guide for common issues, such as the robot not starting, not responding to buttons, beeping and stopping, or not cleaning properly. Solutions range from charging the battery and cleaning components to checking for obstructions and repositioning the robot. For more complex issues, such as problems with sensors or internal motors, the manual outlines the steps for disassembling the device to access and replace specific service parts, including the main PCBA, bumper PCBA, side brush motor assemblies, suction motor assembly, front cliff sensor assembly, and nose wheel assembly. The manual also details the wiring diagram and sensor locations to aid in diagnostics and repair. In cases where the robot cannot find its docking station, users are advised to ensure sufficient room for navigation or to return the device to a repair center if sensors are malfunctioning. An alarm signal indicates when the robot encounters trouble, prompting the user to resolve the issue by removing obstacles or cleaning sensors.
| Type | Robot Vacuum Cleaner |
|---|---|
| Dust Capacity | 0.6 L |
| Battery Life/Running Time | 120 min |
| Battery Type | Li-Ion |
| Voltage | 14.4 V |
| Filters | HEPA Filter |
| Charging Time | 240 minutes |
| Cord length | Cordless |
| Accessories | side brush |