FC8654/01
2-8
DISASSEMBLY- AND RE-ASSEMBLY ADVISE
• First remove the dust bag.
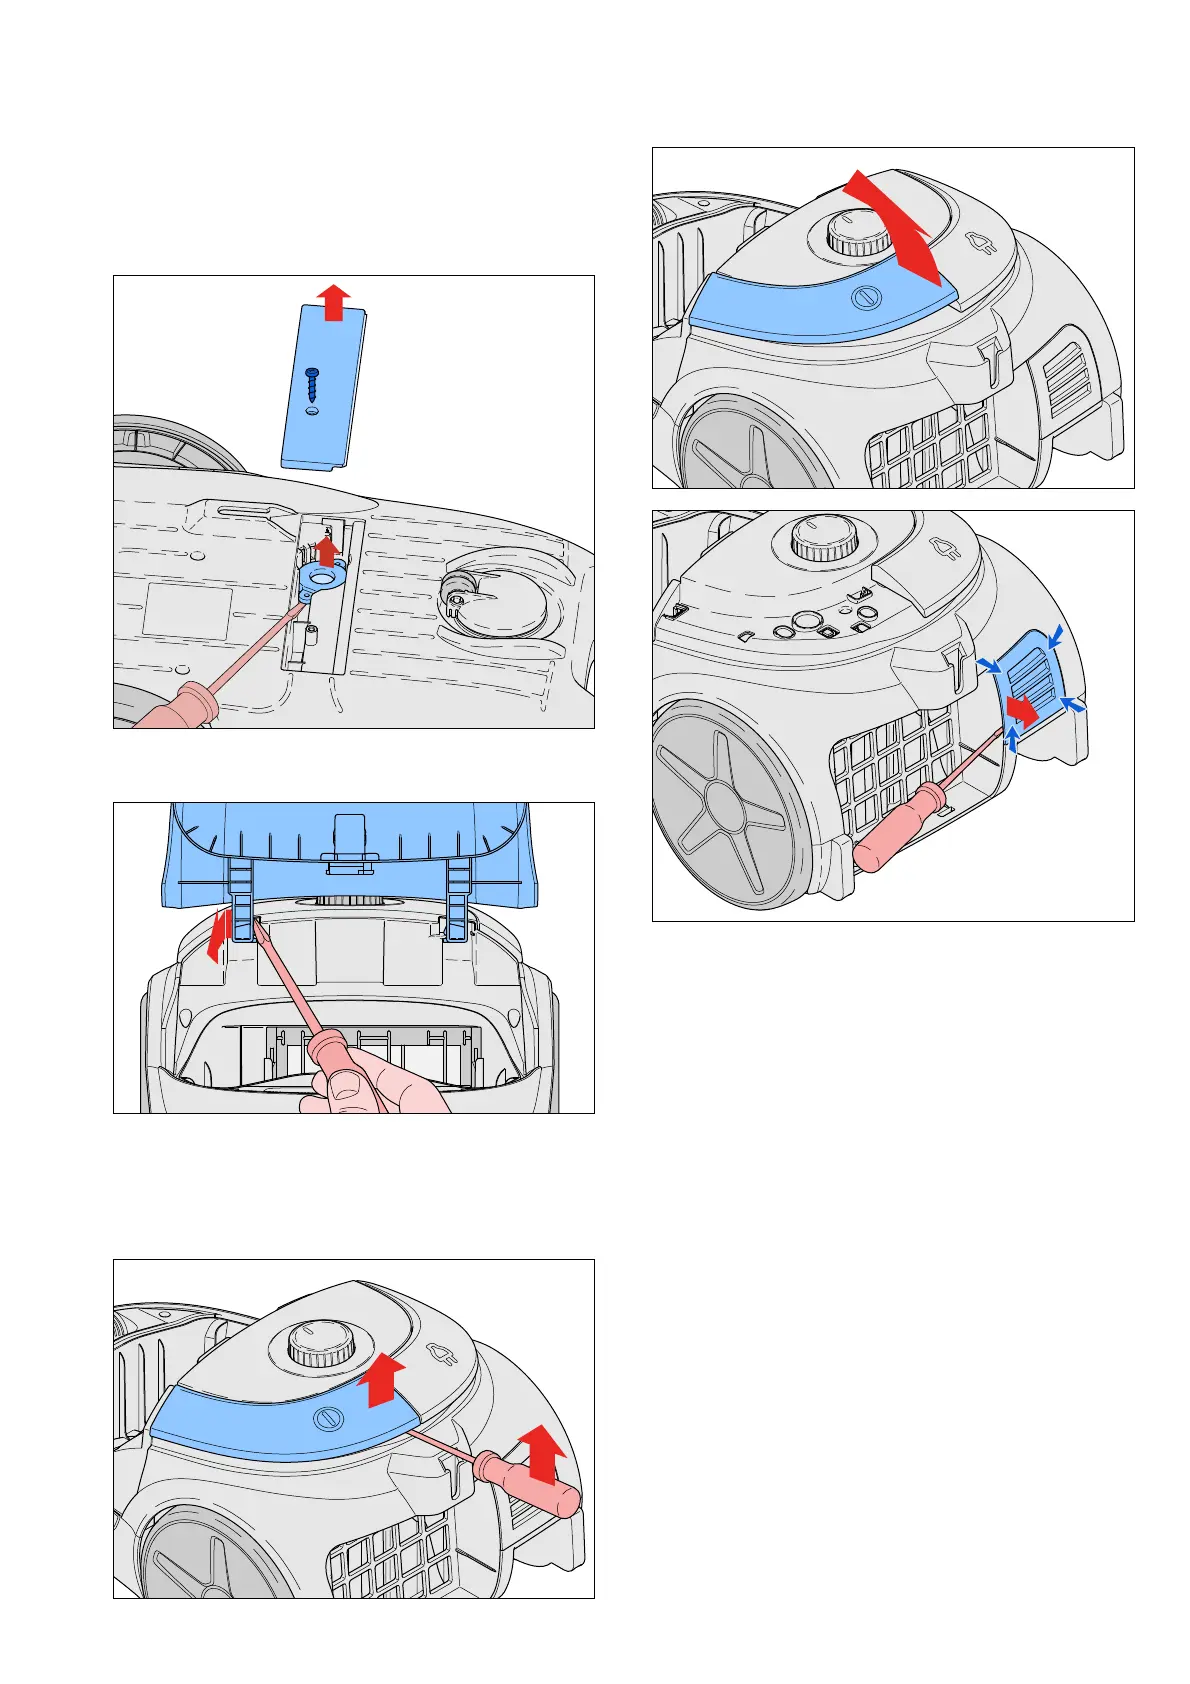
• To replace the Valve assy (10), turn the appliance upside
down and remove bottom plate (16) by removing
screwD. Now by using a screwdriver the valve assy can
be removed (see picture).
D
• Remove the dustcover assy (1) using a screwdriver
(see picture).
• To disassemble the Back housing (9):
Remove the 4 screws B. (see exploded view).
To reach the 2 screws on the back, first remove the
On/Off button (12) and the small panel, which has 4
snap locks! (see pictures).
1
2
• Disconnect the connector from the potmeter PCBA.
• To remove the Turning knob (8) & Potmeter PCBA:
Turn the Back housing upside down and remove the 2
screws C. The potmeter PCBA can now be removed
and replaced.
• Turning knob (8) can be pushed to the outside with a
screwdriver.
• The On/Off switch (20) can be replaced by unplugging
the two wires.
• To replace the main PCBA (19) remove the small 2
screwsE (see exploded view)
• The Cordwinder (17) can be removed by pulling it
in upwards direction and unplugging the two wires,
the Cordwinder can replaced by placing it back in the
opposite direction.
• To replace the Motor assy (22):
Disassemble the Motor housing (21) by removing the 4
screws F (see exploded view).