Do you have a question about the Philips FC9008 and is the answer not in the manual?
Product meets interference suppression requirements and post-repair safety standards.
Details on color, air displacement, vacuum, power consumption, capacity, and filter types.
List of available optional accessories such as S-bags, filters, and specialized nozzles.
Instructions on opening the appliance, removing filter grilles, and switch control panels.
Notes on replacing parts like the HEPA filter and handling specific component requirements.
Guidance for replacing reel half spring unit, cord winder, air valve, and electronic control unit.
Explanation of dustbag clogging issues affecting the dustbag-full indicator.
Information to recognize and differentiate between old and new switch versions.
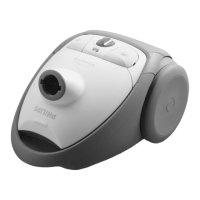
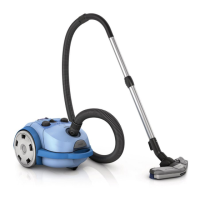
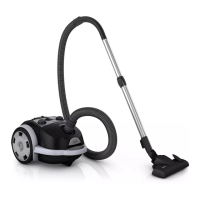
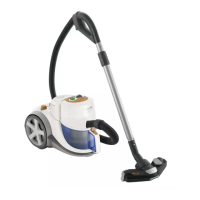
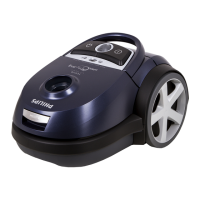
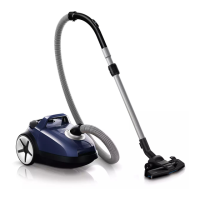
This document describes the Philips FC9008 vacuum cleaner, a household appliance designed for dry vacuuming.
The Philips FC9008 is a vacuum cleaner primarily designed for domestic use, offering efficient cleaning through its powerful suction and multi-stage filtration system. Its core function is to collect dust and debris from various surfaces, utilizing a dustbag for containment and a series of filters to ensure clean exhaust air. The appliance is equipped with a cord winder mechanism for convenient storage and a dustbag-full indicator to alert the user when the dustbag needs replacement. An air valve is integrated to cool the motor if airflow becomes too low or blocked, preventing overheating and ensuring longevity. The electronic control unit (item 12) manages various functions, and in cases where its electronic control is not required, the Triac can be short-circuited as per the circuit diagram.
The FC9008 operates on a 230V power supply with a power consumption of 1400W (IEC standard). It boasts a maximum air displacement of 37 liters per second and a maximum vacuum water column of 310 cm, indicating strong suction capabilities. The dust storage capacity is 3 liters, utilizing an FC8021 type dustbag. The cord length varies depending on the version, typically around 7 meters.
The filtration system is comprehensive, featuring a paper dustbag, an exhaust HEPA air filter (item 22), and a motor inlet filter. The HEPA air filter is a critical component for trapping fine particles and allergens, and it should be replaced when the filter-full indicator light illuminates. The cleaner's dimensions are 460 x 315 x 270 mm, and its packaging dimensions are 595 x 395 x 295 mm. The net weight of the appliance is 5.88 kg, with a gross weight of 9.135 kg. The cleaner is available in a "Misty green" color.
Optional accessories enhance its versatility, including:
The motor is a 1441 230V unit (item 36). The cord winder spring (item 40) is a long type, suitable for both long and short cords, with a length of 9.3 meters. The reel half spring unit (item 40) requires lubrication with silicone grease if replaced.
The FC9008 is designed for ease of use in a domestic setting. Its compact dimensions and relatively light weight contribute to maneuverability. The cord winder mechanism (items 40, 41, 42, 43) allows for quick and tidy storage of the power cord. The appliance includes a dustbag-full indicator (item 13a) to inform the user when the dustbag needs to be replaced, ensuring optimal performance. The switch control panel (item 15) provides intuitive operation.
The appliance is supplied with various nozzles and accessories to cater to different cleaning needs. These include a crevice nozzle (item 56), a small nozzle (item 62), and a plumeau assy (item 55) as an optional accessory. For floor cleaning, a nozzle RD262 (item 63) is available, along with optional polishing nozzles (item 64), polishing discs (item 65), and polishing brushes (item 66). The telescopic tube (item 59) allows for adjustable reach, while the metal tube (item 58) provides durability. Different cord types are available depending on the region, such as Argentina/Australia (item 44), Taiwan (item 45), U.K./H.K. (item 46), Europe (item 47), Swiss (item 48), and Italy (item 49), all with varying lengths.
Maintenance of the FC9008 is straightforward, focusing on ensuring continued optimal performance and longevity. Key maintenance aspects include:
The component configuration may vary for specific versions, and components are distinguished by code numbers for accurate identification and ordering of spare parts.
| Brand | Philips |
|---|---|
| Model | FC9008 |
| Category | Vacuum Cleaner |
| Language | English |