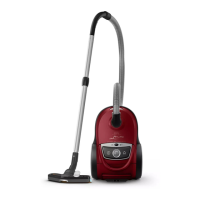
4 Tostoretheapplianceinuprightposition,inserttheridgeonthenozzleintothestorage
slot(Fig.21).
5 AlwaysputtheTriActivenozzleinthecarpetsettingwhenyoustoreit(brushstripretracted
intothenozzle).Alsopreventthesidebrushesfrombecomingbent(Fig.12).
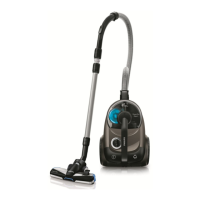
Replacing the dustbag
Always unplug the appliance before you replace the dustbag.
Note: In some cases, the dustbag-full indicator can indicate that the dustbag is full, even though it is not.
This may occur if the pores of the dustbag are clogged (e.g. when you have vacuumed ashes, ne sand,
lime, cement dust and similar substances) or if something blocks the nozzle, tube and/or hose. If the
pores of the dustbag are clogged, you have to replace the dustbag, even if it is not full yet. If the dustbag
is not clogged but not full either, something blocks the nozzle, tube and/or hose. In this case, do not
replace the dustbag but remove the obstruction.
Replacing the dustbag
- Replace the dustbag as soon as the dustbag-full indicator has changed colour permanently, i.e.
even when the nozzle is not placed on the oor (Fig. 22).
1 Pullthecoverupwardstoopenit(Fig.23).
2 Liftthedustbagholderoutoftheappliance(Fig.24).
Makesureyouholdtheholderwiththedustbaginhorizontalpositionwhenyouliftitoutofthe
appliance.
3 Pullatthecardboardtagtoremovethefulldustbagfromtheholder(Fig.25).
, The dustbag is sealed automatically.
4 Slidethecardboardfrontofthenewdustbagintothetwogroovesofthedustbagholderas
faraspossible.(Fig.26)
5 Putthedustbagholderbackintothevacuumcleaner.
Note: If you have not inserted a dustbag, you cannot close the cover.
Theplugmustberemovedfromthesocket-outletbeforeyoucleanormaintaintheappliance.
Note: Only wipe the body of the appliance with a moist cloth.
To guarantee optimal performance, clean the permanent motor protection lter every time you
replace the dustbag.
Note: Replace the motor protection lter once a year.
1 Removethedustbagholderwiththedustbag(Fig.24).
2 Pressthelterholderreleasetab(1)andtakethelterholderoutoftheappliance(2).Take
themotorprotectionlteroutofthelterholder.(Fig.27)
3 Shakethelteroveradustbintocleanit.
4 Putthecleanlterbackintothelterholder.Fitthetwolugsofthelterholderbehindthe
ridgeatthebottomtoensurethatittsproperlyatthetop(1).Thenpresshomethelter
holder(2)(Fig.28).
ENGLISH 9