2-3
SPR 00 0107
10
English
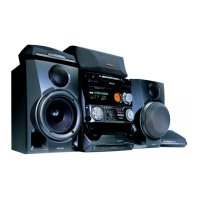
Preparations
C
Speakers Connection
Front Speakers
Connect to the SPEAKERS (FRONT) terminals,
right speaker to "R" and left speaker to "L".
Colored (marked) wire to "+" and black
(unmarked) wire to "-".
● Clip the stripped portion of the speaker wire as
shown.
Rear Surround Speakers
Connect to the REAR SURROUND terminals,
right speaker to "R" and left speaker to "L".
Colored (marked) wire to "+" and black
(unmarked) wire to "-".
Center Speaker
Connect to the CENTER terminal. Colored
(marked) wire to "+" and black (unmarked)
wire to "-".
Notes:
–For optimal sound performance, it is
recommended that the supplied speakers be used.
– Do not connect more than one speaker to any
one pair of
+
/
-
speaker terminals.
– Do not connect speakers with impedance lower
than the speakers supplied. Please refer to the
SPECIFICATIONS section of this manual.
D
Subwoofer Out Connection
Connect the subwoofer to the SUBWOOFER
OUT terminal. The subwoofer reproduces just
the low bass sound effect (explosions or the
rumble of spaceships for example).
Optional Connections
The equipment and connecting cords are not
supplied. Refer to the operating instructions of
the connected equipment for details.
Line Out Connection
Connect this output to any analog audio
equipment for playback or recording (CD recorder,
tape recorder or amplifier for example). Use a
cinch cable to connect the LINE OUT terminals
to the analog audio inputs of the equipment.
Connecting other equipment to your
system
Connect the audio left and right OUT terminals
of a TV, VCR, Laser Disc player, DVD player or
CD Recorder to the AUX/CDR IN terminals.
Notes:
– Do not connect equipment to both LINE OUT
and AUX/CDR IN terminals simultaneously.
Otherwise, noise will be generated and malfunction
might occur.
– If you are connecting an equipment with mono
output, connect it to the AUX/CDR IN left terminal.
Alternatively, you can use a “single to double” cinch
cable.
Wireless Surround Out Connection
Connect the transmitter unit of wireless rear
speakers to the SURROUND OUT terminal.
Note:
– The availability of a wireless transmitter and its
peripherals are subjected to the approval of local
authorities. Please check with your respective local
safety or approving authority.
Digital Out Connection
Connect this digital output for recording on any
audio equipment with digital input (CD
Recorder, Digital Audio Tape [DAT] deck, Digital
to Analog Converter and Digital Signal Processor
for example). Use a cinch cable to connect the
DIGITAL OUT terminal to the digital input of
the equipment.
Inserting batteries into the
Remote Control
Insert two batteries
(Type R06 or AA) into
the remote control with
the correct polarity as
indicated by the + and
- symbols inside the
compartment.
CAUTION
– Remove batteries if they are exhausted
or not to be used for a long time.
– Do not use old and new or different
types of batteries in combination.
– Batteries contain chemical substances, so
they should be disposed off properly.
11
English
Dolby ProLogic Surround Sound provides the
current industry standard for home cinema
sound from VCR and TV broadcasts. The front
left and right speakers deliver detailed, directional
sound as the center speaker "steers" dialogue/
vocal sound and center screen action toward the
TV screen. Both surround speakers add a
greater sense of depth with special effects.
Audio and video tapes and discs with the
Dolby Surround mark are
encoded for multi channel Dolby Surround
sound. The DOLBY PRO LOGIC sound setting
allows you to listen to audio tracks as they were
recorded through the left, right, center, and rear
channels.
IMPORTANT!
– Dolby Pro Logic Surround sound can only
be reproduced if the program is broadcast
in Dolby Surround Sound.
–For the best Dolby Pro Logic sound,
switch on DPL with DSC set to “Classic”
and with VEC off.
– Dolby Pro Logic mode will automatically
switch to normal Stereo mode when
headphones are connected.
– When recording, switch to normal stereo
mode.
Setting up the Dolby Pro Logic
system
You must set up the system properly in order to
experience and enjoy a Home Cinema sound
ambience.
Connecting the Speakers
5-Speakers Connection (refer to
“Preparations - Rear Connections”)
● Front speakers: Connect the front speakers.
● Center speaker: Connect the center speaker.
● Rear (surround) speakers: Connect either the
wired rear surround speakers or a pair of
wireless rear speakers (not supplied) to the
SURROUND OUT terminals.
Positioning the Speakers
To get the best surround sound effect, place the
speakers as follows.
TV
CENTER
SPEAKER
SURROUND
RIGHT
SURROUND
LEFT
FRONT
LEFT
FRONT
RIGHT
MINI HIFI
SYSTEM
SUB-
WOOFER
Front Left and Right Speakers
For the best sound, place the left and right
speakers at an angle of approximately 45
degrees to the listener.
Note:
To avoid magnetic interference with the picture on
your TV, do not position the front speakers too close
to the TV.
Rear (surround) Speakers
The surround speakers should be placed at
normal listening ear level or mounted on the
wall at the back of the room. Most importantly,
experiment when placing the surround speakers
to obtain the best sound.
Center Speaker
For the best sound, place the center speaker at
the same height as the left and right speakers.
Place the center speaker directly above or
beneath the television.
Test Tone
This feature enables you to adjust the Front Left,
Front Right, Center and Surround Sound levels
of the respective speakers in Dolby Pro Logic
mode.
You must sit at the ideal sitting position and
use the remote control to perform this
operation.
1
Press CD, TUNER, TAPE or AUX to switch
on the system.
2
Press TEST TONE.
➜ A test signal is generated; it
will move through the Left,
Center, Right, and Surround
speakers.
Dolby Pro Logic
BA
CENTER
R
DPL TEST TONE
S
REPEAT
L
+
 Loading...