1 Remove any stickers and wipe the body of the sandwich maker with a damp cloth.
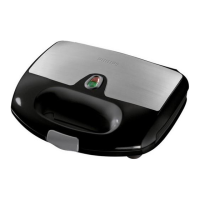
2 Pull the locking tab upwards (1) and open the sandwich maker (2) (Fig. 2).
3 Clean the cooking plates with a damp cloth or sponge (Fig. 3).
Note: The appliance may give off some smoke when you use it for the rst time. This is normal.
1 Lightly grease the cooking plates with a little butter or oil.
2 To adjust the length of the cord, wind part of it round the cord storage facility.
3 Put the mains plug in the wall socket (Fig. 4).
, The red power-on light goes on. This light stays on as long as the appliance is connected to
the mains.
, The green heating-up light goes on.
, The green heating-up light goes out when the appliance is ready for use.
4 Prepare the ingredients for the toasted sandwiches while the appliance is heating up.
Note: For each sandwich, you need two slices of bread and a suitable lling. See chapter ‘Recipes’ for
suggestions.
Note: Lightly butter the sides of the bread that come into contact with the cooking plates to obtain an
even, golden brown result.
Note: To ensure optimal sealing, do not spread llings too close to the edges of the slices of bread.
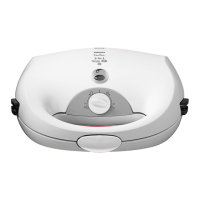
5 Open the sandwich maker.
6 Put the sandwiches to be prepared on the lower cooking plate (Fig. 5).
Note: You can also toast only one sandwich, if you wish.
7 To close the sandwich maker, lower the upper cooking plate carefully onto the bread (1) until
the locking tab locks the plates automatically (2) (Fig. 6).
Note: During cooking, the green heating-up light goes on and off. This indicates that the heating elements
are switched on and off to maintain the correct temperature.
8 Open the sandwich maker after 3-4 minutes to check whether the sandwiches are golden
brown.
Note: The cooking time required to obtain crispy brown sandwiches depends on the type of bread, the
lling and your personal taste.
9 Remove the sandwiches (Fig. 7).
Use a wooden or plastic utensil (e.g. a spatula) to remove the toasted sandwiches from the
sandwich maker. Do not use metal, sharp or abrasive kitchen utensils.
10 If you wish to continue making sandwiches, wait until the green heating-up light goes out
before you put new sandwiches in the sandwich maker.
11 Unplug the sandwich maker after use.
7