ENGLISH
Introduction
Congratulations on your purchase and welcome to
Philips! To fully benet from the support that Philips
offers, register your product at www.philips.com.
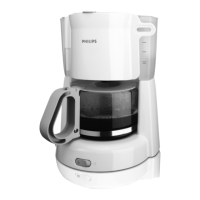
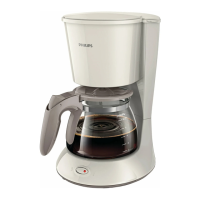
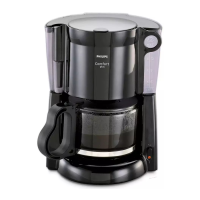
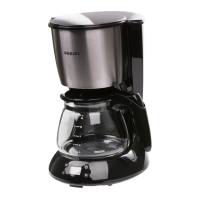
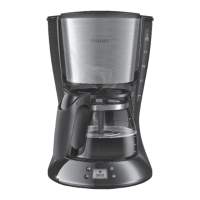
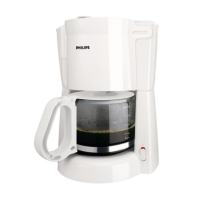
General description (Fig. 1)
A A. Cord with mains plug
B B. On/off switch
C C. Coffeemaker
D D. Lid of coffeemaker
E E. Filter holder
F F. Lid of jug
G G. Jug
Important
Read these instructions for use carefully before
using the appliance and save them for future
reference.
Danger
Never immerse the appliance in water or any
other liquid.
Warning
Check if the voltage indicated on the appliance
corresponds to the local mains voltage before
you connect the appliance.
Do not use the appliance if the plug, the mains
cord or the appliance itself is damaged.
If the mains cord is damaged, you must have it
replaced by Philips, a service centre authorized
by Philips or similarly qualied persons in order
to avoid a hazard.
This appliance is not intended for use by
persons (including children) with reduced
physical, sensory or mental capabilities, or lack
of experience and knowledge, unless they
have been given supervision or instruction
concerning use of the appliance by a person
responsible for their safety.
Children should be supervised to ensure that
they do not play with the appliance.
Keep the mains cord out of the reach of
children. Do not let the mains cord hang over
the edge of the table or worktop on which the
appliance stands.
Caution
This appliance is intended for household use
only.
Do not place the appliance on a hot surface
and prevent the mains cord from coming into
contact with hot surfaces.
Unplug the appliance before you clean it and if
problems occur during brewing.
This Philips appliance complies with all standards
regarding electromagnetic elds (EMF). If handled
properly and according to the instructions in this
user manual, the appliance is safe to use based on
scientic evidence available today.
Preparing for use
1 Cleanthejugandlterholder(seechapter
‘Cleaning’).
2 Puttheapplianceonaatandstablesurface.
3 Putthepluginanearthedwallsocket.
Youcanstoreexcesscordbypushing
itintotheopeningatthebackofthe
coffeemaker(Fig.2).
Flushing the appliance
1 Openthelid(Fig.3).
2 Fillthewatertankwithfresh,coldwater
totheMAXindicationandputthejugin
place(Fig.4).
-
-
-
-
-
-
-
-
-
-
,
Do not put a lter with ground coffee in the lter
holder.
3 Switchtheapplianceonbypressingtheon/off
switch(Fig.5).
The light goes on.
Let the appliance run until the water tank is
completely empty.
4 Switchtheapplianceoffwhenallthewateris
in the jug.
5 Lettheappliancecooldownforatleast3
minutesbeforeyoustartbrewingcoffee.
Using the appliance
1 Openthelid(Fig.3).
2 Fillthewatertankwithfresh,cold
water(Fig.4).
The water level indicator shows the amount
of water in the water tank. The graduations
correspond to large cups (125 ml). Make sure
that the water level does not exceed the MAX
indication.
3 Closethelid.
4 Placethejugonthehotplate.
5 Openthelterholder(Fig.6).
6 Takeapaperlter(type1x2orno.2)and
foldthesealededgestopreventtearingand
folding.
In some countries this coffeemaker comes with a
permanent lter. In that case you should not use
paper lters.
7 Putthelterinthelterholder.
8 Putpre-groundcoffee(lter-negrind)inthe
lter(Fig.7).
For large cups: use one heaped measuring spoon of
ground coffee for each cup.
For small cups: use one level measuring spoon of
ground coffee for each cup.
9 Closethelterholder.
10 Switchtheapplianceonbypressingtheon/off
switch(Fig.5).
Note: The light goes on.
11 Whenallthewaterhaspassedthrough
thelter,youcanremovethejugfromthe
appliance.
12 Switchtheapplianceoffafteruse.
13 Removethelterholderandthrowthepaper
lteraway(Fig.8).
14 Cleanthejugandtheremovablelterholder
inhotwaterwithsomewashing-upliquidor
inthedishwasher.
15 Ifyouhaveusedthepermanentlter,empty
andrinseit.
16 Ifyouwanttobrewanotherjugofcoffee,
lettheappliancecooldownforatleast3
minutesbeforeyoustartbrewingcoffeeagain.
Cleaning
Alwaysunplugtheappliancebeforeyoustart
cleaningit.
Neverimmersetheapplianceinwater.
1 Cleantheoutsideoftheappliancewitha
moistcloth.
2 Cleanthejugandtheremovablelterholder
inhotwaterwithsomewashing-upliquidor
inthedishwasher.
Descaling
Regular descaling will prolong the life of the
appliance and will guarantee optimal brewing
results for a long time.
In case of normal use (two full jugs of coffee every
day), descale the coffeemaker:
- 2 or 3 times a year if your using soft water (less
than 18 DH);
- 4 or 5 times a year if you are using hard water
(more than 18 DH).
Turn to your local water board for information
about the water hardness in your area.
1 Fillthewatertankwithwhitevinegar(4%
aceticacid).Donotputalterandground
coffeeinthelterholder.
2 Lettheappliancecompletetwobrewing
cycles.
See chapter ‘Using the appliance’. Let the appliance
cool down before you start the second run.
3 Lettheappliancecompletetwomore
brewingcycleswithfresh,coldwaterto
removeallvinegarresidues.
Youcanalsouseanappropriateliquid
descaler.Inthiscase,followtheinstructions
onthepackageofthedescaler.
Donotuseadescalingpowder.
4 Cleantheseparateparts(seechapter
‘Cleaning’).
Accessories
YoucanorderanewjugfromyourPhilips
dealeroraPhilipsservicecentreundertype
numberHD7980.
Youcanorderapermanentlterfromyour
PhilipsdealeroraPhilipsservicecentre
underreferencenumber996500013387
(permanentnyloncoffeelter).
Environment
1 Donotthrowtheapplianceawaywiththe
normalhouseholdwasteattheendofitslife,
buthanditinatanofcialcollectionpoint
forrecycling.Bydoingthisyouwillhelpto
preservetheenvironment(Fig.9).
Guarantee & service
If you need service or information or if you have
a problem, please visit the Philips website at www.
philips.com or contact the Philips Consumer Care
Centre in your country (you nd its phone number
in the worldwide guarantee leaet). If there is no
Consumer Care Centre in your country, go to your
local Philips dealer.
Troubleshooting
Problem Solution
The
appliance
doesn’t
work.
Make sure that the appliance is
plugged in.
Make sure that the voltage
indicated on the appliance
corresponds to the local mains
voltage.
Make sure that the appliance is
switched on.
In all other cases, contact the
Philips Customer Care Centre.
Water leaks
out of the
appliance.
Make sure that the water tank
has not been lled beyond the
MAX level.
,
,
,
 Loading...