5
9 Press the on/off button to switch off the
coffeemaker.
10 Empty the jug.
5 Using the
coffeemaker
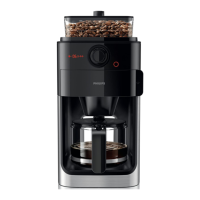
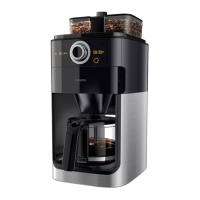
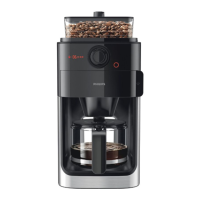
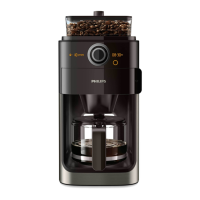
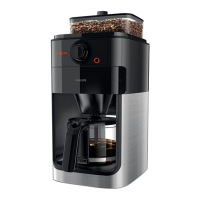
5.1 Filling the water reservoir
1 Open the water reservoir lid and ll the water
reservoir with the required amount of cold
water. (Fig. 2)
When you open the water reservoir lid, there
are indications for 2 to 10 cups on the inside
of the appliance. You can use these indications
to determine how much water to put in the
water reservoir. The reection changes from
light to dark per lled cup of water. You can
also use the water level indicator on the jug.
D
Note:
Do not ll the water reservoir beyond the
10-cup indication.
5.2 Using coffee beans
We advise you to use light roasted coffee beans
to brew the perfect cup of coffee.
B
Warning:
Always keep the water reservoir lid closed when
you ll the coffee bean container with coffee
beans. Otherwise coffee beans can fall into the
water reservoir and block up the water inlet.
1 Remove the coffee bean container lid. (Fig. 8)
2 Fill the coffee bean container with coffee
beans. Make sure there are enough coffee
beans in the container for the amount of
coffee you want to brew (Fig. 9).
D
Note:
Always make sure the coffee bean container is
at least half full.
4 Beforerstuse
4.1 Setting the automatic
switch off time
You can adjust the time after which the appliance
automatically switches off. The default time is
set to 30 minutes. You can adjust this time to a
maximum of 120 minutes. If you want to adjust
the automatic switch off time, follow the steps
below.
1 Make sure the appliance is switched off
(but the mains plug is in the wall socket).
2 Press and hold in the centre of the knob until
the display starts to ash.
3 Turn the knob to increase or decrease the
time. 1 is 10 minutes, 2 is 20 minutes, 3 is
30 minutes and so on until 12 is 120 minutes.
4 Press in the centre of the knob to conrm the
minutes.
D
Note:
The appliance always saves the last setting.
4.2 Flushing the coffeemaker
You need to ush the coffeemaker once before
rst use.
1 Open the water reservoir lid. Fill the water
reservoir with fresh cold water up to the
8-cup indication. (Fig. 2)
D
Note:
Do not put coffee beans or ground coffee in
the coffeemaker.
2 Close the water reservoir lid.
3 Put the jug in the appliance (Fig. 3).
4 Press the on/off button (Fig. 4).
• The display lights up.
5 Press the strength select button (Fig. 5).
6 Turn the knob to choose the pre-ground
coffee setting (Fig. 6).
• The pre-ground coffee icon lights up.
7 Press in the centre of the knob to conrm.
Then press in the centre of the knob again to
start the ushing process (Fig. 7).
8 Let the coffeemaker operate until the ushing
process has been completed.
ENGLISH