1
Connect
2
Set up
Basic Connection
Before Connecting
Select one of the following basic connections ( A or B ) according to the type of connecting devices you have.
COAXIAL
DIGITAL OUT
CVBS OUT
S-VIDEO OUT
VIDEO OUT AUDIO OUT
AUDIO
ANTENNA-IN
TV-OUT
TO TV
EXT1
TO VCR/SAT
EXT2
COMPONENT
VIDEO OUT
P
B
P
R
Y
R
L
SCART IN
COAXIAL
DIGITAL OUT
CVBS OUT
S-VIDEO OUT
VIDEO OUT AUDIO OUT
AUDIO
ANTENNA-IN
TV-OUT
TO TV
EXT1
TO VCR/SAT
EXT2
COMPONENT
VIDEO OUT
P
B
P
R
Y
R
L
CVBS OUT
S-VIDEO OUT
VIDEO OUT AUDI
A
TO TV
EXT1
R
L
Antenna or
cable TV signal
Television (rear)
Note See the accompanying user manual for other possible connections (e.g. Composite Video, Component Video,
S-VIDEO).
Recorder
(rear)
COAXIAL
DIGITAL OUT
CVBS OUT
S-VIDEO OUT
VIDEO OUT AUDIO OUT
AUDIO
ANTENNA-IN
TV-OUT
TO TV
EXT1
TO VCR/SAT
EXT2
COMPONENT
VIDEO OUT
P
B
P
R
Y
R
L
SCART IN
TENNA-IN
EXT
TO VCR/SAT
EXT2
Satellite dish/
Cable TV wall
outlet
Television (rear)
Recorder (rear)
Cable
box
(rear)
C
Select the country of your area for auto channel
tuning and press OK. The auto scan menu
appears and the automatic TV channel search
starts.
D
Once complete, the programme list menu
appears.
Manage Presets
OK
BACK
Next Page Prev Page
1 C2 On P01
2 C3 On P02
3 C4 On P03
Sort and rename the programs.
PR CH NICAM Station
Move Up
Move Down
NICAM
Rename
Note In this menu, you can change the TV
channels sequence, rename it or set NICAM
mode. For detailed descriptions, refer to the
accompanying User Manual.
E
Press OK on the remote control to continue.
The clock setting menu appears.
Set the system time.
Clock Setting
OK
BACK
Next Page Prev Page
Date: Time:
31 01 2007 00 00 00
::
//
F
Use ST keys to set the current date and time,
use W X keys to select different entry fields.
Press OK to confirm
Note You may using the numeric keypad
0-9 on the remote control to enter the date and
time.
G
Once complete, press OK to confirm and exit
the menu.
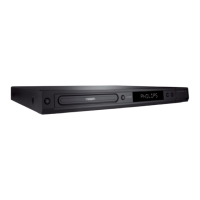
The DVD recorder is now ready for use.
A
Finding the viewing channel
A
Press 2 on the recorder.
B
Switch on the TV and other connected devices
(e.g. Cable Box, Satellite Receiver). The
installation menu is displayed.
Welcome
OK
Next Page
Before using the recorder,
please complete the installation.
C
In case you don’t see the recorder’s setting menu,
press the Channel Down button on the TV’s
remote control repeatedly (or AV, SELECT,
°
button) until you see the menu. This is the
correct viewing channel for the recorder.
B
Start basic setup
Use the recorder’s remote control and follow the
on-screen instructions to complete the installation.
Note Use up S and down T keys to toggle
through the options. To con rm a setting, press
OK.
A
Press OK on the remote control.
The language setting menu appears.
Menu Language
Select a menu language.
English
Français
Deutsch
Español
OK
BACK
Next Page Prev Page
Note The language options are different
depending on your country or region.
B
Select the language for this recorder’s on-screen
display and press OK.
The country setting menu appears.
Country Setting
OK
BACK
Next Page Prev Page
Select your current country.
UK
Germany
France
Spain
Option A
Use this connection if you are connecting the
antenna cable directly from the antenna wall socket
or from a cable TV socket.
A
Unplug the antenna cable that is currently
connected to your TV and plug in the antenna
cable to the ANTENNA-IN
socket on this
recorder.
B
Connect an RF antenna cable from the TV-
OUT
socket on this recorder to the
Antenna In socket on the TV.
C
Connect a scart cable (not supplied) from the
EXT1 TO TV socket on this recorder to the
Scart input socket on your TV.
D
Plug in the power cable from the recorder to an
AC power outlet.
Option B
Use this connection if your current antenna cable is
connected to a cable box with a Scart output
socket.
A
Keep the existing antenna connection from the
Cable box to your TV.
B
Connect a scart cable (not supplied) from the
EXT1 TO TV socket on this recorder to the
Scart input socket on your TV.
C
Connect another scart cable (not supplied) from
the EXT2 TO VCR/SAT socket on this
recorder to the Scart output socket on the
Cable Box.
D
Plug in the power cable from the recorder to an
AC power outlet.
HDR3500_QSG_eng.indd 2HDR3500_QSG_eng.indd 2 2008-02-22 2:03:36 PM2008-02-22 2:03:36 PM
 Loading...


