8
Get started
Table of contents
1 CLOCK will be shown on the display. Press the k button. The year
indicator flashes.
2 Press the + or – button to set the year.
3 Press the k button to advance to the settings for the month.
4 Repeat steps 2 and 3 to continue to set the month, day, 12/24-
hour system and the time in the same way.
D Note
The date and time can be changed at any time using the menu (see
chapter 8, Customize settings on page 18 for more information).
3.6 Display information
• Press the j
/ DEL button while the recorder is stopped to rotate the
information on the display: elapsed playback/recording time of the
current file > remaining total recording time > recording time of the
current file > recording date of the current file.
• Press and hold k during recording to display the remaining recording
time.
3.3 Power on/o
1 To power on, press the k button until the display shows a short
animation
[ ].
2 To power o, press the k button while the recorder is stopped
until the display shows
BYE.
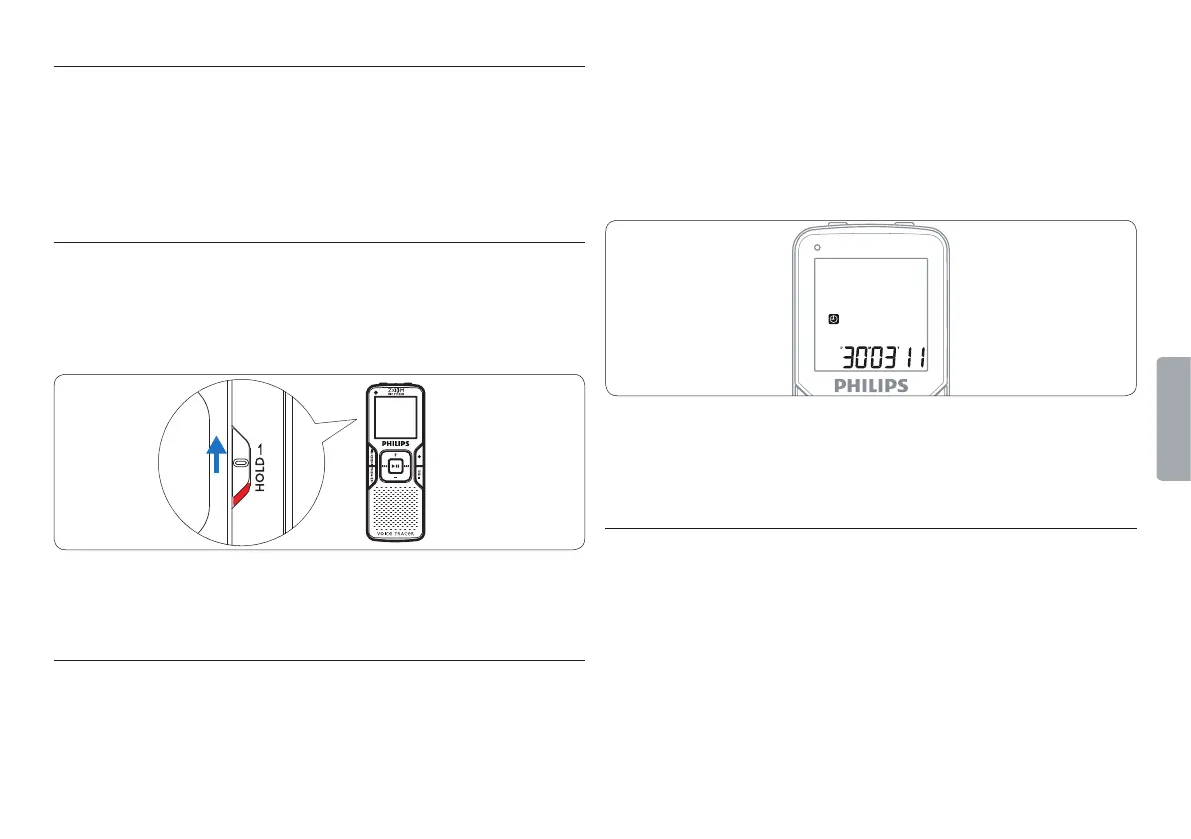
3.4 Keypad lock (HOLD function)
1 Slide the HOLD switch up into the Hold position to lock the keypad
of the recorder.
• The display briefly shows ‘On Hold’ and turns o.
2 Slide the HOLD switch down to the O position to disengage the
keypad lock.
3.5 Set date and time
When the batteries are installed for the first time, you will be prompted
to set the date and time.