3 To contour the nape of the neck or sideburns, turn
the appliance and make downward strokes (Fig.
14).
4 Move the appliance slowly and smoothly following
the natural hairline.
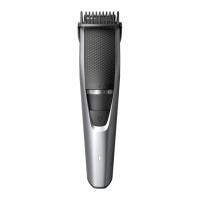
Hair combs
Attach a dark gray hair comb to the extra-wide hair
trimmer to evenly trim the hairs on your head. The
appliance comes with 4 hair combs. The numbers on
the combs relate to the number of millimeters of hair
length that will remain after trimming.
Comb mm
Hair comb 4mm
Hair comb 9mm
Hair comb 12mm
Hair comb 16mm
1 Attach a hair comb to the extra-wide trimmer.
2 Move the trimmer slowly over the crown from
different directions to achieve an even result.
Make sure that the surface of the comb always
stays in contact with the skin.
3 Always move the trimmer against the direction of
hair growth (Fig. 15). Press lightly.
4 Make overlapping passes over the head to ensure
that all hair that should be cut has been cut.
5 Gently shake the hairs off the appliance in
between strokes to prevent hairs from collecting
between the cutting element and the comb.
Fading hair combs
Attach a dark gray fading hair comb to the extra-wide
hair trimmer to create a fade line around the ears. The
appliance comes with 2 fading hair combs. Use both
combs to trim hair around both ears. Choose a comb
based on the preferred trimming direction of back to
front or front to back.
Comb mm
Fading hair combs 4 mm–9mm
1 Attach one fading hair comb to the extra-wide
hair trimmer to trim the hair around the ear.
2 Place the trimmer on your hair close to the ear.
Place the trimmer at the back or front of your ear,
depending on the trimming direction you prefer.
Always make sure that the side of the comb with
the short teeth is closest to your ear (Fig. 16).
3 Move the trimmer slowly around the ear, while
holding it steady.
4 Repeat the movement several times around one
ear to make sure that all the hair that should be
cut has been cut to a fade. Then attach the other
fading hair comb to trim the hair around the other
ear.
5 Gently shake the hairs off the appliance in
between strokes to prevent hairs from collecting
between the cutting element and the comb.
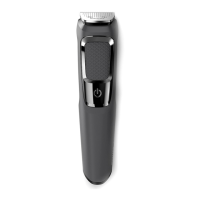
Attachments for use on body
Always use a body comb when trimming sensitive
areas.
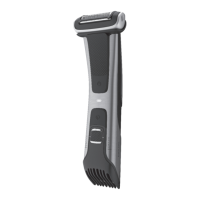
Body combs
Attach a light gray body comb to the full-size hair
trimmer to trim hairs below the neckline. The
appliance comes with 2 body combs. The numbers on
the combs relate to the number of millimeters of hair
length that will remain after trimming.
Comb mm
Body comb 3mm
Body comb 5mm
1 Attach a body comb to the full-size hair trimmer.
2 To trim in the most effective way, stretch the skin
with your free hand and move the comb against
the direction of hair growth (Fig. 17). Make sure
that the surface of the comb always stays in
contact with the skin.
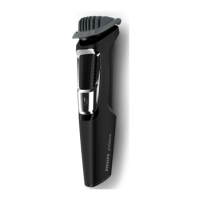
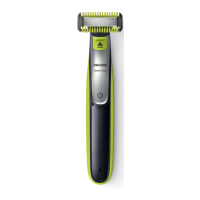
Precision attachments for use on face
Precision trimmer
Use the precision trimmer to create fine lines and
contours around your facial style close to the skin, to a
length of approx. 0.5mm.
1 Hold the precision trimming head perpendicular to
the skin and move the trimming head upwards or
downwards with gentle pressure (Fig. 18).
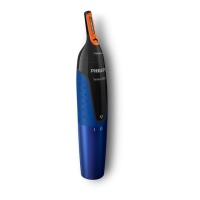
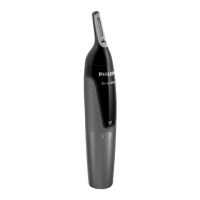
Nose and ear hair trimmer
Use the nose and ear hair trimmer to trim your nose
and/or ear hair.
- Make sure nasal passages are clean. Make sure
outer ear channels are clean and free from wax.
- Do not insert the cutting element too deep into
your nostrils or ear channels (max. 5 mm).
- When trimming both nose and ear hair, make firm,
rotary movements to ensure that the cutting
element reaches all the hairs.
- Clean the nose and ear hair trimmer after each use
(see 'Cleaning the nose and ear hair trimmer').
Note: The nose and ear hair trimmer is not designed
to clean-shave your nostrils or ear channels, but to cut
the hairs to a shorter length. Nose and ear hairs have
important protective functions and should not be fully
removed.
Trimming nose hair
1 Gently insert the cutting element into one of the
nostrils. Move the tip in and out of the nostril in a
firm, rotary motion to cut the hairs to a shorter
length (Fig. 19).
Trimming ear hair
1 Slowly move the cutting element along the outer
ear to trim hairs that stick out beyond the rim.
2 Gently insert the cutting element into the outer
ear channel. Move the tip in and out of the outer
ear channel in a firm, rotary motion to cut the hairs
to a shorter length (Fig. 19).
Cleaning
After every use: cleaning under the tap
1 Make sure that the appliance is switched off and
that the USB power source has been removed
from the power outlet and from the appliance.