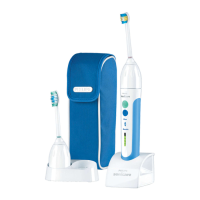
Do you have a question about the Philips Sonicare Optimal Clean HX6829/76 and is the answer not in the manual?
Welcome to the Philips Sonicare family. This toothbrush provides superior plaque removal and healthier gums.
Read all instructions, keep charger dry, avoid water, do not use outdoors or near heat.
Supervise children/users with reduced capabilities. Avoid essential oils/coconut oil; replace worn brush heads.
UV light is harmful; operate sanitizer with screen, keep out of reach. Do not immerse or clean when hot.
Do not clean in dishwasher. This appliance is for teeth, gums, and tongue only.
Consult dentist/doctor for bleeding, surgery, pacemakers, or medical concerns before use.
Use product for intended purpose, handle batteries safely, keep away from fire/heat, avoid short-circuiting and metal contact.
Appliance complies with EMF standards. FCC compliance requires no unauthorized modifications.
OptimalClean toothbrushes remove plaque for oral health. Device complies with Canada's RSS.
Instruction to save these instructions for future reference.
Diagram identifying key components like handle, brush head, charger, and travel case.
Instructions for attaching the brush head to the handle securely.
First-time use vibration is normal. Apply gentle pressure. Wet bristles, apply toothpaste, angle brush at 45 degrees.
Press power, keep bristles on teeth/gumline, use back-and-forth motion. Clean inner surfaces with vertical strokes.
Brush chewing surfaces, stained areas, or tongue. Safe for braces/restorations. White mode adds time for front teeth.
QuadPacer divides brushing into 4 sections with pauses, ensuring even coverage. Details on Clean and White modes.
Provides a thorough and complete clean. Brush each segment for 30 seconds.
Provides a thorough clean with extra time to brighten/polish teeth. Brush segments for 30s, then 5&6 for 15s.
Choose between low and high intensity. Default is low intensity; can be changed while brushing.
BrushSync tech enables brush head communication and reminders. Look for the symbol.
Lists Pressure Sensor, Quadpacer, Brush head Replacement Reminder, EasyStart, SmarTimer. Measures pressure to protect gums.
Excess pressure changes vibration/flashes amber. Sensor comes activated; can be deactivated.
QuadPacer divides mouth into 4 sections for even brushing, with beeps depending on mode.
Sonicare tracks brush head wear using BrushSync technology, requires smart brush heads.
Activate via 'Activating/Deactivating Features'. Model comes with EasyStart deactivated; gently increases power.
SmarTimer switches off toothbrush when done. For clinical studies, deactivate EasyStart. Dental professionals recommend 2 min brushing twice daily.
You can activate or deactivate EasyStart, brush head reminder, and pressure sensor.
Steps to activate/deactivate EasyStart via charger and button presses. Triple tone and light indicators provide feedback.
Note: Activate/deactivate reminder only when a smart brush head is attached.
Steps to activate/deactivate sensor via charger and button presses.
Triple tone (low-med-high) activates sensor; lights blink green. Triple tone (high-med-low) deactivates; lights blink amber.
Use UV sanitizer to clean brush heads. Discontinue use if UV light stays on or sanitizer emits smoke. UV light is harmful.
Rinse brush head, shake off water. Warning: Do not place brush head cap on head during cleaning. Open door via recess.
Place brush head with bristles facing bulb. Only clean snap-on heads; do not clean Kids heads.
Ensure outlet voltage is correct. Close door and press button to start 10-min cycle. Sanitizer stops if door opened.
Toothbrush provides at least 28 sessions. Initial charge takes up to 24 hours.
Plug in, place handle on charger/sanitizer. 2 beeps confirm placement. Flashing light indicates charging; full charge shows green light.
Indicators show battery level (Full, Partially full, Low, Empty) and emit sounds for low/empty.
Indicator switches off to save energy. Toothbrush switches off when empty. Keep on charger for full charge.
Rinse metal shaft, wipe handle. Rinse brush head/bristles. Caution: avoid sharp objects on seal.
Unplug charger before cleaning. Wipe surface with a damp cloth.
Rinse travel case with warm water and clean inside with a damp cloth.
Warning: Do not immerse or clean when hot. Clean sanitizer weekly for optimal effectiveness.
Unplug, remove drip tray, clean interior surfaces, remove screen and UV light bulb.
Reinsert UV light bulb and protective screen correctly. Place drip tray back. Ensure dry before use.
For extended periods, unplug, clean, and store in a cool, dry place away from direct sunlight.
Replace Philips Sonicare brush heads every 3 months for optimal results. Use genuine heads.
Locate the model number (HX68XX) on the bottom of the Philips Sonicare toothbrush handle.
Philips warrants products for two years from the date of purchase against defects.
Proof of purchase needed for warranty. Philips recommends genuine brush heads for performance and warranty.
Contact Consumer Care for support. Warranty excludes brush heads, misuse, wear and tear, UV bulb.
Implied warranties are limited. Philips is not liable for special, incidental, or consequential damages.
Limitations on liability include loss of savings, profit, use, third-party claims, and costs of substitute services.
Battery must be recycled. Contact local officials or call 1-800-822-8837 or visit www.call2recycle.org.
Contact local waste management or visit www.recycle.philips.com for recycling. Symbol means do not dispose with household waste.
UV bulb contains mercury; use collection point. Battery must be removed by qualified professional.
Take safety precautions. Protect eyes/hands. Use towel/cloth, hammer, screwdriver. Ensure hands/product are dry.
Avoid short-circuiting batteries after removal; keep terminals away from metal objects.
Deplete battery charge by running toothbrush until it stops. Repeat until it won't turn on.
Remove brush head. Cover handle. Strike housing to eject end cap. May need multiple strikes.
Remove end cap. If stuck, repeat strike. Press shaft on hard surface to release components.
Wedge screwdriver to pry frame, break metal tab connecting battery to PCB, and pull battery to break second tab.
Caution: Be aware of sharp battery tab edges. Cover contacts with tape to prevent shorts.
Battery can be recycled. Do not dispose of appliance with household waste; use an official collection point.
| Brand | Philips |
|---|---|
| Model | Sonicare Optimal Clean HX6829/76 |
| Category | Electric Toothbrush |
| Language | English |

