9
CONTINUE
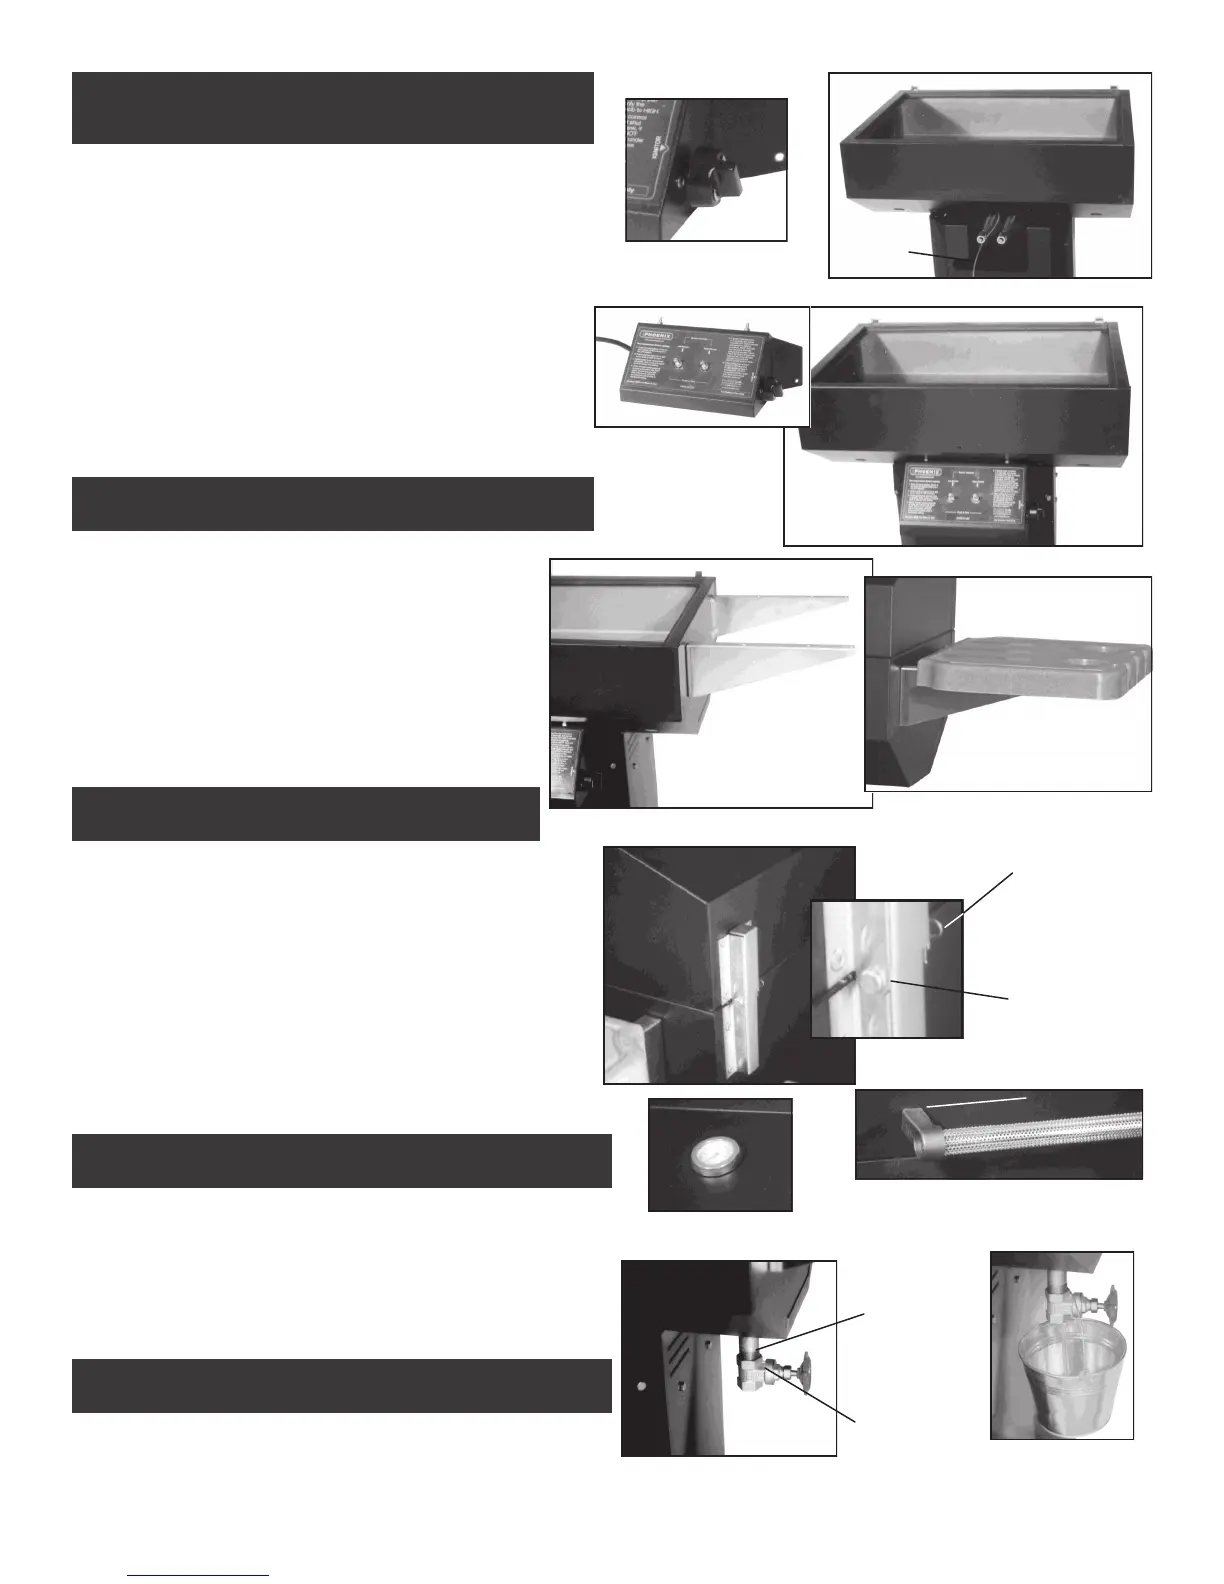
Step 3: Attaching Control Panel to Grill Pit.
A. Press the rotary control knob to igniter stem. (Fig. H)
B. Attach the igniter probe wire (preassembled at factory to the gas
collector box) to the rotary piezo spark generator. (Fig. I)
C. Attach the control panel to the front of pit by pushing the two
threaded studs thru the holes in the bottom of the pit, making
sure the venture tubes fit over the valve orifices and secure with
2, flat washers and 2, 1/4” Kep nuts. (Fig. J-1)
D. Attach the bottom of the control panel to column using 2 1/4-20 x
1/2” hex head bolts , 4 flat washers and 2 Kep nuts. Press the 2
gas control knobs onto the valve stems. (Fig. J)
Igniter Wire
Fig. J
Step 4: Attaching Side Shelves
A. Select one of the sides and attach the shelf brackets to
the grill pit using 4 hex head bolts, 8 flat washers
(washers outside of bracket and on inside of pit) and 4
Kep nuts. Repeat on other side. (Fig. K)
B. Turn a NuStone shelf upside down to see the location of
the four (4) threaded inserts. Position the shelf on the
brackets and attach using the four (4) 1/4-20 x 1/2” Hex head
bolts , (4) flat washers and (4) lock washers. Repeat same pro-
cedure for opposite side. (Fig. L)
Fig. K
Fig. L
Step 5: Lid Assembly to Fire Pit
A. Position the top and bottom hinges together and
complete assembly using the two (2) hinge pins and hinge
clips. (Fig. M)
B. With the lid open attach the handle to the lid using two 1/4-20 x 3/4” hex
bolts, flat washers, graphite gaskets, and Kep nuts. The gaskets are
positioned between the handle end caps and grill lid. (Fig. N)
C. Install the thermometer through the hole in the center of the lid.
And snug thermometer with thumb bolt. Do Not Over Tighten.
(Fig. O)
Hinge Clip
Hinge Pin
Step 6: Install Drip Pan and Drain Valve
A. With the lid open, insert drip pan into place using the lift tabs on
each end. Line up the drain pipe with the hole in the pit bottom and
make sure the drain pipe extends out the bottom of the pit. Install
the brass valve onto the drain pipe, hand tighten only. (Fig. P)
(You may need to remove the valve occasionally for cleaning.
Hang the drain bucket on the brass valve. (Fig. Q)
Fig. M
Graphite Gasket
Fig. N
Fig. O
Brass Valve
Drain Pipe
Fig. P
Fig. Q
Step 7: Install Cooking Grid
A. Place the cooking grid into the grill.
Fig. H
Fig. I
Fig. J-1