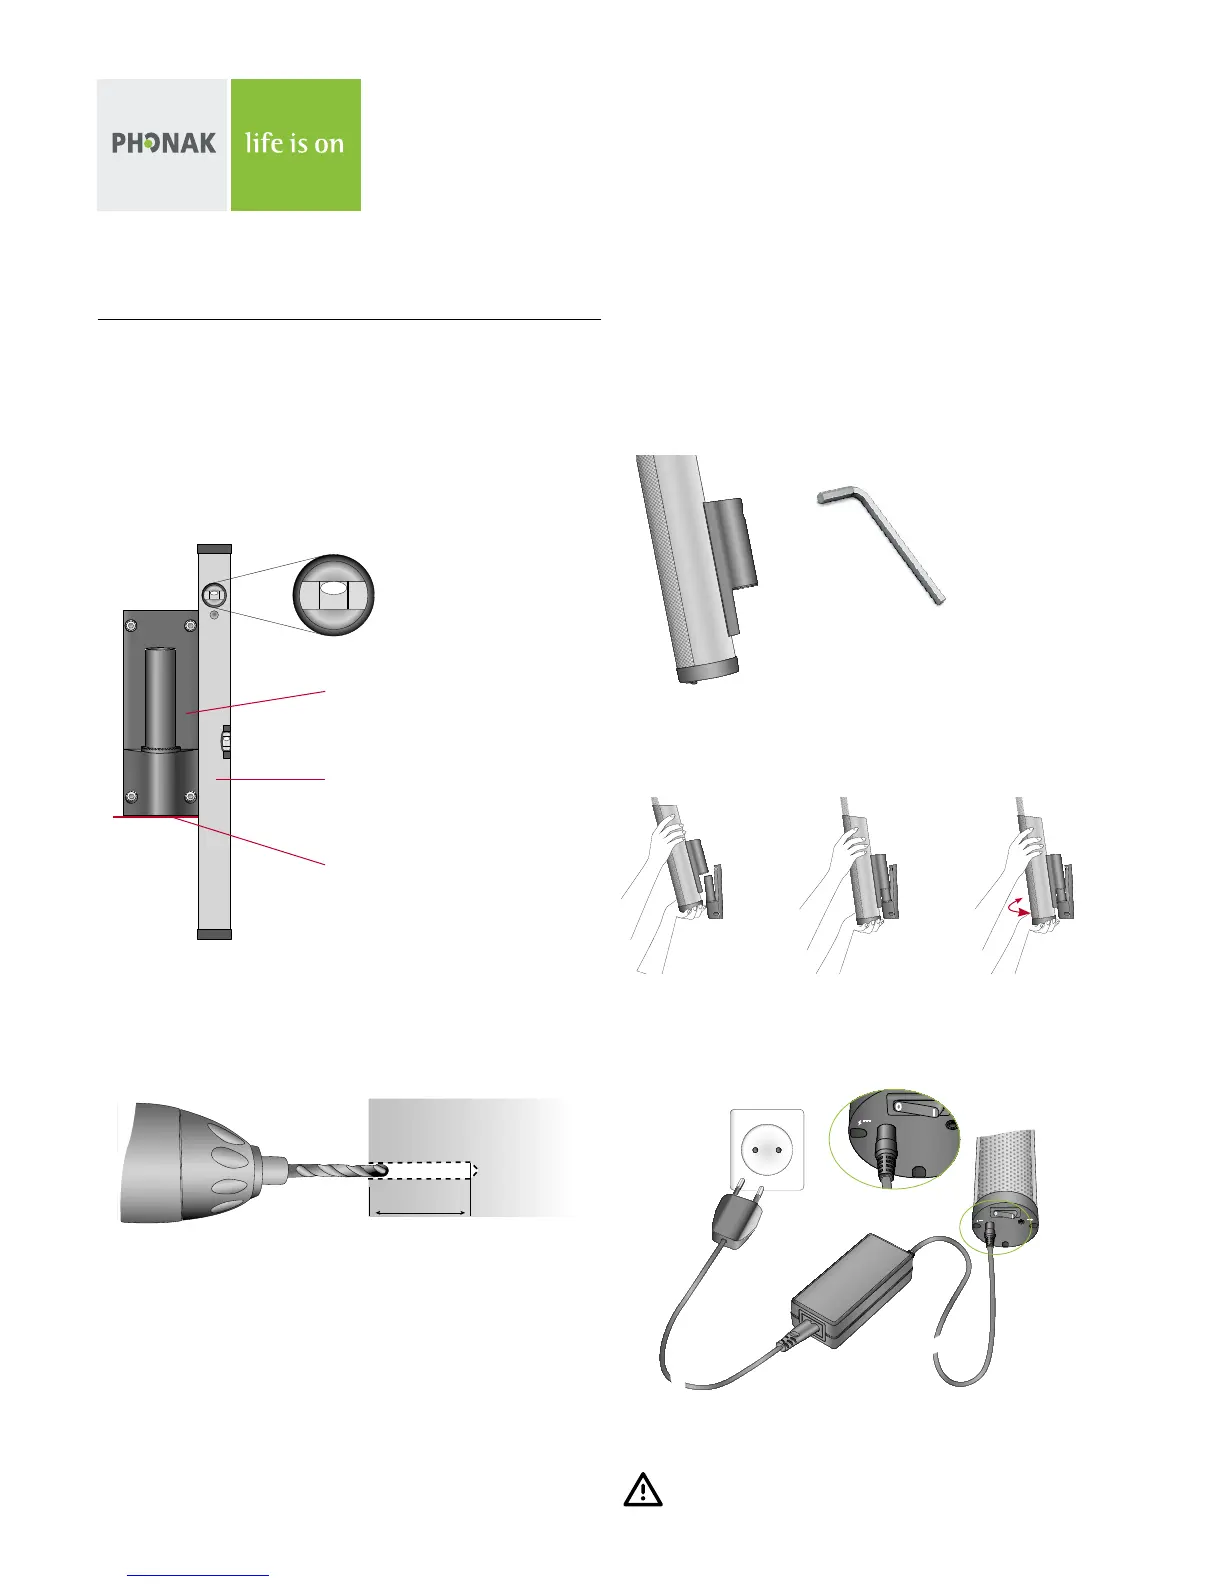
4) Mount the array fixation [C] on the DigiMaster by using the two
black hex screws [D] and hex wrench 5 [K].
5) Carefully attach the DigiMaster [A] to the wall support and turn it
to face the center of the class.
6) Attach the power cable to the power adapter [OPTION]. Plug the power
cable into the mains and the 19 Volt jack into the socket on the
bottom of the DigiMaster. Your DigiMaster is now ready to be paired
with the inspiro.
Make sure the power cable is safely positioned!
Please check the Dynamic SoundField User Guide to learn about the
standard functions of Dynamic SoundField.
2.2 Mounting DigiMaster on the wall
1) Measure 1.40 meters (4 feet) up from the floor level and mark the
wall with a pencil.
Hold the wall support [B] against the wall so that the pencil mark
is at the bottom of the wall support. Adjust the wall support using
the spirit level until it is level. Use the pencil to mark the wall
through the wall support’s four holes.
2) Remove the wall support and drill 4 holes using a 5 mm (0.2 inches)
diameter drill bit. The depth of these holes should be at least
30 mm (1.2 inches).
3) Push the anchors [D] into the holes. Mount the wall support using
the 4 torx screws [D] and the torx T20 screwdriver [K].
Spirit level
Pencil mark
(1.4m / 4 feet above floor level)
Wall support [B]
30 mm
 Loading...