Before You Begin:
Verify that you have the following. There is really only a single required tool to do this install.
However, having other tools at your disposal is always a good thing.
Required:
1. Something to cut the USB cable and remove the black sheath. I recommend a pair of wire
strippers since they have a nice blade to cut larger cables built in.
2. Tools to open your arcade stick, be it a 3mm hex key or screw driver.
Recommended:
1. Sharpie Marker. Used to mark the ribbon cable connectors.
2. A pair of wire cutters/diagonal cutters. These come in handy when snipping away zip ties.
3. Ruler. To mark out how long to cut things.
4. Zip ties. This will allow you to put the cable securely back into place.
Installation:
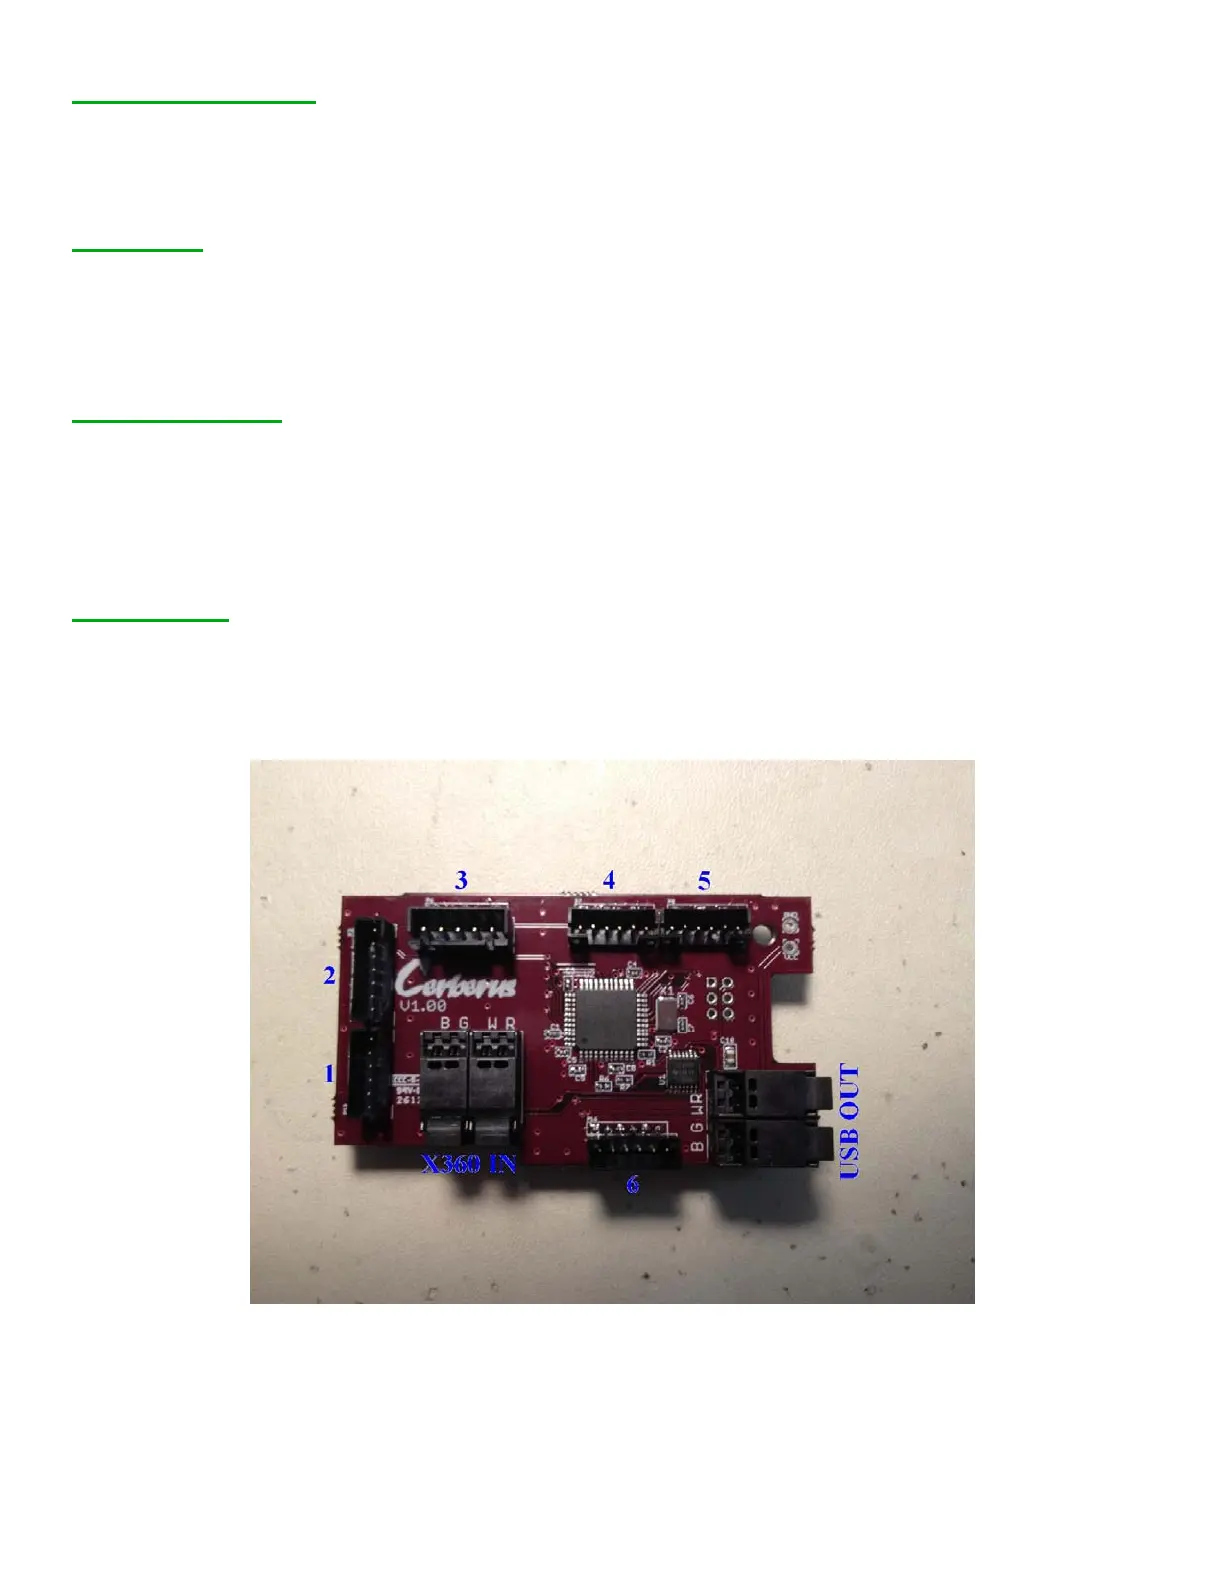
*Note that this first build lacks some markings on the silk screen, please use the below image as a
reference for the 1-6 cable marking and the labels for the X360 IN terminals (the cable that comes
from the 360 PCB) and the USB OUT terminals (the cable that goes OUT of the arcade stick).
Step 1. Open your arcade stick up, and remove the ribbon cables from their original spots. Mark the
cables 1 – 6 starting with the bottom left cable and going clockwise. You will see matching markings
on the Cerberus board.