Before You Start
01
▎Place the machine on a clean and level surface.
▎Install the turntable into the machine and connect the power.
▎Please make sure to wear protective goggles when handling the machine.
▎Do not remove or lift the acrylic cover when the machine is running.
Warning
▎
▎
▎
▎
Disconnect the power cable before performing maintenance.
DO NOT take off the acrylic cover while the machine is running.
Avoid direct contact of resin and other cleaning fluid with skin to prevent allergies.
In case of contact with resin and alcohol (cleaning fluid), please rinse immediately with plenty of water.
Specifications
Rated Power : 48W
Input : 24 VCD
Product Dimension : L35.4 x W30.9 x H36.8 cm
Turntable Size : Ø19.6 cm
Maximum Model Size : Ø25 x H23.5 cm
Weight : 3.9 kg
Timer : 0-2 hours
LED Wavelength : 405 nm
Instructions
02
Make sure the model has been thoroughly cleaned without any residual resin before curing.
Place the model on the turntable and put the acrylic cover into place.
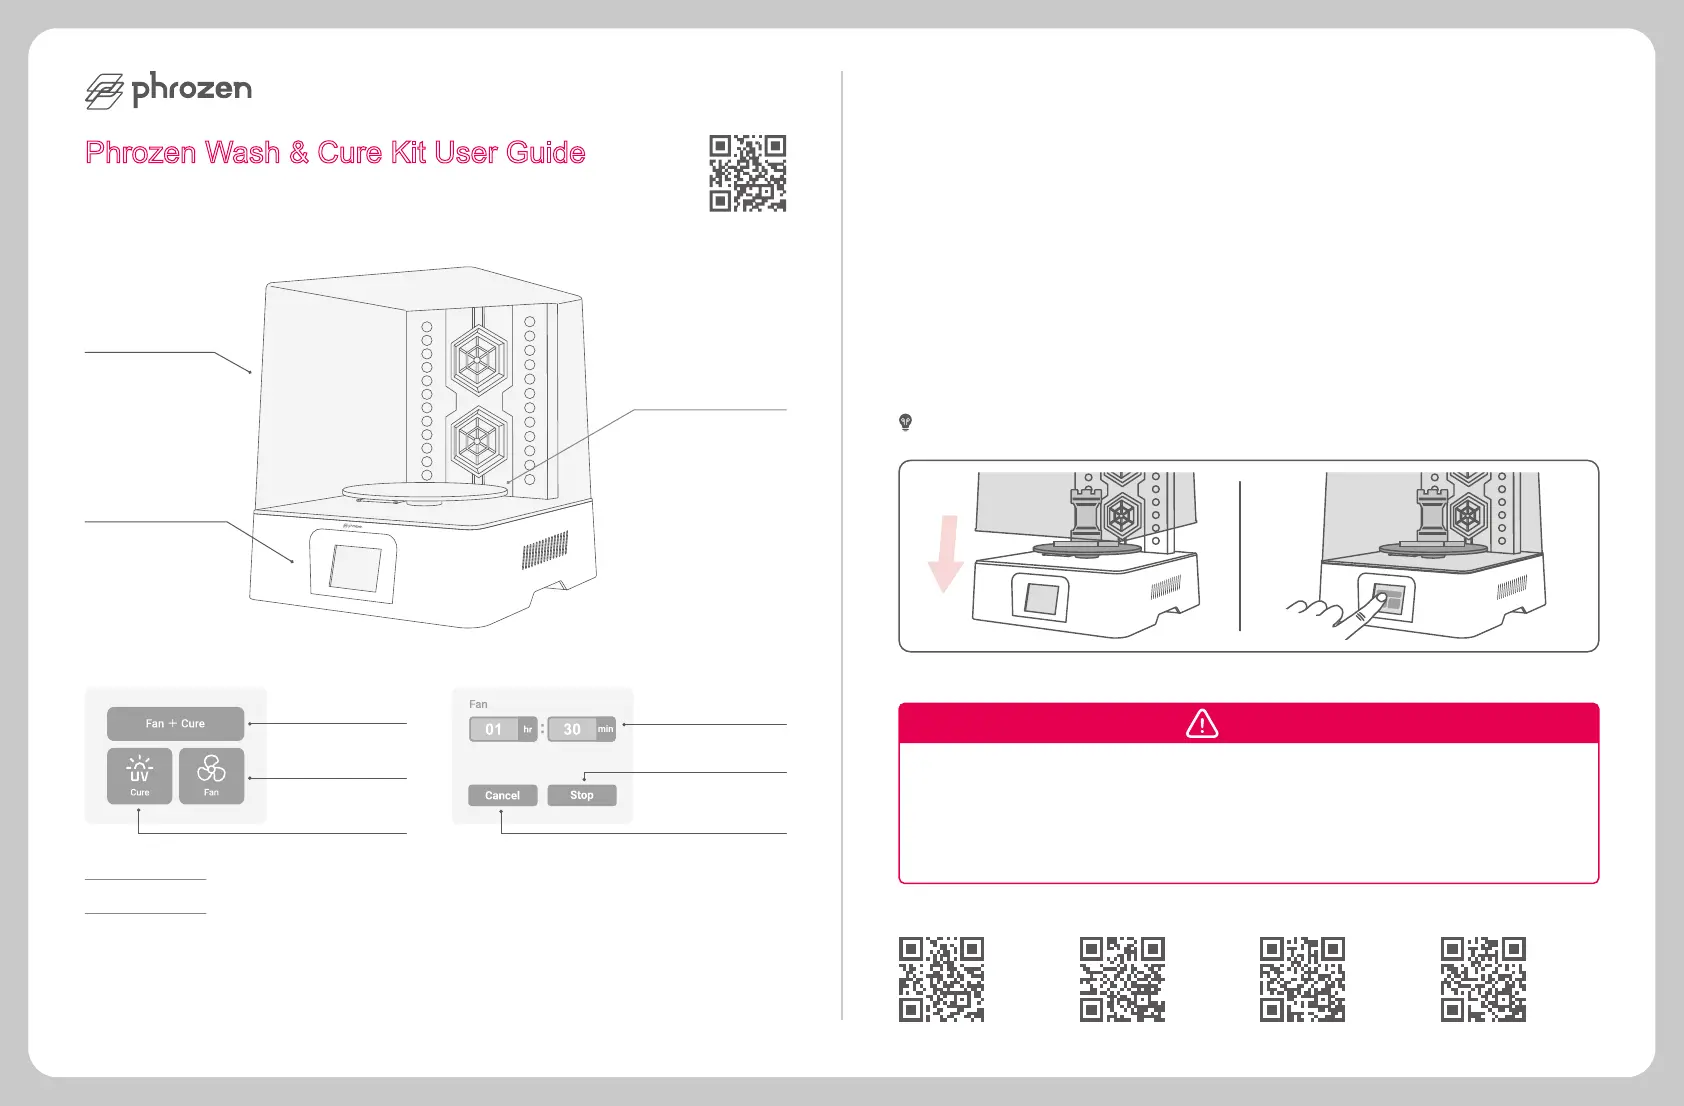
Select CURE, FAN, or FAN + CURE according to your needs.
Input the required time and press ENTER. Timer settings are available for up to two hours.
Please take out the model after the curing process ends.
1
2
3
4
5
Note : Cured model might reach higher temperatures; please remove it carefully.
Drying prints
Cure & dry prints
Curing prints
Stop machine
Display remaining time
End progress &
return to homepage
Acrylic Cover
Touch Panel
Turntable
Scan for other
languages
Phrozen Wash & Cure Kit User Guide
Curing Station Post UV Cure Lamp
2 3
InstagramYouTubeHelp Center Facebook
 Loading...