PICK VARIABLE FLOW SERVICE MANUAL
12
these steps in sequence to clean your
Pick heater without disassembling
the unit.
2. Close the air supply valve.
3. Turn the pump motor OFF
4. Close the stem supply, water outlet,
and the water supply valves.
5. Drain the heater completely by
opening the drain valves under the
pump and the heater.
6. Remove the pipe plug (or blind
flange on flanged piping) from the
tee above the heater. Remove the
temperature indicator.
IMPORTANT: The open
temperature indicator port will
provide a vent for gasses that may
be formed during the cleaning
operation.
On flanged systems a short stand
pipe must be installed in the
temperature indicator port. It should
extend6” above the top of the outlet
horizontal outlet pipe.
7. Close the drain valves under the
pump and heater.
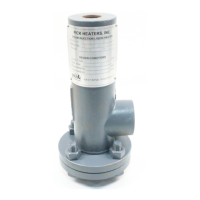
8. Carefully pour cleaning solvent into
the opening at A. Slowly fill the
heater to the level of this opening.
SEE FIGURE 1.
On flanged units only fill horizontal
outlet 1/3 to ½ full- DO NOT fill
above temperature indicator port.
9. Turn on the pump motor. Allow the
cleaning solvent to circulate in the
heater for approx. 60 minutes,
running the pump motor throughout
this period. The time required to
clean the Pick heater will depend on
how much lime deposit is on and in
the injection tube assembly. A good
indication of when the unit is clean
is the cessation of foaming.
10. Turn off the pump motor. Drain the
cleaning solution into suitable
containers by opening the system
drains. Be sure to follow
manufacturer’s cleaning instructions
for handling, storing or disposing of
the material. Many cleaning agents
can be used more than once before
losing effectiveness. Consult a local
chemical supplier.
11. Reinstall the temperature indicator
and pipe plug (blind flange). Flush
the heater completely by opening
the water supply valve, while
leaving the drain valves open. Turn
on the pump motor. When the water
exiting form the drain valves is
clean and clear, close the drain
valves. Open the water outlet valve.
Open the use point nearest from that
location until the water is clean and
clear. Close the use point valve and
turn off the pump.
12. The Pick heater is now ready to be
returned to service. Please refer to
normal heater startup procedures in
the Installation Manual.
NOTE: The piston in the injection tube
must be free to respond to variations in
steam flow. If restricted, hammer or
vibration will result.
Disassembly is a straightforward and
relatively simple procedure, subject to a few
common-sense precautions. Before
proceeding with disassembly, please read
this entire section carefully to avoid damage
to your heater.
HEATER DISASEMBLY
IMPORTANT: The following parts are
required for proper re-assembly. Make
sure parts are on hand before taking the
unit out of service for maintenance or
cleaning.
SEE FIGURE 1 The body of a Pick heater
(except Model 6X7) consists of two
housings that are flanged together. Before
proceeding, be sure a replacement gasket is
available for reassembly.
If the injection tube is disassembled, new
stainless steel bolts and flexlock nuts will be
required to properly install the spring
stopper. See TABLE 2 for quantity for each
heater model.
 Loading...