Page 14 ;&(%$*4.8"4,7%<'*#$"&8#=%/7*,#*%4,77%>?@@@?@AA?BCDC1 Item 64254
EF;6GH IJ6KFGLIM NFLMG6MFMO6E6GPJ
R*8*(,7%I/*(,$"83%L8#$('4$"&8#
1. Before each use, test the Tool as
directed in the prior section.
2. If an automatic oiler is not used, add
a few drops of Pneumatic Tool Oil to the airline
connection before use. Add a few drops
more after each hour of continual use.
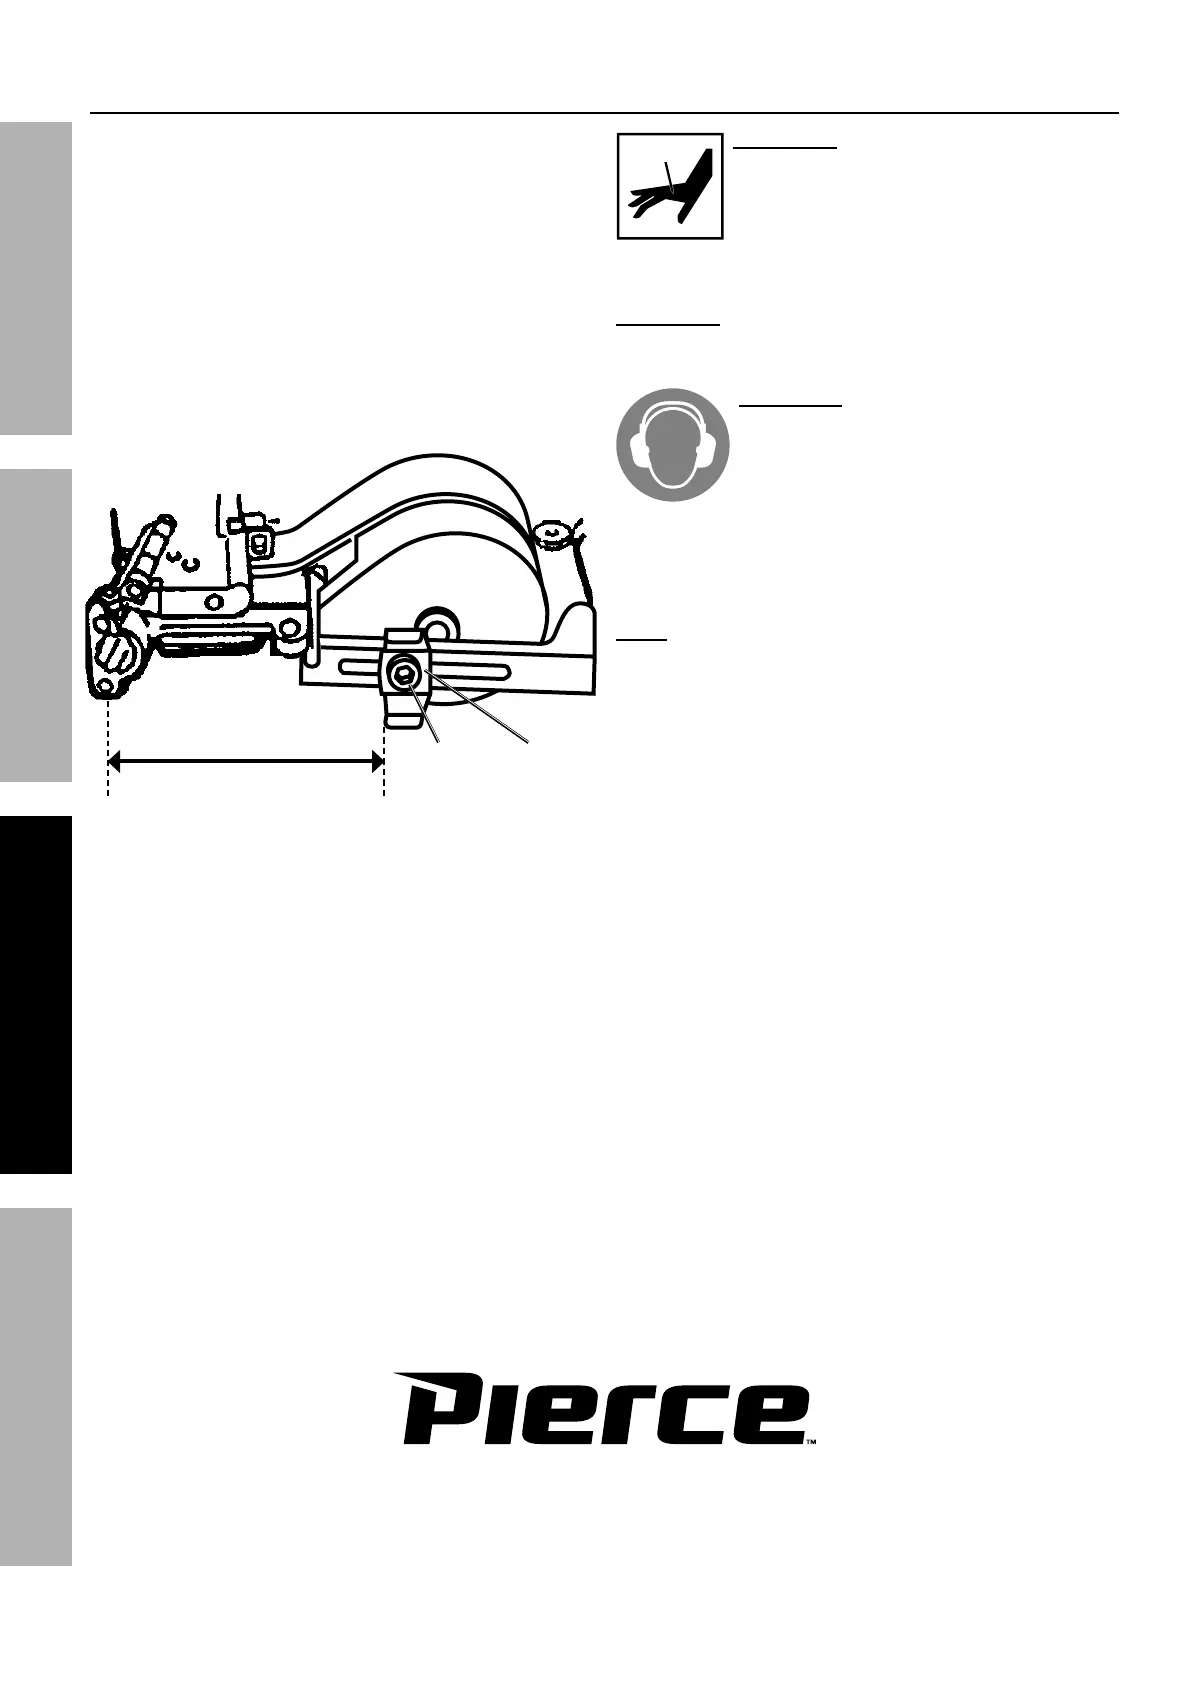
3. E."837*%R'"9*%E*$'/-%
The Shingle Guide controls roof shingle spacing.
a. Loosen the Screw on the Shingle Guide.
b. Slide the Guide to the desired spacing.
c. Retighten the Screw.
e+&$$&5%]"*)f
E4(*)
E."837*%
R'"9*
EWLMRT6%EJFOLMR
4. Keep all moving parts free from dirt, tar, and debris.
Clean and oil all moving parts before each use.
QFKMLMRd%%GI%JK6!6MG%
E6KLIPE%LMXPKH-%%V**/%#*4&89%.,89%
,),[%2(&5%G&&7%9"#4.,(3*%,(*,=%
*#/*4",77[%"2%.&79"83%)&(Y/"*4*1%%
G&&7%,//7"*#%*\$(*5*%2&(4*%$&%2,#$*8*(=%
,89%2,#$*8*(#%5,[%9*27*4$%&(%9"#4.,(3*%"8%
,8%'8*\/*4$*9%9"(*4$"&81
QFKMLMRd%%GI%JK6!6MG%LMXPKH-%%
U&%8&$%.&79%G&&7%8*,(%+&9[%)."7*%
9("]"831%%G&&7%(*4&"7%4,8%4,'#*%"8Z'([1
QFKMLMRd%%GI%JK6!6MG%E6KLIPE%
LMXPKH=%LMOTPULMR%J6KNFM6MG%
W6FKLMR%TIEE-%%%
F7),[#%)*,(%.*,("83%/(&$*4$"&8%).*8%
'#"83%$.*%$&&71
5. Position Tool at desired fastener location
and depress the Workpiece Contact fully
against the workpiece. Squeeze the
Trigger to discharge a fastener.
M&$*-%%JK6!6MG%UIPST6%UKL!LMR1%%
AllowtheTooltorecoilfromtheworkpiece —
9&%8&$%2&(4*%"$%,3,"8#$%$.*%)&(Y/"*4*1
6. Driving multiple fasteners using contact
actuation mode:
Squeeze and hold Trigger, then push Workpiece
Contact to discharge one fastener, move
and push Workpiece Contact again to
discharge additional fasteners.

 Loading...