Page 13;&(%$*4.8"4,7%<'*#$"&8#=%/7*,#*%4,77%>?@@@?@AA?BCDC1Item 64254
EF;6GHIJ6KFGLIMNFLMG6MFMO6 E6GPJ
T&,9"83%$.*%G&&7
GI%JK6!6MG%E6KLIPE%LMXPKH%;KIN%FOOLU6MGFT%ULEOWFKR6=%S6;IK6%TIFULMR-
g%Q*,(%FMEL?,//(&]*9%#,2*$[%3&337*#%)"$.%#"9*%#."*79#1%%%
Other people in the work area must also wear ANSI-approved impact safety goggles with side shields.
g%K*7*,#*%$.*%G("33*(1
g%U*$,4.%$.*%,"(%#'//7[1
g%F$$*5/$%$&%9"#4.,(3*%$.*%G&&7%"8$&%,%/"*4*%&2%#4(,/%)&&9%$&%*8#'(*%$.,$%
"$%"#%9"#4&88*4$*9%,89%"#%"84,/,+7*%&2%9("]"83%,8[%2,#$*8*(#1
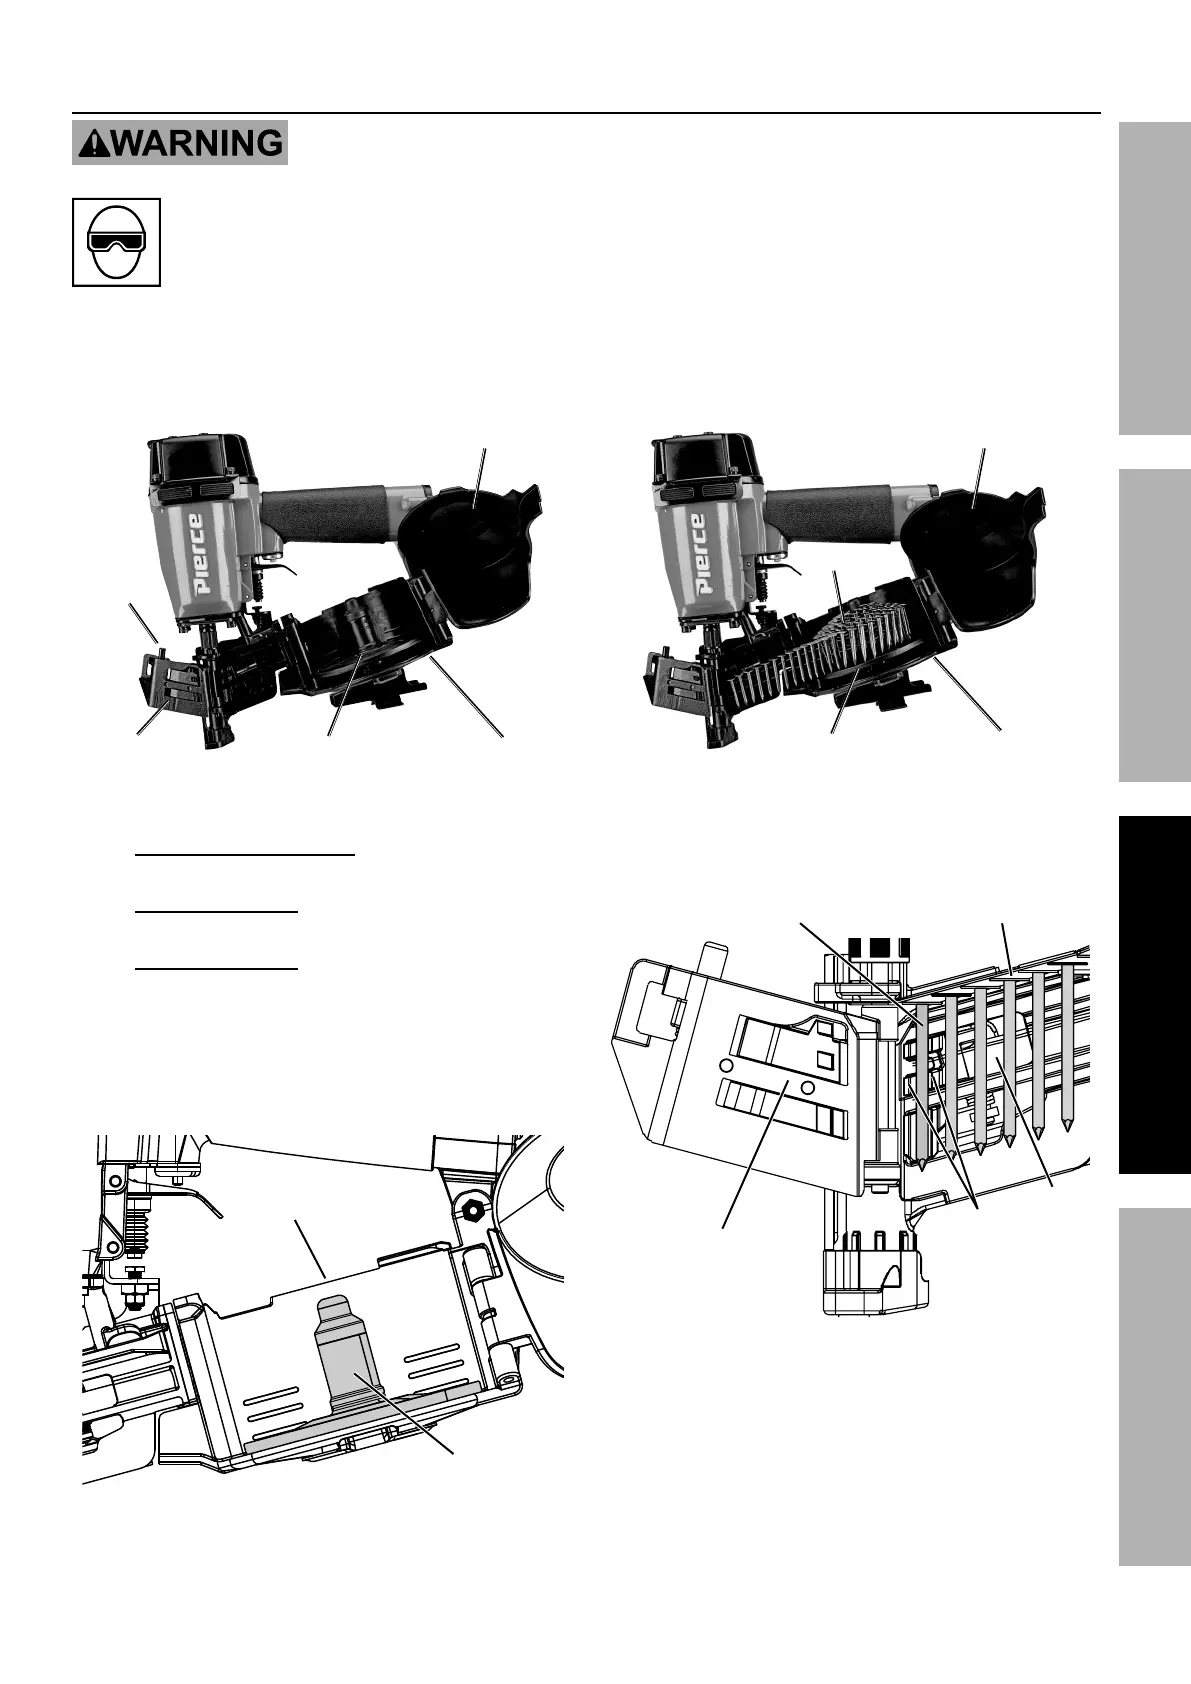
1. Push down on the Latch (77) and swing the Nail
Guide (75) and the Magazine Cover (87) open.
T,$4.
M,"7%R'"9*
N,3,`"8*%O&]*(
N,3,`"8*M,"7%E'//&($%J7,$*
2. Check the Nail Support Plate (96) inside the
Magazine. Adjust the Plate to match the nail length:
F1%P/%$&%>?>0hi%T&83%M,"7#%
eP#*%$&/%#*$$"83f1
S1%>?>0ai%T&83%M,"7#%
eP#*%5"997*%#*$$"83f1
O1%>?j0hi%T&83%M,"7#%
eP#*%+&$$&5%#*$$"83f1
3. Turn the Nail Support Plate 90° counterclockwise
and move it up or down to align the Plate
edge with the appropriate embossed nail size
marking on the inside wall of the Magazine.
C0@i
>i
%
>?>0hi
>?>0ai
aa
%
aB
%
ja
j@
hB
>?j0hi
N,3,`"8*
M,"7%E'//&($%J7,$*
4. When Plate edge is aligned with desired setting, turn
the Plate 90° clockwise until it clicks into place.
5. Place a coil of nails around the Nail
Support Plate in the Magazine.
M,"7#
M,"7%E'//&($%J7,$*
N,3,`"8*
N,3,`"8*%O&]*(
6. Uncoil enough nails to reach the front of the
Feeder and fit the nail heads into the Guide Slot.
7. Insert the first nail between the
two Pawls of the Feeder.
M,"7%
R'"9*
;"(#$%M,"7
;**9*(
J,)7
R'"9*%E7&$
8. Swing the Magazine Cover closed.
9. Close the Nail Guide. Make sure the Latch closes
securely. If the Nail Guide does not fully close
and the Latch does not engage properly, the nail
heads are not in the Guide Slot and the first nail
shank is not between the two Pawls of the Feeder.
 Loading...