Fitting instructions
Warnings
● Ensure that no power is supplied to Raspberry Pi®, PiFace™ Relay+ or PiFace™
EXTRA boards when plugging or unplugging.
Attaching PiFace™ EXTRA boards
Carefully line up all the pins of the PiFace™ EXTRA board with all the sockets on the PiFace™
Relay+. Once aligned, gently push the EXTRA board in until flush.
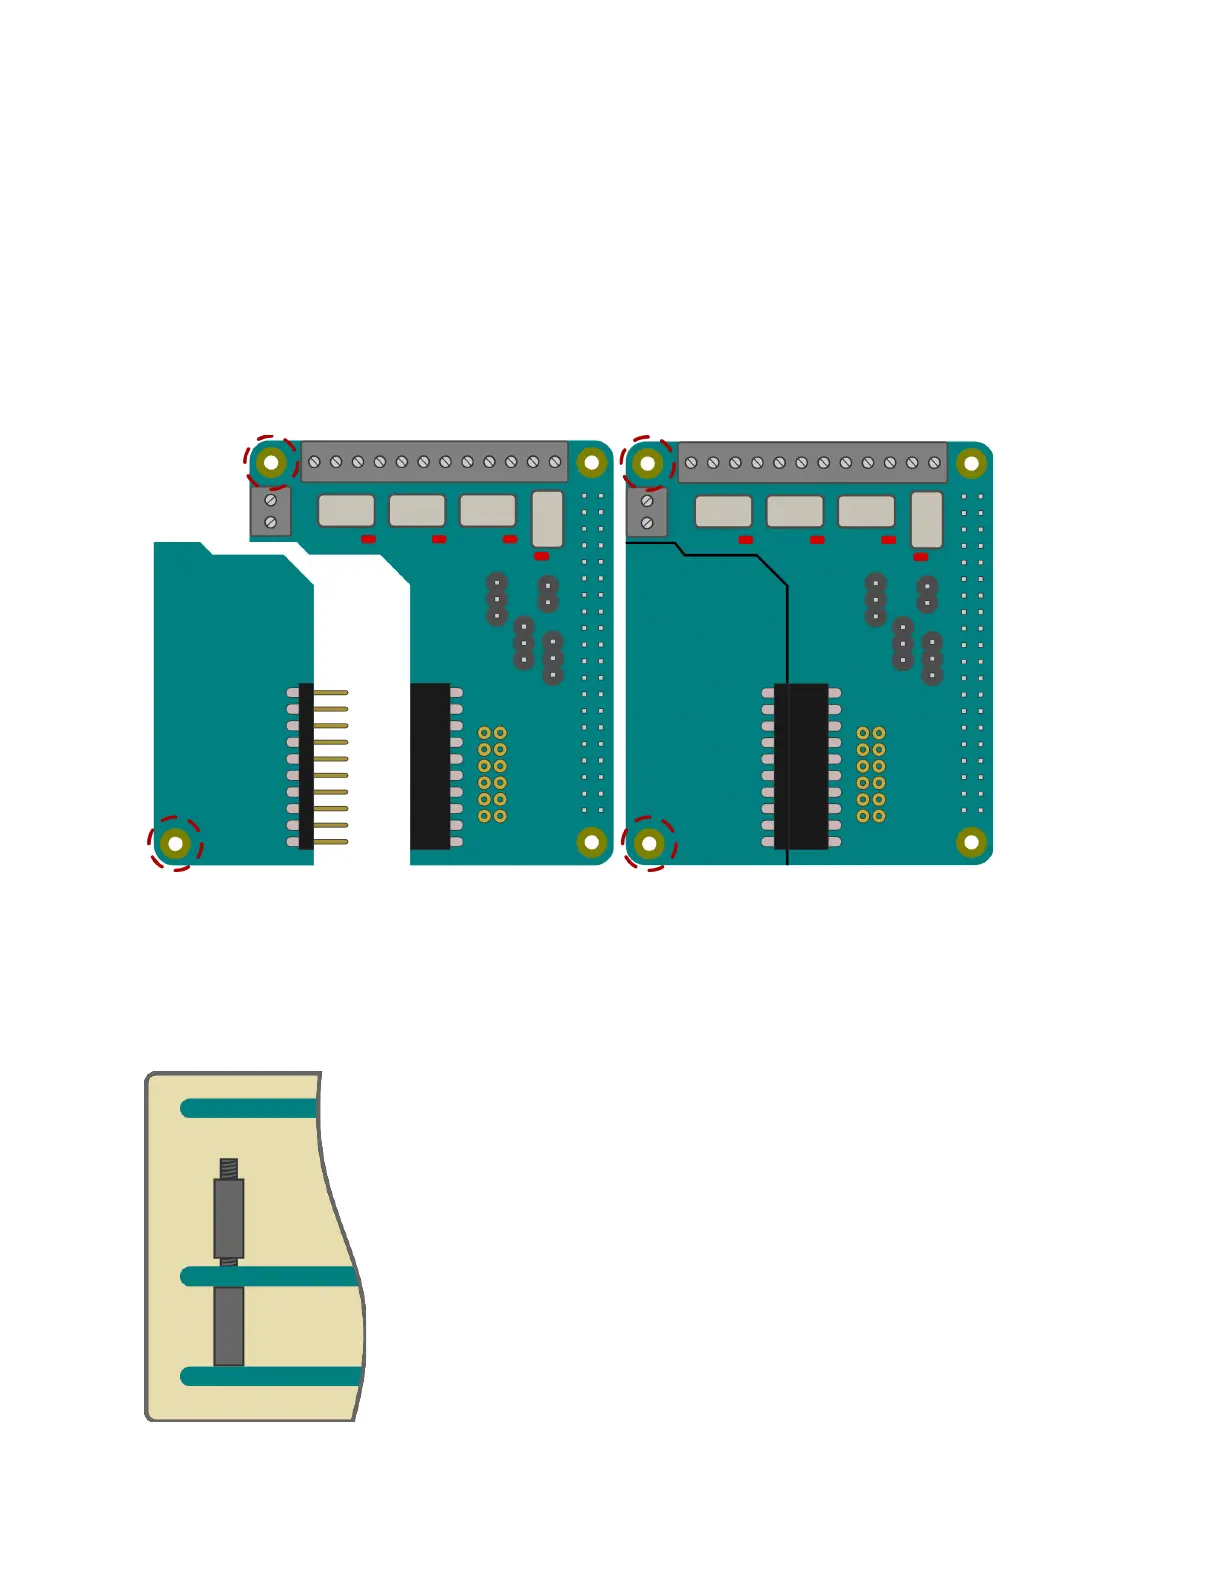
*PiFace™ EXTRA board is shown simplified in this diagram.
Mounting PiFace™ Relay+ on the Raspberry Pi®
To stop the PiFace™ Relay+ board from wobbling, use the plastic spacer provided. Fit it in the
mounting hole that is circled in the diagram above. When attaching a PiFace™ EXTRA board,
use the plastic spacer provided with it in the board’s only mounting hole, also circled above.
When fitting the PiFace™ Relay+ on the Raspberry Pi® ensure any
spacers are properly lined up, then gently push the Raspberry Pi®’s
GPIO pins into the connector. When stacking multiple PiFace™
Relay+s, fit the spacers between the boards before fitting on the
Raspberry Pi®.