EasyManua.ls Logo

Pioneer CT-J300WR User Manual

Pioneer CT-J300WR
35 pages
To Next Page IconTo Next Page
Page #1 background imageLoading...
Page #1 background image
®
PIONEER
The
Art
of
Entertainment
TUNER
CONTROL
AMPLIFIER
AMPLIFICATEUR
DE
COMMANDE
TUNER
Operating
Instructions
Mode
d'emploi
CX-J300/CX-J400*/CxX-J500**
STEREO
POWER
AMPLIFIER
AMPLIFICATEUR
DE
PUISSANCE
STEREO
M-J200/M-J300
SOUND
IMAGE
CONTROLLER
CONTROLEUR
D‘IMAGE
SONORE
GR-JSOO0O/GR-J400
STEREO
DOUBLE
CASSETTE
TAPE
DECK
DOUBLE
PLATINE
CASSETTE
STEREO
CT-J200WR/CT-JSOOWR
.
AUTO-RETURN
STEREO
TURNTABLE
TABLE
DE
LECTURE
STEREO
A
RETOUR
AUTOMATIQUE
PL-J400/PL-J500
*
The
CX-J400
is
for
Europe
only.
**
The
CX-J500
is
sold
outside
U.K.,
Europe,
and
Australia.
WARNING:
TO
PREVENT
FIRE
OR
SHOCK
HAZARD,
DO
NOT
EXPOSE
THIS
APPLIANCE
TO
RAIN
OR
MOISTURE.
FM/AM
CHANNEL
SWITCH
This
switch
is
not
provided
on
models
for
Europe,
U.K.
or
Australia.
Adjustment
is
only
necessary
when
there
is
a
CHANNEL
STEP
switch
at
the
rear
pane!
on
the
tuner
control
amplifier.
The
CHANNEL
STEP
switch
is
located
on
the
rear
pane!
of
the
tuner
control
amplitier.
Before
the
tuner
control
amplifier
leaves
the
factory,
this
switch
is
set
to
the
channel
step
standard
of
the
area
where
the
tuner
contro!
amplifier
is
sold.
Depending
on
the
position
of
this
switch,
each
time
TUNING
button
is
pressed,
the
frequency
display
changes
by
the
following
amount:
{100
kHz/10
kHz]
position
For
areas
with
channel
step
of
100
kHz
for
FM
and
10
kHz
for
AM.
{50
kH2/9
kHz}
position
For
areas
with
channel
step
of
50
kHz
for
FM
and
9
kHz
for
AM.
NOTE:
Hf
the
switch
is
set
to
the
wrong
position,
correct
tuning
may
not
|
be
possible,
Consult
your
dealer
if
you
are
not
sure
about
the
radio
channel
|
step
standard
in
your
area.
j
English
Francais
*
Le
modéle
CX-J400
n’est
destiné
qu’a
!’Europe.
“*
Le
modéle
CX-J500
est
vendu
a
!’extérieur
du
Royaume-Uni,
de
Europe
et
de
|’
Australie.
{For
tuner
control
amplifier
and
stereo
power
amplifier)
LINE
VOLTAGE
SELECTOR
SWITCH
Only
multi
voltage
models
are
provided
with
this
switch.
European,
U.K.,
and
Australian
models
are
not
provided
with
this
switch.
Mains
voltages
in
Saudi
Arabia
are
127
V
and
220
V
only.
Never
use
this
model
with
110
V
setting
in
Saudi
Arabia.
Before
your
model
is
shipped
from
the
factory,
this
switch
is
set
to
the
power
requirements
of
the
destination;
nevertheless,
you
should
check
that
it
is
set
properly
before
plugging
the
power
cord
into
the
AC
outlet.
1.
Disconnect
the
power
cord.
2.
Use
a
medium-size
screwdriver.
3.
insert
the
screwdriver
into
the
groove
on
the
voltage
selector
and
adjust
so
that
the
voltage
value
of
your
area.
220%
v
24ov
340¥
12Ov-1270
Question and Answer IconNeed help?

Do you have a question about the Pioneer CT-J300WR and is the answer not in the manual?

Pioneer CT-J300WR Specifications

General IconGeneral
BrandPioneer
ModelCT-J300WR
CategoryStereo System
LanguageEnglish

Summary

Before Operating

Basic Connections

Turntable Setup

Antenna Connections

FM Antenna Setup

Details connecting the FM antenna, including external antenna installation.

Front Panel Facilities

Scan, Function, and Display Controls

Describes Memory Scan, Function buttons, and display indicators.

Stereo Power Amplifier Controls

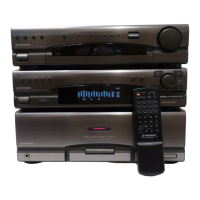
Details the front panel controls for the Stereo Power Amplifier M-J200/M-J300.

CX-J400/CX-J500 Front Panel Controls

Details various buttons and switches on the front panel for CX-J400/CX-J500 models.

Tuner Operations

Tuning Into Stations

Step-by-step guide for tuning into broadcast stations using the tuner.

Manual Preset Tuning

Step-by-step guide for manually tuning and memorizing broadcast stations.

Cassette Deck Operations

Cassette Deck Application Guide

Auto Synchro Editing System (A.S.E.S.)

Describes the Auto Synchro Editing System for recording from CD to tape.

Copying Tapes

Instructions for duplicating recorded contents from one tape to another.

Fine Edit Operation

Instructions for performing fine editing of recorded content using the A.S.E.S. system.

Sound Image Control

Timer Playback

Timer Recording

Maintenance

Troubleshooting

Troubleshooting Common Issues

Lists symptoms, causes, and remedies for common operational problems.

Troubleshooting Clock, Timer, Remote, and CD Functions

Addresses issues with clock/timer functions, remote control, and CD player operation.

Troubleshooting Cassette Deck and Sound Issues

Solutions for cassette deck malfunctions and poor sound quality.

Specifications

Related product manuals