EasyManua.ls Logo

Pioneer GR-555 User Manual

Pioneer GR-555
16 pages
To Next Page IconTo Next Page
Page #1 background imageLoading...
Page #1 background image
Operating
Instructions
GRAPHIC
EQUALIZER
Thank
you
for
buying
this
Pioneer
product.
Please
read
through
these
operating
instructions
so
you
will
know
how
to
operate
your
model
properly.
After
you
have
finished
reading
the
instructions,
put
them
away
in
a
safe
place
for
future
reference.
in
some
countries
or
regions,
the
shape
of
the
power
plug
and
power
outlet
may
sometimes
differ
from
that
shown
in
the
ex-
planatory
drawings.
However,
the
method
of
connecting
and
operating
the
unit
is
the
same.
R-555
WARNING:
1o
prevent
FIRE
OR
SHOCK
HAZARD,
DO
NOT
EXPOSE
THIS
APPLIANCE
TO
RAIN
OR
MOISTURE.
IMPORTANT
NOTICE
[For
U.S.
and
Canadian
models]
The
serial
number
for
this
equipment
is
located
on
the
rear
panel.
Please
write
this
serial
number
on
your
enclosed
war-
ranty
card
and
keep
it
in
a
secure
area.
This
is
for
your
securi-
ty.
[For
Canadian
model]
CAUTION:
to
prevent
Etectaic
SHOCK
DO
NOT
USE
THIS
(POLARIZED)
PLUG WITH
AN
EXTENSION
CORD,
RECEPTACLE
OR
OTHER
OUTLET
UNLESS
THE
BLADES
CAN
BE
FULLY
INSERTED
TO
PREVENT
BLADE
EXPOSURE.
ATTENTION:
pour
prevenin
Les
cHocs
ELEC-
TRIQUES
NE
PAS
UTILISER
CETTE
FICHE
POLARISEE
AVEC
UN
PROLONGATEUR
UNE
PRISE
DE
COURANT
OU
UNE
AUTRE
SORTIE
DE
COURANT,
SAUF
SI
LES
LAMES
PEUVENT
ETRE
INSEREES
A
FOND
SANS
EN
LAISSER
AUCUNE
PARTIE
A
DECOUVERT.
Connection
I
Connection
II
Signa!
path
diagram
Rear
Panel
Facilities
Front Panel
Facilities
Using
the
Equalizer
Controls
CONT
ENTS
LINE
VOLTAGE
SELECTOR
SWITCH
Only
multi-voltage
models
are
provided
with
this
switch.
U.S.,
Canadian,
European,
U.K.,
and
Austra-
lian
models
are
not
provided
with
this
switch,
Mains
voltages
in
Saudi
Arabia
are
127V
and
220V
only.
Never
use
this
model
with
110V
setting
in
Saudi
Arabia.
You
will
find
the
line
voltage
selector
switch
on
the
rear
pan-
el.
Before
your
model
its
shipped
from
the
factory,
the
switch
is
set
to
the
power
requirements
of
the
destination;
neverthe-
less,
you
should
check
that
it
is
set
properly
before
plugging
the
power
cord
into
the
AC
outlet.
If
the
voltage
is
not
properly
set,
or
if
you
move
to
an
area
where
the
voltage
requirements
differ,
adjust
the
selector
switch
as
follows.
Before
adjust-
ing,
disconnect
the
power
cord.
1,
Use
a
medium-size
screwdriver.
2.
Insert
the
screwdriver
into
the
groove
of
the
selector
switch
and
turn
it
so
that
the
power
voltage
marking
of
your
area
points
to
the
arrow
VOLTAGE
SELECTOR
Medium-size
screwdriver
Operations
----
errs
eres
Sate
AS
74
When
Playing
Records:
--
ni
sn
aaa
see
g
75
When
Recording
Broadcasts
-
4
bei
netig
14
sees
“10
When
Playing
Back
Tapes
14
14
When
Editing
Tapes
------0---
15
12.
Functioning
of
Switches
-------
+5.
Troubleshooting
16
Specifications
--
;
sd
highs
asa
ion
TUS
16
@
PIONEER’
The
Art
of
Entertainment
Question and Answer IconNeed help?

Do you have a question about the Pioneer GR-555 and is the answer not in the manual?

Pioneer GR-555 Specifications

Electrical Specifications IconElectrical Specifications
Power requirements (U.K. model)240 Volts~, 50/60 Hz
Power requirements (U.S. and Canadian models)AC 120V, 60Hz
Power requirements (Other destination model)AC 110V/120~127V/220V/240V (switchable), 50/60Hz
Power consumption15W
Audio Specifications IconAudio Specifications
Frequency response10 Hz ~ 50 kHz
Harmonic distortion0.03%
SN ratio (DIN)85 dB
Weight and Dimensions IconWeight and Dimensions
Dimensions (W x H x D)420 x 105 x 334 mm
Dimensions (W x H x D in inches)16-9/16 x 4-1/8 x 13-1/8 in
Weight4.2 kg (9 lb 4 oz)

Summary

Important Notices and Safety

Model-Specific Information

Includes serial number security for U.S./Canadian models and cautions for Canadian models.

Line Voltage Selector Switch

Instructions for adjusting the line voltage selector switch for regional power requirements.

Safety Instructions and Warnings

General Electrical and Appliance Safety

Covers shock hazards, water, ventilation, heat, power cords, and cleaning procedures.

United Kingdom Specific Instructions

Details on UK plug wiring codes and safety adaptations.

Outdoor Antenna Grounding Requirements

Guidance on grounding outdoor antennas for protection against surges and static.

Connection I

Connecting to Amplifier ADAPTOR Jacks

Diagram illustrating connections to an amplifier with ADAPTOR jacks.

Connection II

Connecting to Amplifier ADAPTOR/TAPE 2 Jacks

Diagram illustrating connections to an amplifier with ADAPTOR/TAPE 2 jacks.

Signal Path Diagram: Playing Records

Signal Path Diagram: Recording Broadcasts

Signal Path Diagram: Playing Back Tapes

Signal Path Diagram: Editing Tapes (Deck 1 to Deck 2)

Signal Path Diagram: Editing Tapes (Deck 2 to Deck 1)

Rear Panel Facilities

Jack Descriptions and AC Outlet

Details on equalizer jacks, tape jacks, and the unswitched AC outlet.

Stereo Amplifier Tape Jack Connections

Guides for connecting to amplifiers with one or two sets of tape jacks.

Front Panel Facilities

Power Switch and Indicators

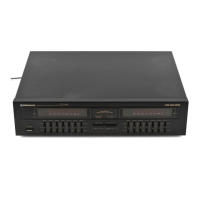
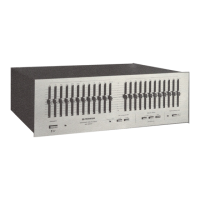
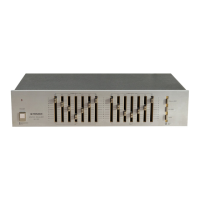
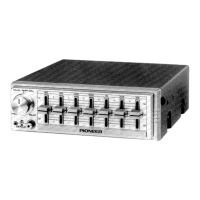
Details on the power switch, equalizer, and tape monitor indicators.

Spectrum Analyzers and Equalizer Controls

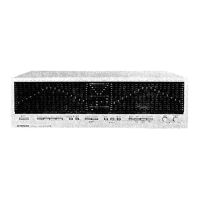
Explanation of spectrum analyzers and how to use equalizer controls.

Tape Monitor Switch Functionality

Explanation of the tape monitor switch and its indicator.

Using the Equalizer Controls

Compensating Frequency Response

Adjusting equalizer for flat playback frequency response.

Improving Listening Room Acoustics

Tips for adjusting equalizer settings based on room acoustics.

Coloring Reproduced Sound

Using equalizer to boost or attenuate specific instrument/vocal frequencies.

Equalizer Recording Techniques

Sound Coloring and Noise Reduction

Techniques for altering sound, preventing howl, and reducing tape noise.

Creating Compatible Recorded Tapes

Tips for recording tapes for car stereo playback.

Operations: Playing Records

Combining Equalizer with Record Playback

Step-by-step guide to combining the equalizer with record playback.

Operations: Recording Broadcasts

Equalizer Use for Broadcast Recording

Steps for using the equalizer while listening to and recording broadcasts.

Operations: Playing Back Tapes

Equalizer with Tape Playback

Steps for combining the equalizer with tape playback from different decks.

Operations: Tape Editing

Tape Copying Procedures

Procedures for copying tapes between decks with equalizer compensation.

Functioning of Switches

Equalizer and Tape Monitor Switch Operation

Diagram explaining the operation of equalizer and tape monitor switches.

Troubleshooting

Common Symptoms and Solutions

Lists common problems and their remedies for no sound or no equalizer effects.

Specifications

Technical Specifications Overview

Details input/output, frequency response, power, dimensions, and accessories.

Related product manuals