Do you have a question about the Pioneer PL-X33Z and is the answer not in the manual?
Warning to prevent fire or shock hazard by avoiding exposure to rain or moisture.
Covers reading, retaining, heeding instructions, water, location, ventilation, heat, power sources, cord, cleaning, polarization.
Essential information on grounding outdoor antennas for surge and static protection.
Guidance on connecting external FM antennas using coaxial or feeder wire for better reception.
Covers mic mixing, graphic equalizer, balance, surround/stereo wide, function switches, and volume.
Guide to starting playback in forward and reverse directions, including pause and stop.
Steps for normal and reverse recording, including pause, restart, and stopping recording.
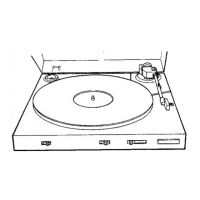
Procedure for adjusting stylus descent position on PL-X55Z and PL-555Z turntables.
Guide to replacing the stylus and playing records manually or automatically.
Steps for normal and high-speed tape copying, including listening while copying.
Procedures for cleaning and demagnetizing cassette deck heads for optimal performance.
Solutions for common issues like no sound, tape not working, and recording problems.
Troubleshooting for tuner reception, turntable operation, and sound quality problems.
| Drive method | Direct drive |
|---|---|
| Wow and flutter | 0.0025% (WRMS) |
| S/N ratio | 78dB (DIN-B) |
| Signal-to-Noise Ratio | 78dB (DIN-B) |
| Tonearm | Static balance type |
| Dimensions | 420 x 130 x 365mm |
| Weight | 6.1kg |
| Drive System | Direct Drive |
| Turntable platter | Aluminum Die-cast |
| Platter | Aluminum Die-cast |
| Speeds | 33 and 45rpm |
| Speed | 33 and 45rpm |