Before installing and setting up the unit, make sure you have all of the accessories (
Page 6 of Operating Instructions .)
Connect the power cords to an outlet after you have nished all of the connections.
Easy Setup Guide
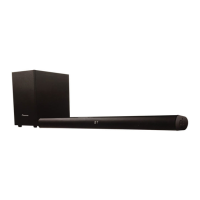
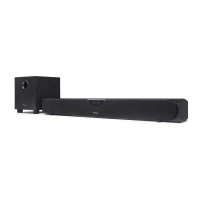
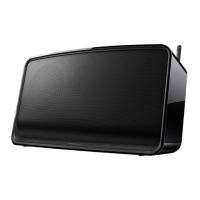
SBX-N700/SBX-N500 Installation/Preparation and Settings
SBX-N700/SBX-N500 Installation/Preparation and Settings
HDMI OUT(ARC)
OPT IN 1
(TV)
OPT IN 2
LAN(10/100)
IR OUT
HDMI OUT(ARC)
OPT IN 1
(TV)
OPT IN 2
LAN(10/100)
IR OUT
HDMI IN
Rear of unit
Connecting to your TV, player, and other devices
Please also read the instructions
on the back side.
Connecting the power cord
Connect the power cords of the AV speaker
bar and wireless subwoofer (SBX-N700 only)
to an outlet.
Preparing the remote control
Insert the supplied batteries (AAA x2).
Insert the batteries as indicated by the
marks
in the battery compartment.
HDMI IN
ARC
Connecting to an ARC-compatible TV
Connecting to a TV that is not ARC compatible
Connect to your TV using an HDMI cable (commercially available).
Connect to the ARC HDMI input terminal on your TV.
Connect to your TV using an HDMI cable (commercially available).
To enable hearing of the TV audio with the unit, connect the
supplied optical digital audio cable.
* ARC (Audio Return Channel) :
This is a function that enables output of
the TV audio from the unit by connecting only the HDMI cable.
Connecting to the network
Connecting wirelessly
You can use an access point or wireless
router to connect the unit to the network
via a wireless LAN.
For details on connecting and the
network settings, refer to the operating
instructions for your access point or
wireless router.
Computer
Router
Computer
Broadband
service
Rear View
TV
Check whether your TV
settings need to be set.
Check whether your TV is
ARC compatible.
HDMI cable
DVD player, etc.
Rear View
TV
HDMI cable
Optical digital
audio cable (supplied)
Optical digital audio cable (commercially available)
DVD player, etc.
Front of unit
Access point
or
wireless router
Wireless
communication
Computer
Insert the negative
end (
) first.
OPTICAL
OUT
Connecting to the network via the
LAN port
You can connect to a local area network (LAN)
from the LAN port on the rear of the unit.
For details, refer to the operating instructions
for your network device.
Use a LAN cable to connect the LAN port of
the unit to the LAN port of your modem or
router.
For the LAN cable, use a straight cable with
RJ45 connectors that is compliant with
category 5 (CAT5) or higher.
For details, refer to pages 21 to 23 of the Operating Instructions .
AC IN
HDMI OUT(ARC)
OPT IN 1
(TV)
OPT IN 2
LAN(10/100)
IR OUT
LAN(10/100)
Broadband
service
Pressing the
[
STANDBY/ON] button
Remove the protection cap at
the end and then connect the
cable while paying attention to
the orientation of the connector.
Conrm that "PIONEER" is displayed on the
display window of the AV bar.
SBX-N700 only
Confirm that the CONNECT indicator on the wireless
subwoofer lights blue.
*
If the CONNECT indicator on the wireless subwoofer
does not light blue, perform pairing. For details, refer
to page 52 of the Operating Instructions .