Straw Rocket Launcher User Guide 45186 V0918 3
Caring for the Launcher
If the Straw Rocket Launcher has been
stored without use for several months, or
if the piston’s movement becomes erratic,
the O-ring inside the launch cylinder might
need to be relubricated. To relubricate the
seal, do the following:
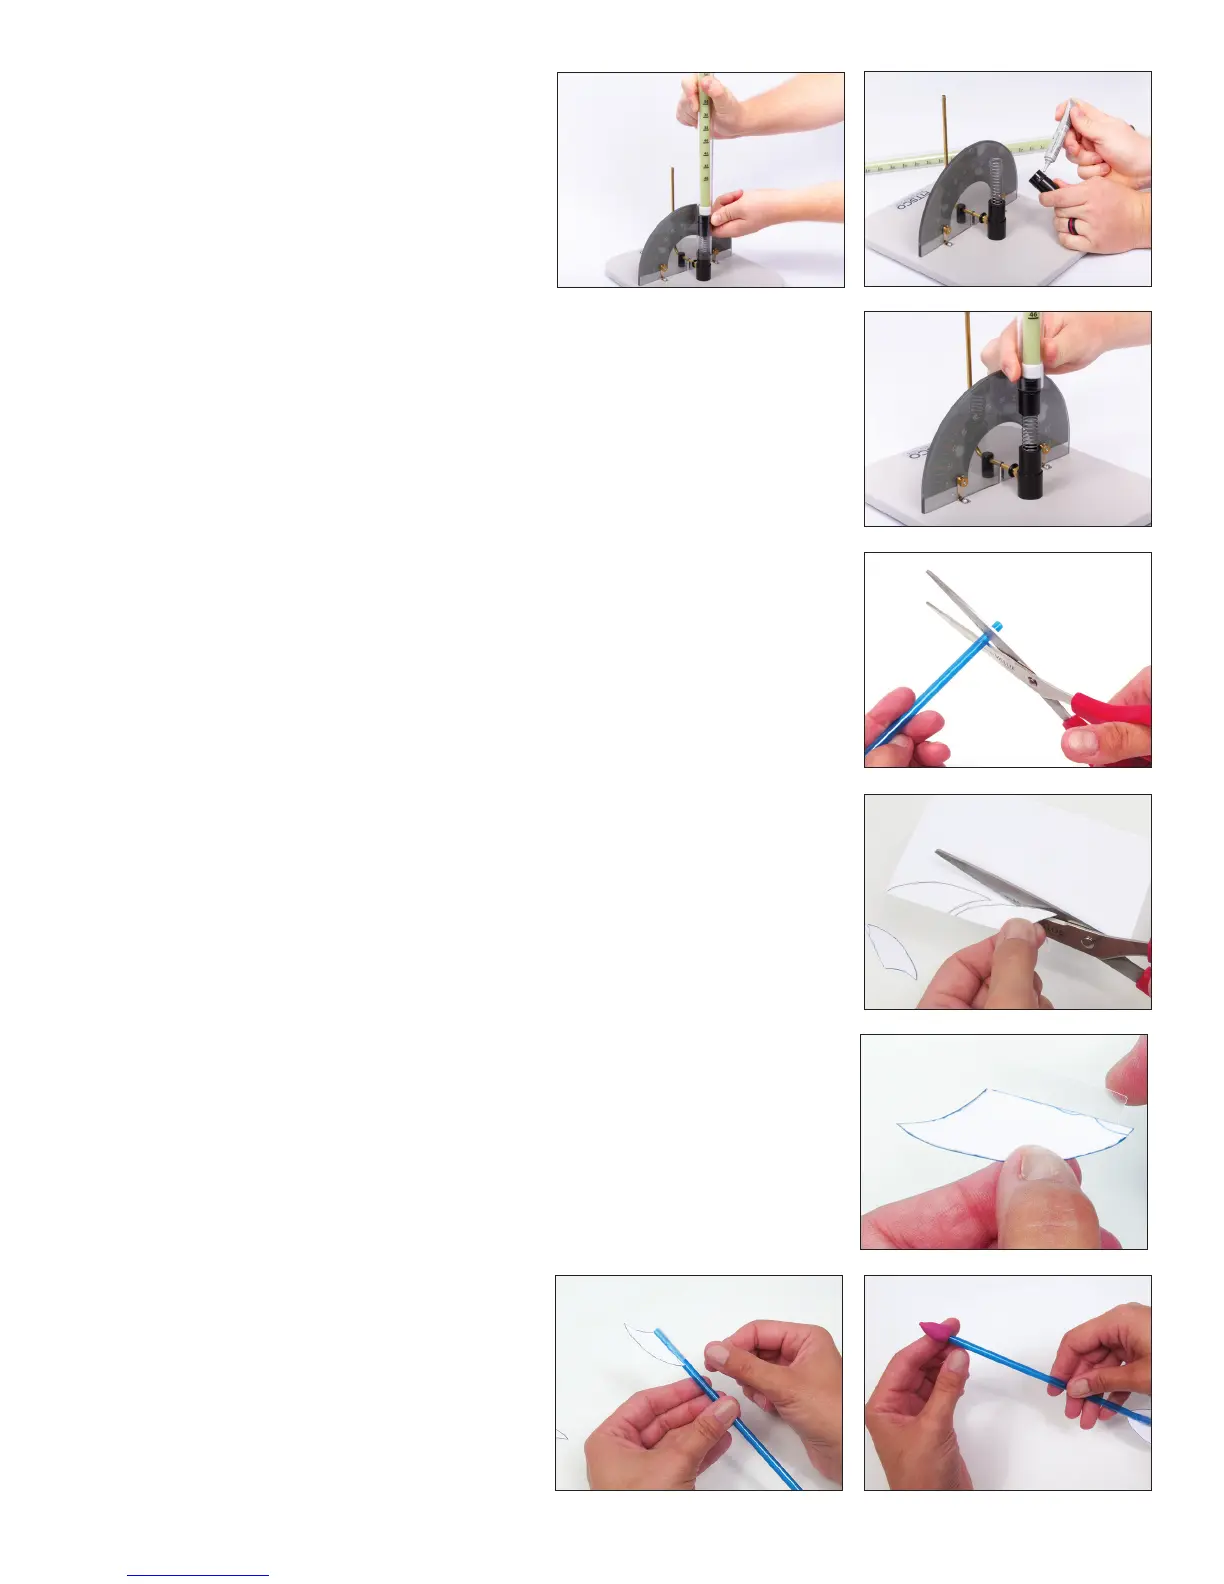
1. Gently separate the launch cylinder
from the base by pulling them apart so that the spring apparatus,
including the piston, is exposed (Figure 5).
2. Rub a small amount of silicone-based lubricant around the O-ring
(Figure 6).
3. Replace the launch cylinder in the launcher base (Figure 7).
Making Straw Rockets
Straw rockets can be constructed easily and quickly from common
items.
Note: Most of these items can be purchased together in the Straw
Rocket Class Pack (35784):
• Precision Straws (or 7/32"-diameter drinking straws*)
• Transparent tape
• Heavy paper or lightweight card stock (such as index cards)
• Modeling clay or poster-mounting putty
• Scissors
* Straw packages don’t usually list the diameter. We recommend testing the straw on
the launcher before purchasing a large quantity.
1. The straw will form the body of the rocket. If you are not using
Pitsco’s Precision Straws, test the straw on the launcher to ensure
that it is the right size. The straw should t over the tube, but you
should be able to slide it freely up and down. If the straw is too loose,
air will leak between the straw and the tube, thereby decreasing
the distance the rocket will y. A properly tting straw rocket can y
distances up to 50 feet.
2. On a piece of paper, design a straw rocket determining the n shape,
number of ns, rocket length, and nose cone shape/mass.
You can experiment with rockets by varying the:
◦ Shape, size, and number of ns.
◦ Shape and mass of the nose cone.
◦ Rocket’s center of gravity.
◦ Length of the rocket body.
3. Use the straw as is or cut the straw to the
length you want (Figure 8).
Figure 8
Figure 9
Figure 5
Figure 6
Figure 7
Figure 10a
Figure 10b
Figure 11
 Loading...