SKU 3980 For technical questions, please call 1-800-444-3353. Page 7
Removing The Strut Springs
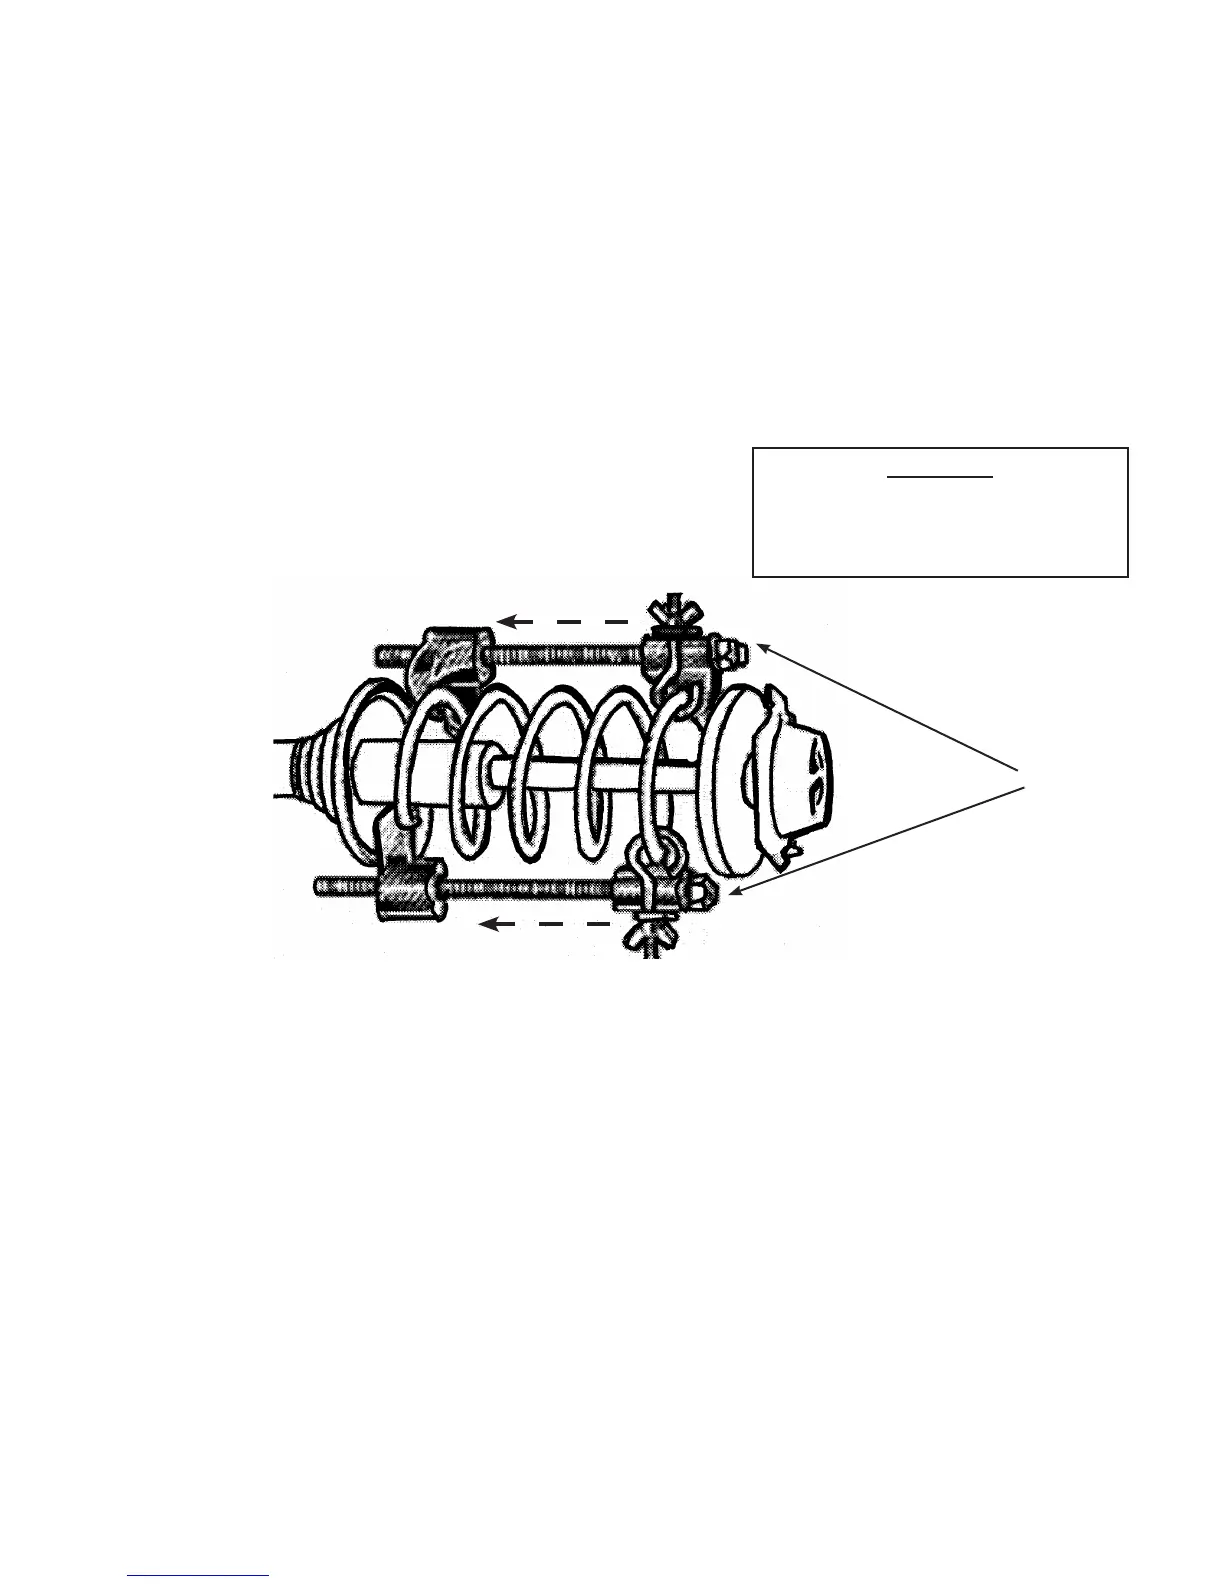
Step 1: You can use a 15/16" socket, end wrench, or appropriate impact wrench and socket to tighten the
NUTS (4) to compress the coil spring.
Step 2: Check the SAFETY HOOKS (6) to ensure they are installed correctly.
Step 3: Rotate the Strut Assembly so you can easily access the NUT on each Strut Spring Compressor.
Step 4: Begin to tighten the NUT on one Strut Spring Compressor as shown in Figure 5. Tighten the NUT (4)
about one inch, then tighten the NUT of the other Strut Spring Compressor an equal amount.
Figure 5 -- Tighten the Nuts Evenly
Step 5: If you are using an impact wrench to compress the Strut spring, use caution and only tighten the NUT
(4) a small amount each time. Switch to the opposite NUT (4) often to compress the strut spring
evenly.
Step 6: As you tighten the NUT (4) on each Strut Spring Compressor, you will be compressing the strut
spring. When you compress the strut spring enough to allow free play of the coil spring on the Strut
Assembly, you may remove the Strut Bearing Nut at the top of the Strut Assembly and remove the
Strut Bearing and Top Hat. You can now remove the compressed strut spring.
WARNING
You MUST tighten the NUTS
EVENLY. Do not tighten one Strut
Spring Compressor all at once.
Nut (4)