Page 4 For technical questions, please call 1-888-866-5797. Item 58731
Assembly/Mounting Instructions
Read the ENTIRE IMPORTANT
SAFETY INFORMATION
section at the beginning of this
document including all text
under subheadings therein
before set up or use of
this product.
Note: Tire Changer requires
assembly after unpacking.
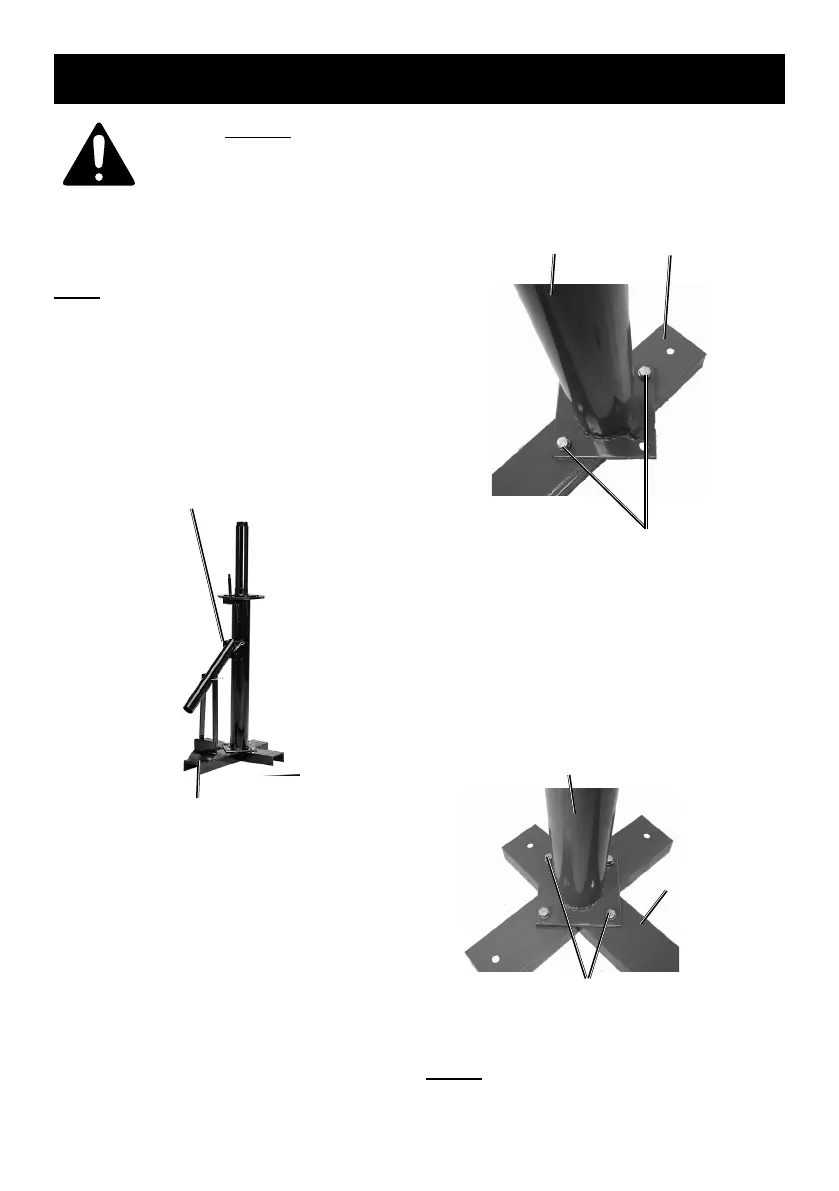
1. On a secure, level surface, place
bottom of Center Post (1) diagonally
across middle of Post Base (13).
2. Align Center Post with Post Base so
that Center Post bracket faces longer
end of Post Base with Mounting Tab.
Bracket
Mounting Tab
3. Fasten Center Post and Post
Base together using Bolts (6),
Washers (11) and Nuts (12).
Center
Post (1)
Post
Base (13)
Hex Bolt (6)
Washer (11)
Nut (12)
4. Set each of Side Bases (9) along either
side of Post Base until holes align.
5. Fasten together using the Hex Bolts (6),
Washers (11), and Nuts (12).
Side
Base (9)
Center
Post (1)
Hex Bolt (6)
Washer (11)
Nut (12)
NOTE: Floor surface should
be at least 4″ deep.