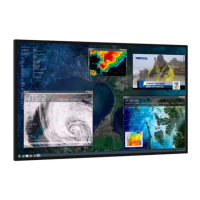
Do you have a question about the Planar Clarity Matrix G3 and is the answer not in the manual?
Key safety warnings and cautions for system operation and handling.
Guidelines to optimize display performance and avoid image retention issues.
Procedures and warnings for handling LCD panels to prevent damage.
Details on the mounting system for securing LCD displays.
Explanation of how the mounting system creates the video wall structure.
Overview of the component that manages video information flow to displays.
Information on the rack-mountable unit that supplies power to system components.
Key considerations for planning the video wall installation.
Options for adding, placing, and displaying sources using WallDirector software.
Setup procedures and hardware limitations for high-resolution input signals.
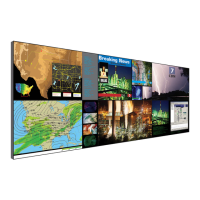
How multiple sources can be displayed on a wall using defined zones.
Strategies for using multiple VCs to extend video wall capabilities.
Displaying content at its original resolution without scaling.
Methods for enabling standby power modes for energy efficiency.
Implementing a network switch for communication redundancy and failure mitigation.
Feature for synchronizing video signals for optimal display performance.
Guidelines for connecting system components for optimal communication.
How to connect various video sources to the video controllers.
Instructions on positioning video controllers and power supplies in a rack.
Overview of different mounting methods for Clarity Matrix displays.
Details on installing the EasyAxis mounts for thin-profile video walls.
Standard procedures for attaching mounting brackets to a wall structure.
Step-by-step guide for installing brackets for the initial row of displays.
Process for installing brackets for rows following the first one.
Diagrams and instructions for routing power cables between components.
Best practices for routing video cables from rack equipment to displays.
How each 1920x1080 display connects to the VC via a data cable.
Detailed steps for installing the initial row of LCD modules.
Procedures for installing rows of displays after the first one.
Initial setup and configuration of the video wall using software or OSD.
Methods for connecting and communicating with system components via serial interface.
Steps for configuring displays, including matrix layout and color balance.
Explanation of color temperature and its effect on display appearance.
Steps to select and customize color temperature settings for displays.
Process for matching colors and whites/grays across multiple displays.
Advice and best practices for achieving accurate color balance.
Adjusting backlight intensity for optimal brightness and longevity.
How to manage display identification data for optimal performance.
Adjusting image to compensate for bezels and gaps between displays.
Settings to hide pixels at image edges to match display bezels.
How to view status and diagnostic information for system components.
Saving, recalling, and deleting display configurations using the on-screen menu.
Setting up and saving configurations as presets via the WallDirector software.
Configuring system alerts via WallDirector, Email, or SNMP for status notifications.
Technical specifications for specific Clarity Matrix LCD display models.
Technical specifications for other Clarity Matrix LCD display models.
Detailed specifications for the VC4H-BP+ and VC9H-BP+ video controllers.
Optical performance metrics like screen brightness, contrast, and uniformity.
Operating conditions including temperature, humidity, and altitude limits.
Supported video signal types, resolutions, and timings for various inputs.
Required minimum sync pulse and blanking timing parameters for inputs.
Instructions on how to remove shipping support from the remote power supply.
Steps for removing the cover from the N+1 bay of the RPS.
Overview of how the Fiber Video Extension module integrates with the system.
Information on the maximum supported lengths for fiber optic cables.
Description of the front panel features of the fiber extension module.
Description of the rear panel connections of the fiber extension module.
List of items included with the Fiber Video Extension module.
List of optional accessories available for the fiber video extension.
Overview of the 3D visualization system for professional applications.
Benefits of wide viewing angles for multi-user 3D content.
Capability to display conventional 2D images alongside 3D content.
Recommended method for cleaning passive 3D glasses using a microfiber cloth.
Guidance on installing 3D panels and disabling frame compensation for 3D applications.
Requirements for graphics cards and workstations to support the 3D system.
Instructions for installing the optional stud adapter bracket for wall mounting.
How to access and download technical documents and software from Planar's portal.
| Screen Size | 55 inches |
|---|---|
| Brightness | 700 cd/m² |
| Viewing Angle | 178° (H) / 178° (V) |
| Panel Type | IPS |
| Refresh Rate | 60 Hz |
| Product Type | LCD video wall display |
| Resolution | 3840 x 2160 |
| Contrast Ratio | 4000:1 |
| Response Time | 8 ms |
| Input Connectors | HDMI, DisplayPort |
| Connectivity | RS-232, LAN |
| Control | Remote Control |
| Inputs | HDMI, DisplayPort |
| Touch Technology | No |