10
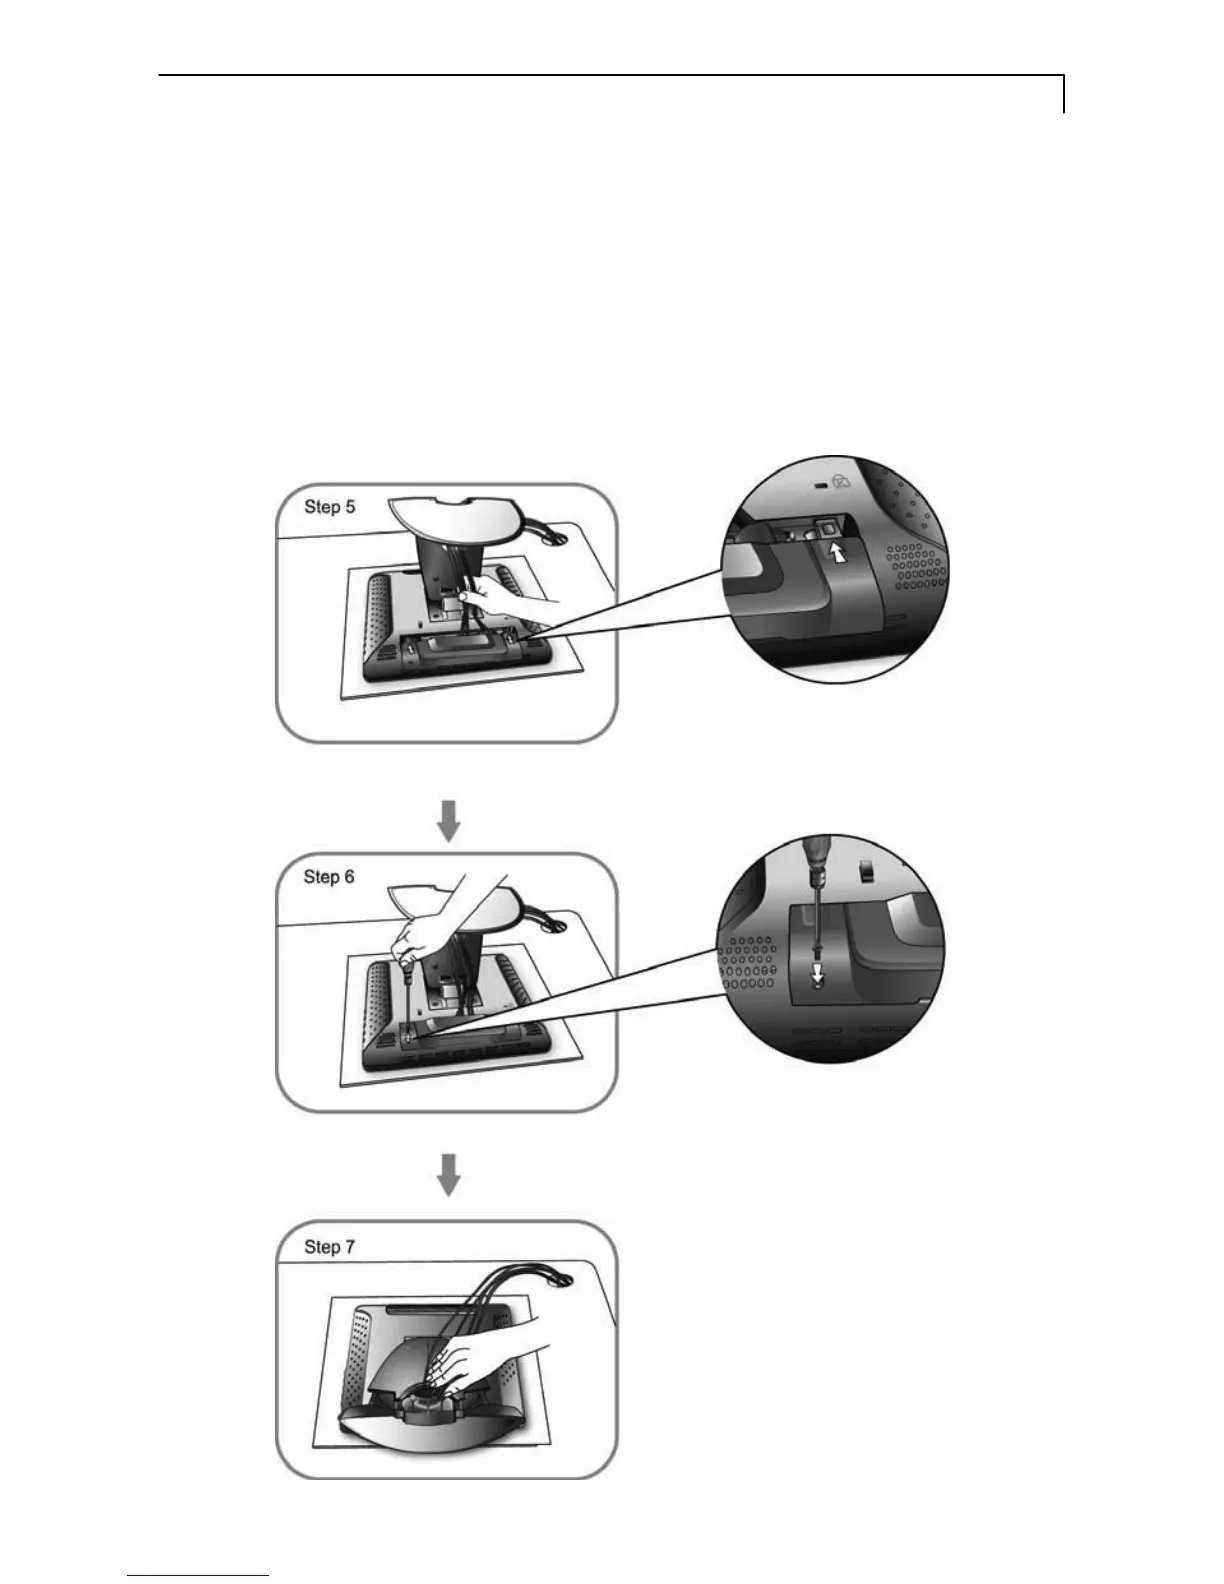
5. Take the optional cable cover and screw from the accessory box. Position all
cables under the cover lip as seen in the step 5 diagram.
6. Using a Philips Head screwdriver, insert the screw (CBM M3x6) into the cable
cover and monitor as seen in the step 6 diagram.
7. Re-attach the stand back cover to the LCD stand by pressing firmly until the
tabs snap into place as seen in the step 7 diagram. You may also keep the
cables in order by using the cable organizer.