Do you have a question about the PLANMED SOPHIE and is the answer not in the manual?
Important warnings, cautions, and notes for servicing to avoid personal injury or damage.
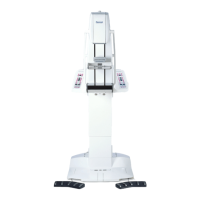
Information on manual validity and product development policy.
Details on electrical and mechanical similarities and differences between Sophie models.
Information on software compatibility lists and hardware compatibility.
Guide to navigating the manual, with brief descriptions of each chapter.
Detailed specifications for the Toshiba E7272 X-ray tube assembly and generator.
Defines criteria for exposure time, peak tube potential, tube current, and mAs product.
User statement detailing radiation leakage, filtration, voltage, current, and duty cycle factors.
Key operational limits and performance data for the Toshiba E7272 tube.
Graphical representation of anode thermal characteristics and tube housing heat dissipation.
Detailed specifications for the Toshiba E7290 X-ray tube assembly and generator.
User statement detailing radiation leakage, filtration, voltage, current, and duty cycle factors.
Key operational limits and performance data for the Toshiba E7290 tube.
Graphical representation of anode thermal characteristics and tube housing heat dissipation.
Details tools, environmental, and space requirements for unit installation.
Information on radiation safety regulations, safe distances, and shielding.
Details mains voltage, frequency, fuse ratings, and typical power consumption.
Step-by-step instructions for safely unpacking the unit from its crate.
Procedure to safely move the unit from its transportation state to operational readiness.
Instructions for bolting the unit to the floor for stability and leveling.
List of standard accessories included with the unit and instructions for unpacking them.
Instructions for attaching optional accessories like remote control, printer, etc.
Initial setups and checks that must be performed before patient work.
Procedures for driving the unit into transport position and transporting it safely.
Precautions and procedures for handling and transporting the mobile Sophie unit.
Steps to prepare the mobile unit for operation after it has been transported.
Steps to prepare the mobile unit for safe transportation.
Description of all keyboard functions and special display modes in a short-form format.
Short-form presentation of all available special keyboard functions for user settings.
Short-form presentation of all available special service mode keyboard functions.
Procedure to access and exit the special service mode for diagnostics and calibration.
Explanation of how normal displays change meaning in service mode.
Details on accessing and performing special service mode keyboard functions and displays.
Detailed descriptions of service mode functions, excluding adjustments and setups.
Procedure to move the unit to the transport position for safe movement.
How to view tube head and power supply heatsink temperatures in service mode.
How to display the real density setting in service mode, without zero compensation.
How to view the number of exposures recorded by the unit.
Procedure to view the last 49 error messages stored in the unit's memory.
Procedure to print the complete error list on an optional printer.
Function to temporarily ignore error codes related to motorized movements for diagnostics.
Monitor signals from sensors and switches, and control related motors for diagnostics.
Overview of STOP, HELP, and ERROR message types appearing on clock displays.
List of available HELP messages, their reasons, and recommended actions.
List of available error messages, their explanations, and associated error codes.
In-depth explanations of error messages, including causes and troubleshooting steps.
Explanations for errors indicating external circumstances, easily corrected by the user.
Errors related to safety circuitry, monitoring X-ray tube performance during exposure.
Errors related to monitoring movement of motorized mechanisms and time-out issues.
Errors related to software diagnostics of X-ray tube and power supply performance.
Errors related to sensors and switches, including paddle and mechanism position detection.
Errors related to temperature sensors, FET, and other special sensors monitoring unit conditions.
Errors related to serial communication between CPUs and internal CPU voltage issues.
Errors indicating processor circuitry or internal software malfunctions.
Errors related to wrong information in CPU EEPROM memory or hardware failures.
Errors indicating erroneous or missing signals from various sensors and switches.
Covers cleaning procedures for unit surfaces and compression paddles.
Monthly inspections for exposure indicators, audible indicators, exposure switch, labels, AEC, and compression force.
Checks to be performed by a qualified service technician annually to ensure image quality and safety.
Requirement for annual calibration of measurement and test instruments for accuracy.
Procedure to measure beam quality using aluminum filters and a radiation monitor.
Procedure to measure radiation output for both large and small focal spots.
Procedure to measure focal spot dimensions using a Star X-Ray Test Pattern.
Procedure for evaluating image quality using a mammographic phantom.
Procedure to verify AEC performance with different sensors and exposure parameters.
Covers checks for compression force, filament pre-heating voltages, and anode voltage.
Procedure to verify the accuracy of the compression force measurement.
Recommendation to calibrate filament pre-heating voltages annually for tube parameter changes.
Procedure to measure anode voltage using a Mammographic kVp meter or digital multimeter.
Procedure to measure tube current and exposure time using an ion chamber and multimeter.
Procedure to measure tube current and exposure time using an ion chamber and multimeter.
Procedures to check X-ray beam alignment using fluorescent screens and film.
Procedure to measure light localizer illuminance across the image receptor support quadrants.
Procedures to check X-ray field alignment and contrast ratio against light field.
Checks for protective earth resistance and condition of spiral and external cables.
Regional safety requirements and initial setups for unit parameters and keyboard calibrations.
Verifying factory-set parameters and performing initial keyboard calibrations.
Setup for film/screen combination and printer/label type selection.
Special adjustments and functions performable by the end-user in normal keyboard mode.
Setting for automatic kV pre-selection based on compression thickness.
Setting for automatic selection of rhodium/molybdenum filter based on breast thickness.
Setting the default magnification factor for MAG-mode operations.
Enabling or disabling automatic compression paddle release after exposure.
Setting the maximum speed of the compression paddle during descent.
Setting the ratio of compression speed reduction related to compression force.
Setting the compression force where compression temporarily stops and changes to crawling speed.
Selecting between traditional or TWINCOMP compression methods.
Setting the lowest crawling speed for the lift motor for height fine-adjusting.
Procedure to set the unit's internal clock and calendar.
Restores user density display to zero for achieving own ZERO density.
Fine-adjusts contrast/exposure time when using the AAEC mode.
Enables or disables automatic film labeling for marking system use or error prevention.
Turns the BUCKY grid movement on or off, primarily for diagnostic use.
Sets the alarm sound frequency, which can also affect loudness.
Toggles the display dimming feature on or off.
Enables or disables the mA limit, setting the maximum allowed mA value.
Advanced adjustments and functions performable only in the special service mode.
Procedure to enter the special service mode for experienced technicians.
Resets all operating parameters to factory predetermined settings, making the unit fully functional.
Setup for 41 different parameters affecting unit behavior, including compression, rotation, and filters.
Calibration procedure to ensure the C-arm is straight upwards in the 0° CC-projection position.
Calibration for the compression mechanism and sensors to ensure accurate thickness display.
Calibration of the compression force sensor to ensure measurement accuracy.
Calibration of filament preheating voltages to compensate for tube parameter changes.
Procedure to calibrate AEC sensors to ensure proper performance and AEC-system accuracy.
Adjustment of kV offset and gain parameters for precise kV calibration.
Adjustments to optimize AEC tracking for nonstandard film/screen combinations.
Procedure to test AEC tracking and determine the nature of any problems.
Adjustments for thickness, tube potential, and time using PC software and MAMMOTOOL.
Adjusting AEC density settings based on operation mode and filter used.
Procedures for calibrating mechanical components like MAG/LOAD and UP/DOWN mechanisms.
Restoring positional information for MAG/LOAD mechanism by driving it side to side.
Restoring positional information for UP/DOWN mechanism by driving it from limit to limit.
Procedure to adjust the X-ray beam alignment for the Toshiba E7272 X-ray tube.
Procedure to adjust the spot collimator for correct exposure area and alignment.
Instructions for checking and cleaning filters to ensure optimal image quality.
Procedure to adjust the X-ray beam alignment for the Toshiba E7290 X-ray tube.
Procedure to adjust the spot collimator alignment using Figure F.10.
Procedure to adjust X-ray beam alignment for the large focal spot using film.
Procedure to adjust X-ray beam alignment for the small focal spot using film.
Instructions for checking and cleaning filters 2 and spot collimator.
Procedure to adjust the light field beam to match the X-ray field on film.
Adjustment of the sensor for the filter ladder's final position.
Procedure to adjust the absorber adjusting screw for the twincomp paddle damper.
Procedure to adjust the gas spring tension for proper C-arm movement.
Procedures for adjusting sensors and switches using service mode displays.
Instructions for initial adjustment of mirror, filter, and collimator limit sensors.
Procedure to check and adjust the mirror limit sensor for proper rotation.
Procedure to check and adjust collimator limit sensors for proper movement.
Checks for worm-screw rotation, vaseline application, mirror movement, and screw tightness.
Checking and adjusting compression paddle limit sensors for upper, release, and lower limits.
Checking and adjusting limit sensors for MAG-up and MAG-down positions.
Checking the functioning of the labeling head disk position sensor.
Checking and adjusting C-arm rotation limit sensors for correct positioning and safety.
Checking and adjusting lift motor limit sensors for down and up positions.
Adjusting detector plate position for lift reference sensor based on C-arm locking knob.
Checking and adjusting microswitches for small and large cassette identification.
Checking microswitches for small and large lower compression paddles and bucky grids.
How to view sensor and switch signals in service mode for diagnostic purposes.
Troubleshooting steps for when the unit is completely dead or shows electrical issues.
Checking fuses and mains voltage as first steps for a dead unit.
Troubleshooting for DC motors and stepper motors in various mechanisms.
Troubleshooting the MAG/LOAD DC motor, checking signals and voltages.
Troubleshooting stepper motors for compression, labeling, and collimator mechanisms.
Electrical troubleshooting for the collimator assembly, checking signals and voltages.
Troubleshooting mechanical issues, including paddle holder and cassette table identification.
Troubleshooting paddle holder issues by checking microswitches and signals.
Information required before contacting Planmed, including serial numbers and problem details.
Check unit serial number and tube-head serial number before contacting support.
Record circumstances, cassette type, film type, and processor type for image quality issues.
Provides phone number, fax, and address for Planmed head office support.
Instructions for safely removing and replacing various unit covers to access internal components.
Instructions for removing the base rear cover, front cover plate, and side cover plates.
Instructions for removing the hood bottom cover plates and telescopic column covers.
Instructions for removing the stationary column rear panel and rear cover.
Detailed instructions for removing various C-arm covers including top, lower, vertical, and side panels.
Instructions for removing the hood, including transport handle and keyboard cables.
Instructions for removing the cassette table cover, disconnecting cables.
Instructions for removing the collimator cover.
Essential for system functionality and updates, covering Rear CPU and Tube CPU software.
Procedures for replacing software chips on Rear CPU and Tube CPU boards.
Procedure for replacing the software chip on the Tube CPU board.
Instructions for replacing mains fuses and power supply fuses, emphasizing correct type and rating.
Details on rating, location, and purpose of the unit's mains fuses.
Details on ratings, location, and purpose of the power supply fuses.
Procedure for replacing the light field bulb assembly, including safety and handling precautions.
Procedure for replacing the entire X-ray tubehead assembly, including safety precautions.
Crucial steps before replacement, including C-arm positioning and locking.
Procedure for safely removing the tubehead from the unit's shafts.
Procedure for replacing the power supply unit, including connector and screw handling.
General instructions for replacing PC-boards, emphasizing careful handling of connectors.
Diagram and list identifying the location of various PC-boards within the unit.
Instructions for replacing Base PCB, Sync PCB, Rear collector PCB, and Rear processor PCB.
Instructions for replacing Shelf collector PCB on the C-arm.
Procedure for replacing the Force sensor PCB, including disconnecting connectors and screws.
Procedure for replacing the AEC sensor assembly, emphasizing not separating sensor from cover.
Instructions for replacing Mag control board and Tube processor board.
Procedure for removing and installing the display PCB assembly and changing the membrane.
Procedures for replacing various sensors and switches on the unit.
Diagram illustrating the location of various sensors and switches on the unit.
| Brand | PLANMED |
|---|---|
| Model | SOPHIE |
| Category | Medical Equipment |
| Language | English |