To Remove an Oven Thermocouple
v Remove the spillage tray as explained above.
v Remove the 2 feet on the bottom of the left hand side panel. The side panel can then be removed.
v Unscrew and remove the back panel.
v Release the thermocouple nut from the rear of the tap.
v Release the nuts holding the probe in position over the burner at the back of the oven compartment.
v Remove the old thermocouple through the side and replace with the new one ensuring that it is
clear of the door springs.
v The tip of the thermocouple should be approximately 15 mm above the centre of the burner.
v To replace the side all the edges should be inside the chassis.
The gas valves fitted to this unit are not to be stripped for re-greasing or maintenance
purposes. If required, the whole of the valve must be replaced. If the appliance needs more
detailed servicing or replacement of other parts this servicing should be carried out by a
competent person (e.g. a CORGI registered fitter).
It is recommended that this appliance is professionally serviced every 2 years.
SPARE PARTS
Description Part No.
Oven Thermocouple LPS 180-1
Grill Thermocouple LPS 181-2
Hob Thermocouple LPS 181-4
Oven Shelf LPS 212-2
Pan Support 3 Burner Hob LPS 213-2
2 Burner Hob LPS 213-3
Baking Tray LPS 219-2
Grill Pan LPS 220-1
Tap Knob LPS 253-1
It is essential that you quote the DATA PLATE details (on rear of cooker) and the
model and gas type when ordering spares.
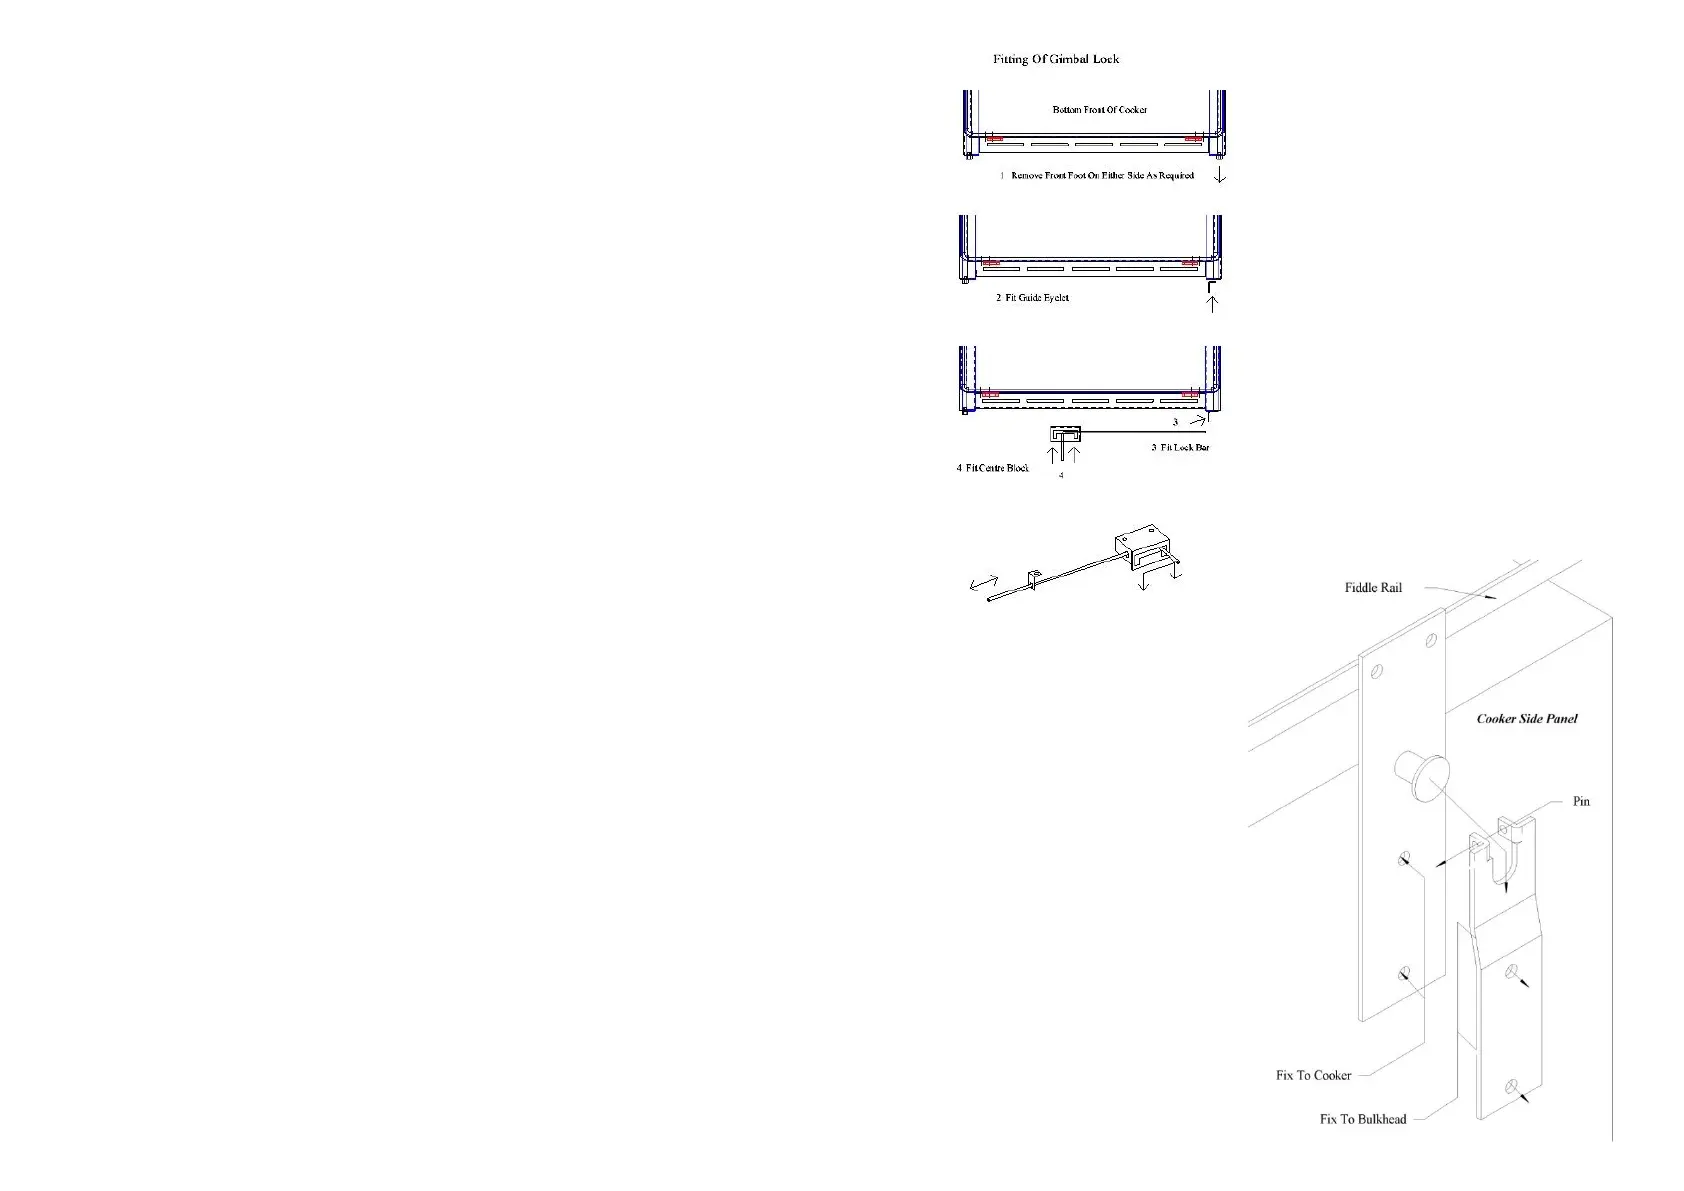
Fitting of Gimbal Brackets