EasyManua.ls Logo

Plastimo IRIS 100 User Manual

Plastimo IRIS 100
6 pages
To Next Page IconTo Next Page
Page #1 background imageLoading...
Page #1 background image
PLASTIMO COMPASS INSTRUCTIONS
Thank you for purchasing a Plastimo compass. This instrument is the
result of our more than 40 year of experience in compass development.
The choice of components we use and the care that we take in our
manufacturing process is reflected in the high quality of each Plastimo
compass we produce.
1. Installation
Check that the place where you would like to mount your compass is at a
sufficient distance from magnetic objects that may interfere with your
compass’s local magnetic field, such as other compasses, fire
extinguishers, loudspeakers, electric wires and equipment, metallic parts
of steering systems, cameras, tools, etc.
Make sure that:
The compass main lubber line is parallel to your boat’s centre line. This is
especially important for bulkhead compasses mounted on an inclined
surface.
For flush or bracket mount compasses, the mounting surface is perfectly
stable and horizontal.
For flush mount compasses, place the supplied mounting template where
you would like to position the compass. Drill out the mounting holes and
the hole for the lighting wire if applicable. Cut out the hole for the main
body of the compass using a hole saw or portable jigsaw.
Use non-magnetic screws only (screws which do not adhere to a magnet
like 316L stainless steel, brass or aluminium screws..) to mount your
compass.
2. Deviation
The course discrepancy (in degrees) between the compass heading North
and the true magnetic North is called deviation. It can be negative or
positive.
In order to minimise this error, your compass should be installed as far as
possible from objects interfering with its local magnetic field.
Once the deviation errors are calculated and adjusted for, your compass
will be a perfectly reliable navigation instrument.
Question and Answer IconNeed help?

Do you have a question about the Plastimo IRIS 100 and is the answer not in the manual?

Plastimo IRIS 100 Specifications

General IconGeneral
BrandPlastimo
ModelIRIS 100
CategoryCompass
LanguageEnglish

Summary

Installation

Compass Alignment and Stability

Ensure lubber line is parallel to boat's centre line; mounting surface must be stable and horizontal.

Flush Mount Installation

Use template, drill holes for compass and lighting wire, cut main body hole.

Non-Magnetic Screw Mounting

Use only non-magnetic screws like 316L stainless steel, brass, or aluminium for mounting.

Deviation

Plotting a Deviation Curve

Check compensation screws neutrality. Compare headings from hand bearing and steering compasses at intervals.

Compensation

Compensating the Compass

Adjust built-in magnets to affect card's horizontal component for North/South and East/West deviation.

Lighting and Utilisation

Compass Lighting

Compasses include a 12V bulb; some models with 2 bulbs support 24V power.

Reading the Compass

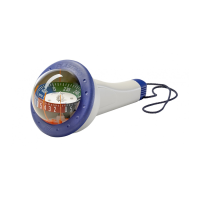
Read from the front. Lubber line indicates boat's heading. Avoid proximity to magnetic interference.

Maintenance and Troubleshooting

Maintenance Advice

Clean with soapy water; avoid solvents. Use rubbing cream for scratches. Do not use mastic acetic acid.

Troubleshooting Defects

For defects like bubbles, contact dealer or service centre; do not open magnetic cell.