8
ABOVE GROUND POOL
INSTALLATION
Ground Preparation
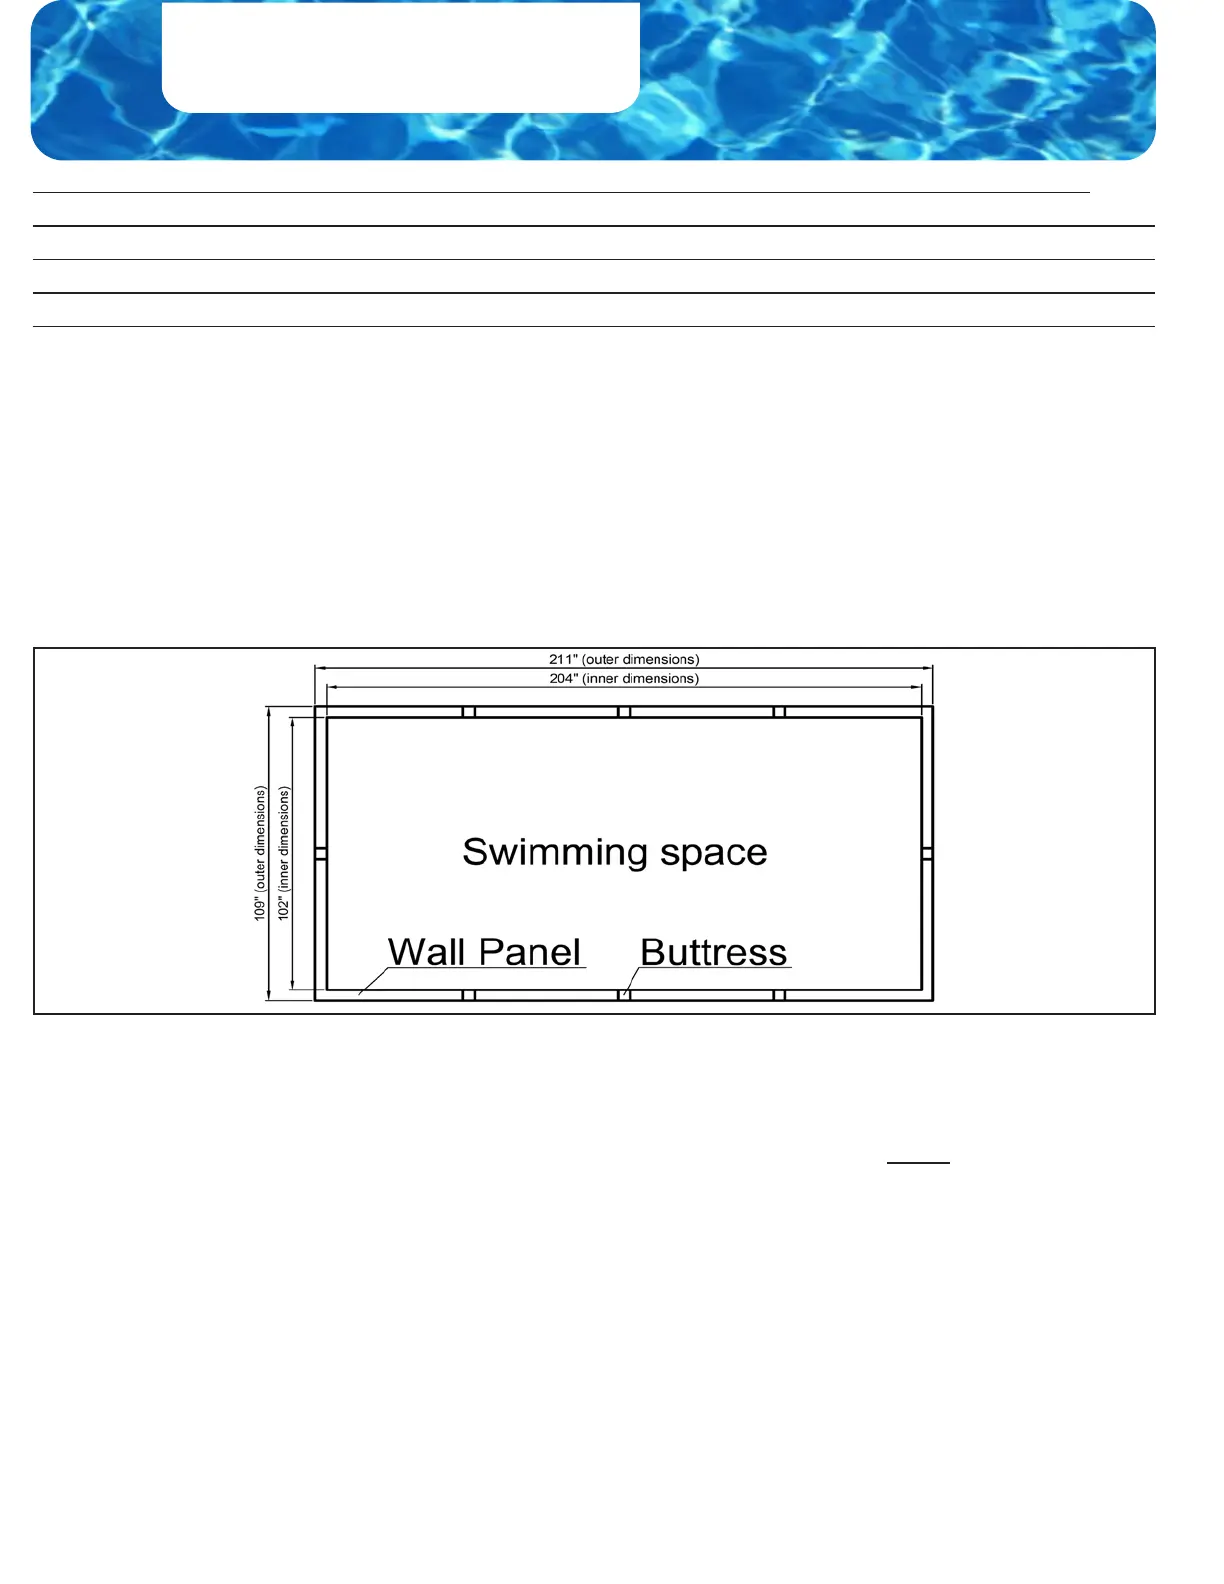
• Follow the 102” (2 panels) x 204” (4 panels) sketch provided above as your guide to install a rectangle
pool of any size. is sketch is universal for all rectangle pools’ sizes. Simply add or subtract 51” per
panel section and apply it to your pool’s size.
• First, square o and level the entire ground of your pool’s outer dimensions (Note: Outer dimensions
are always 3.5” wider than the inner dimensions). Next, dig out trenches every 51” apart between
every two wall panels for installing Buttresses under the ground, leveling ush with the ground. Please
make sure that the part of the trench located inside the pool is 20.25” long and the part of the trench
located outside the pool and accommodating the part of the Buttress having the Reinforcing Bracket
is 19.25” long according to the picture on the bottom on the right of the Page 9. ese trenches must
be four inches deep, four inches wide and thirty nine and a half inches long to accommodate all
buttresses. Also, at the ends of each Horizontal Buttress located on the dry/outside side of the pool, dig
6” (deep below the ground level) x 10” x 8.5” additional pits to accommodate 2” (thick) x 8”x 8” patio
blocks, making sure that the centers of the patio blocks will be centered and placed under the end of
each Horizontal Buttress. Next, please dig four 1.5” (deep) x 8.5” x 8.5” square pits to accommodate
four 2” (thick) x 8”x 8” patio blocks at all the four corners of the pool as shown on the illustrations on
the Page 9.
• Designate the place of the Skimmer, Filter and Return (or Two Returns), making sure that they
should be placed one panel o the corner (please see Page 23 for your reference as an example). If
your pool is quite big, please diagonally station the second return on the opposite side of the pool to
provide the pool with eective and ecient water circulation.
For 52” Above Ground Installation:
Choose Skimmer, Return(s) and Filter Location
IMPORTANT: Before starting the Installation Process, PLEASE read the entire Instruction
carefully and comprehensively step-by-step to follow all the information mentioned. Otherwise,
if you do not follow the Instruction out completely, the Pool Warranty attached to the Instruction
will become void. Please take into account that the textured surface of the pool panels should be
located on the outside/dry side of the pool and smooth surface – on the inside/wet side of the pool.
 Loading...