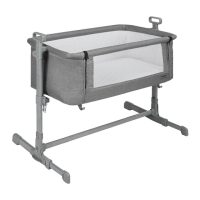
The Plebani Stellina is a crib designed for infants aged 0-6 months, with a maximum weight capacity of 9 kg. It is manufactured in accordance with European safety standards EN 1130:2010. The crib offers various features to ensure the baby's safety and comfort, including adjustable height, anti-regurgitation, rocking, and co-sleeping functions.
Components:
The Stellina crib comes with the following components for assembly:
- Legs (A): 2 pieces
- Main structure (B): 1 piece
- Lower support (C): 1 piece
- Cross frame (D): 1 piece
- Handles (E): 2 pieces
- Mattress (F): 1 piece
- Fixing belts (G): 2 pieces
- Transport bag (H): 1 piece
Assembly:
- Remove all components from the transport bag (H).
- Insert the legs (A) into the main structure (B) of the crib (Fig. 1), ensuring that the "A" and "B" markings on the legs and the crib structure align (Fig. 2).
- Insert the handles (E) into the legs (Fig. 3) until they are completely fixed with a "CLICK" sound. Verify the fixing by lifting the structure slightly using the handles.
- Insert the cross frame (D) into its designated slots at the bottom of the legs (Fig. 4), one side at a time, until it is completely fixed with a "CLICK" sound.
- Locate the two holes on the back side of the structure (Fig. 5A). Insert the lower support (C) (Fig. 5), ensuring the plastic hooks face upwards (Fig. 5B). Push it firmly until it is completely fixed with a "CLICK" sound (Fig. 5C).
- Secure the bottom of the structure to the support by closing the belts and pulling the straps to adjust them (Fig. 6). It is recommended to fix them as shown in the diagram.
- Insert the mattress (F) into the structure (Fig. 7).
- The "Stellina" crib is now ready for use (Fig. 8).
WARNING: In its basic configuration (as a standalone crib), always ensure the side is raised and locked.
Adjustments:
The Stellina crib has eight different height adjustments:
- To lower: Simultaneously press and hold the buttons on the sliding body (Fig. 9) until the desired height is reached.
- To raise: Grasp the crib at the sides and lift it (Fig. 10) until the desired position is achieved.
Functions:
- Anti-Regurgitation: This function allows you to lower only one side of the crib, maintaining a maximum difference of 2 position marks (Fig. 11).
IMPORTANT: When using this function, always place the baby with their head on the highest side (Fig. 12).
WARNING: Do NOT make adjustments with the baby inside the crib.
- Rocking: The Stellina is equipped with a rocking system for gently soothing your baby.
WARNING: Before activating this mode, ensure both sides are at the same height adjustment and the crib is horizontal (Fig. 14). If there is a height difference, raise the lower side until it matches the other.
To activate: Push the rocking foot at the bottom of the leg until it is fully released (Fig. 15). Repeat on the other leg.
To deactivate: Press the button on the rocking foot (Fig. 16) and lift it to restore the crib to fixed mode.
- Co-Sleeping (Near to the Bed): This mode allows you to fix the Stellina to the parents' bed.
WARNING: This mode is only permitted if the following conditions are met:
- The crib side must always be placed close to the parents' mattress, with no space between the two structures (Fig. 17).
- The height of the parents' mattress must be greater than or equal to the height of the crib mattress (Fig. 18), up to a MAXIMUM of 2 cm. If this condition is not met, adjust the crib height as described above (Fig. 9 and 10).
- The crib must be anchored to the bed frame or mattress support.
WARNING: Check that the crib structure in this function does not interfere with the parents' bed.
To use Co-Sleeping mode:
- Lower the front side of the Stellina.
- Open the zips completely, pull the inner tube fixing lever outwards (Fig. 19), and unhook the tube. Repeat on both sides.
- The crib is now open and ready to be fixed to the bed (Fig. 20). For comfort and safety, place the unhooked frame on its hooks under the structure (Fig. 21).
- To re-fix the tube after use, align the marks on the two parts of the tube (Fig. 22) and close both zips tightly to avoid injury.
WARNING: Use the crib with the lower tube ONLY in Co-Sleeping mode.
To fix to the parents' bed:
- Place the crib near the parents' bed and check its height relative to the parents' mattress. The crib has retractable feet to allow placement alongside beds with closed side rails.
- Attach the male part of the fixing belt (G) to the female part on the crib (Fig. 23).
- Open the belt buckle, unroll the belt, and pass it around the edge of the bed (Fig. 24).
- Close the buckles (Fig. 25). Repeat for the other belt.
- Push the crib close to the bed and pull the straps firmly until the crib is in close contact with the mattress.
WARNING: Before each use, check for any space between the mattress and the crib edge. If there is space, pull the straps until the mattress and crib are in close contact.
It is recommended to place any free part of the strap under the bed, or tie it, to keep it out of the baby's reach to prevent danger or strangulation.
Wheels with Brakes:
The Stellina is equipped with wheels with brakes for easy movement.
- To lock: Push the brake on the wheels downwards (Fig. 13).
- To unlock: Pull the brake lever upwards.
Wheels must be locked every time the crib is in use; use them only for moving.
General Warnings:
- NEVER leave your child unattended. The safety of your child is your responsibility.
- Using smartphones or tablets reduces attention to the baby and increases exposure to risks. Constantly check if the baby is less than 6 months old.
- Dispose of plastic packaging bags and keep them out of reach of children to avoid suffocation.
- Before each use, ensure all locking devices are engaged and functioning, and all components are free from defects or damage. Do not use the product if any parts are broken, defective, or missing.
- Check for loose or improperly assembled screws, or any elements that could injure the child or cause clothing to get caught (chains, soothers, etc.), leading to strangulation.
- Perform assembly and installation operations WITHOUT any babies nearby. Assembly must be done by an adult.
- Do not make any modifications or add elements that could compromise the safety of the item.
- When using the crib as a classic crib, always ensure the side rail is completely closed and secured, with no open points.
- Do not let your child play with this product, or allow other children or animals to play unattended near it or climb into it.
- The product is allowed for children aged 0-6 months, up to 9 kg MAXIMUM weight.
- Do not use this product when the child is able to sit up, kneel, or pull themselves up.
- Keep the crib away from heat sources, electrical outlets, ovens, fires, windows, and other dangers.
- If the product has been exposed to the sun, wait for it to cool down before use.
- Do not make modifications that could damage the product's safety. Use only manufacturer-approved spare parts.
- Do not place ropes or straps near the baby or the product, as they could be a source of strangulation.
- Ensure assembly instructions are followed in order, as some parts must be assembled before others.
- The mattress height must always be greater than or equal to the crib mattress height, up to a MAXIMUM of 2 cm.
- Do not use the crib on unstable or elevated surfaces, near stairs or steps.
- Keep fixing belts away from children.
- Do not place the product near walls or obstacles, as they could be a source of entrapment.
- Do not use the rocking/tilting function when you cannot supervise the baby in the crib. In these situations, the crib must be in a fixed position.
- Do not use the rocking function when the crib is in "co-sleeping" mode.
- Do not move the product with the baby inside.
- Use only one mattress inside the crib.
- Use only the mattress supplied with the product or approved replacement mattresses. If using another mattress, ensure it is less than 5 cm thick and does not create spaces greater than 3 cm between the bed and the mattress.
- Do not use plastic bags or films as mattress covers, as they can cause suffocation.
- Never use a water mattress.
- Do not allow your child to wear pins, necklaces, earrings, or other objects that could get caught in the net.
- Do not insert or leave objects or toys that would reduce the internal depth or that the baby could use to climb out, as they could cause choking or strangulation.
- Do not remove adhesive or sewn labels, as this may make the product non-compliant with safety standards.
- Do not perform any opening or closing operations of the crib with the baby or any objects inside. Ensure the baby is at a safe distance during these operations.
- Avoid putting fingers in locking systems and various mechanisms.
- When not in use, keep the item out of children's reach.
Care and Maintenance:
- Cleaning and maintenance should only be performed by adults.
- Regularly check the item and its accessories for broken, defective, or missing parts.
- WARNING: Do not wash any component or part in the washing machine.
- To clean plastic parts and fabric, use towels with warm water and neutral detergents.
- Brush fabric parts to remove dust.
- Do not use solvents or bleach. Dry thoroughly before use or storage.
- Dry iron parts well to prevent rust.
- Protect the product from atmospheric agents, water, rain, or snow; prolonged exposure to sunlight may cause color changes.
- Keep tubes and moving parts clean from dust and sand to prevent jamming, friction, and malfunctions.
- Regularly check wheels and their wear; keep them clean from dust and sand.
- Do not use spare parts not approved or supplied by the manufacturer. Use only Plebani spare parts.
The manufacturer reserves the right to make changes to the product at any time to improve it. Plebani s.r.l. disclaims any liability for damage or injury caused by improper use or misuse of the product.