5
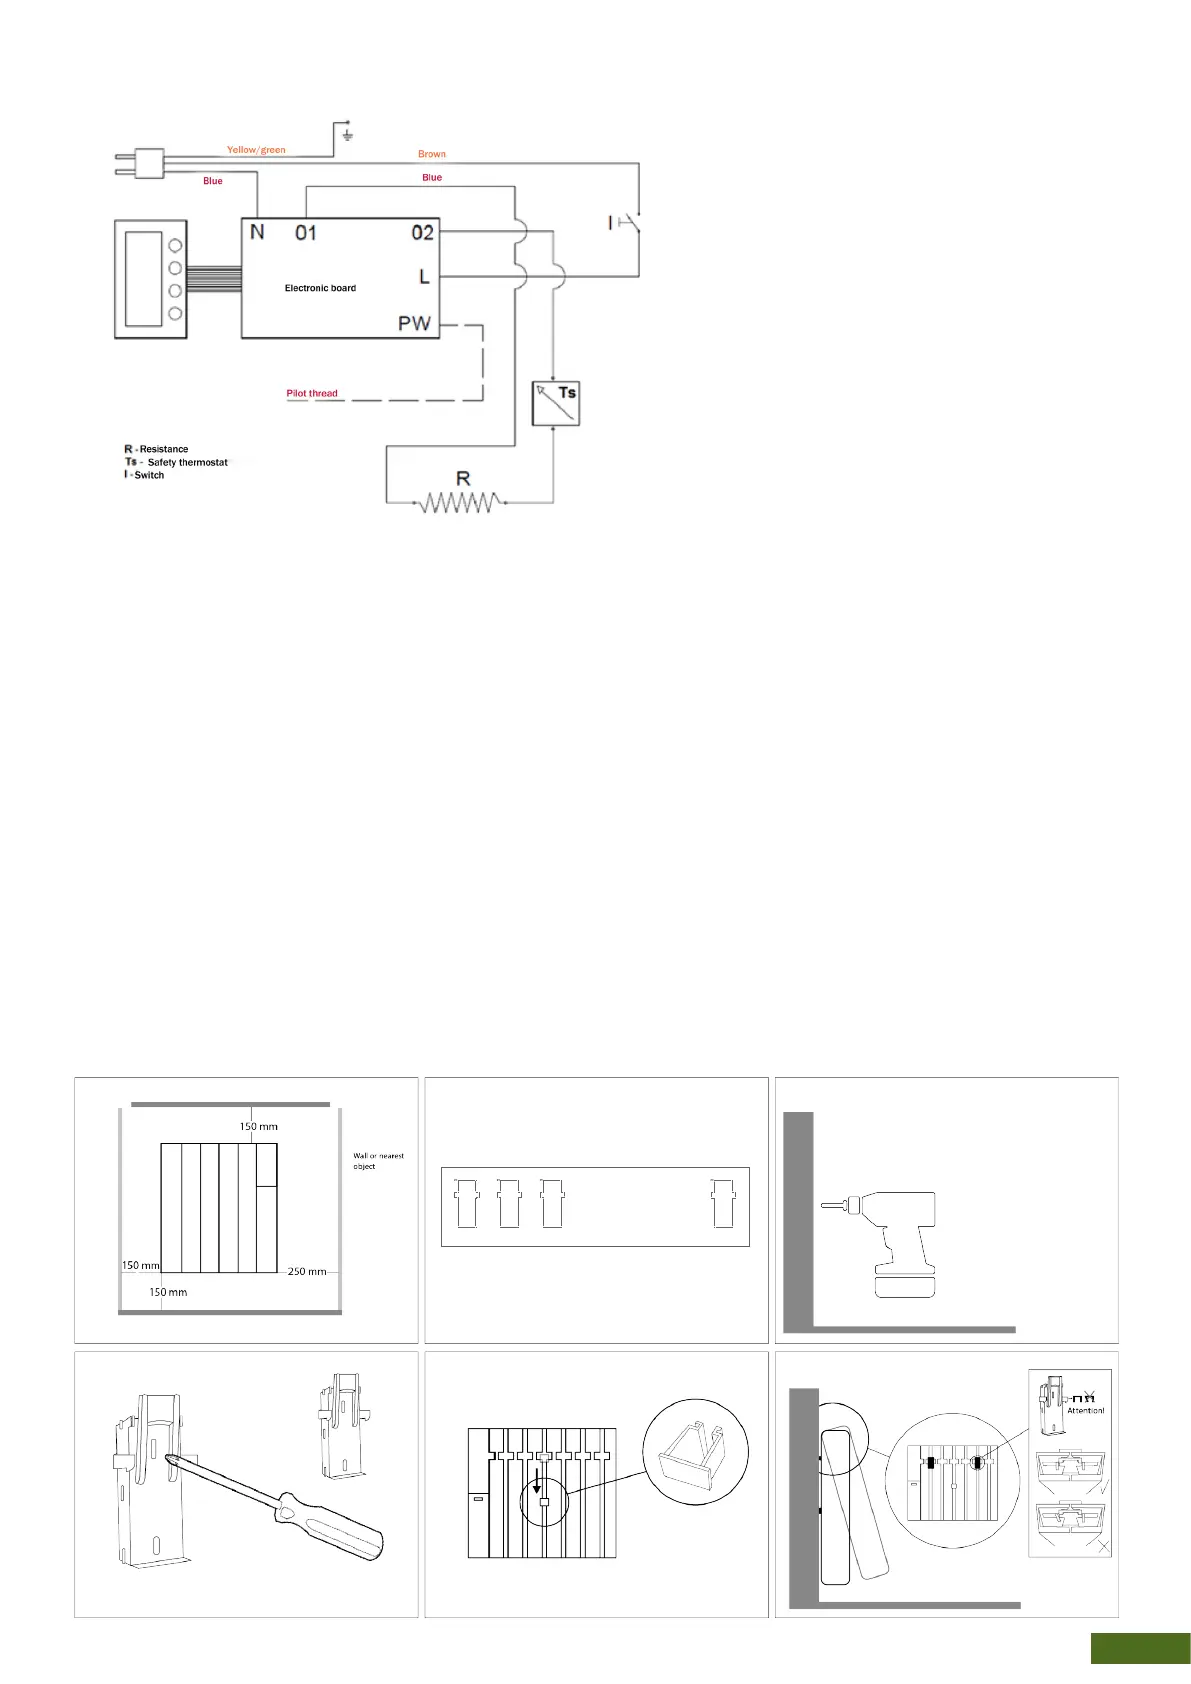
ELECTRIC WIRE
WALL MOUNTING
Together with the issuer, we provide an installation kit consisting of the following elements:
• Fixing brackets.
• Template.
• Screws and xing plugs.
Follow the following steps (graphics are attached):
1. Remove the radiator from its packaging (unpack at the top) and choose where to hang it taking into
account the minimum distances required around the emitter.
2. Use the guide included in the box to help. It is necessary to previously perforate the template in
the marks.
3. Using the holes as a guide, mark the necessary holes. We suggest you use a level to ensure that the
radiator is positioned correctly.
4. Using a drill, make the holes for the plugs appropriate to the type of wall.
5. Screw the xing brackets to the wall.
6. Place the radiator in the brackets, and x it using the screws provided for safety.
The radiator should always be xed to the wall.
 Loading...