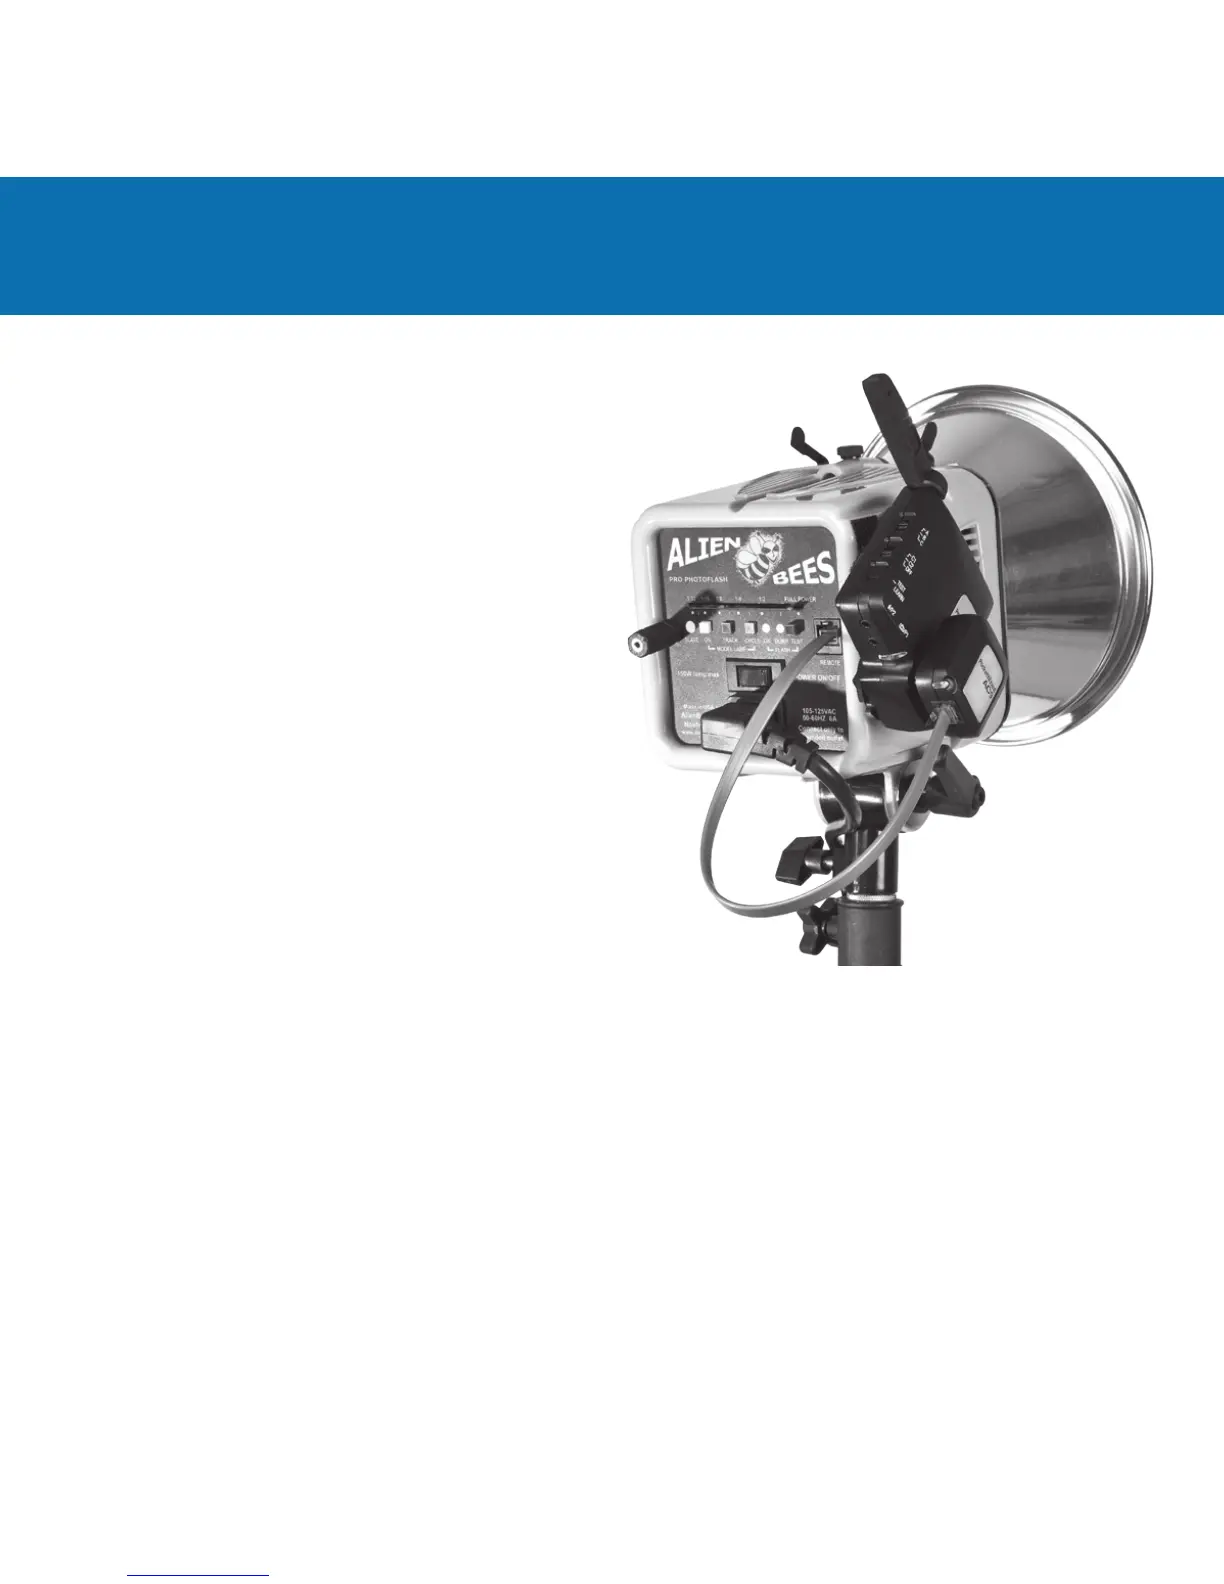
1. Slide the AC9 onto your remote FlexTT5 and connect
the REMOTE cable from the AC9 to the ash.
2. Turn on the ash rst, then the remote FlexTT5
radio. If this order is reversed, the ash may not
trigger properly. The AC9’s Status LED blinks green
occasionally to indicate normal operation.
3. Turn on the modeling light and set it to Cycle or
Ready mode as desired, and disable the optical
slave by inserting a plug or adapter into the sync
port. Power level will be set by the AC9.
4. Set up your camera and PocketWizard
ControlTL transmitter.
5. Take pictures.
6. Adjust the Camera’s Flash Exposure Compensation
(FEC) to adjust the output power of your remote
ash. See the Camera FEC Range and Basic Power Control sections for more information on FEC.
Make sure all your radios are set to the same PocketWizard ControlTL channel. See the Quick Guide or
Owner’s Manual for your FlexTT5 radio for more information on channels.
NOTE: The AC9 overrides ash power output settings you make directly on your ash. If you wish to control the ash
from its control panel, then you need to disconnect the REMOTE cord and connect a regular sync cord from the P2
port on your FlexTT5 to your ash.
To use your AC9:
 Loading...