Getting Started
Using your PocketWizard Plus
9. Install batteries or use an AC adapter in the transmitter and receiver.
10. Attach a sync cord (PC to miniphone is the most common) from your camera to the Sync
In connector on the transmitter or use the hot shoe to mount the transmitter to your
camera. Note that the Sync In and Sync Out jacks look the same,.
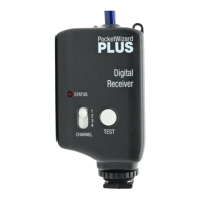
11. Attach a sync cord from the Sync Out connector on the receiver to your strobe pack
12. Set the Slide Switch on the PocketWizard Plus transmitter and receiver to the same ID
number
13. Turn the transmitter and receiver on. They will automatically sync up to 1/250th of a
second with a focal plane shutter and 1/500 with a lief shutter
14. Verify that the light on the receiver blinks every few seconds
15. Verify that the light on the transmitter double blinks every few seconds
16. Move the LOCAL - BOTH - REMOTE selector switch on the transmitter to the Both
position
17. Press the Test Fire button on the transmitter and confirm that the remote strobe goes off.
The receiver will stay activated as long as you hold the Test Fire button.
Installing Batteries
To install batteries, open the battery compartment door, and insert two AA batteries.
Make sure that they are in the proper orientation, as shown on the label in the battery
compartment.
When to Change Batteries
If the light on the PocketWizard Plus transmitter or receiver stops blinking, the batteries are low.
Press the test fire button on the transmitter, and see if the receiver light turns on. If it does, you
still have some battery life remaining, however with reduced range. If the light does not turn on,
the batteries should be replaced. Expected battery life for the receiver is about 120 hours, the
transmitter should last about 200 hours.
Connecting the Transmitter to the Camera
To connect the PocketWizard Plus transmitter to the camera you have two choices. The
preferred method of connecting is to use the built in hot-shoe. Slide the PocketWizard Plus into
the hot shoe on your camera. If you do not have a hot shoe, you will need a PC to miniphone
cable. The miniphone end plugs into the Sync In terminal on the transmitter and the PC
connection plugs into your camera's PC connector.
Connecting the Receiver to the Flash Pack
To connect a receiver to a flash pack requires a cable with a mini phone plug for the Sync Out
terminal on the receiver and the appropriate connector for your strobe. Sync cables are available
for most popular strobes. (see the included accessories list).
Connecting the Transmitter to a Local Strobe
The transmitter is equipped with a miniphone connector labeled Sync Out. With the appropriate
adapter or cable, a strobe pack can be fired by cable from the transmitter without the use of a
receiver. To fire the local pack, the local - both - remote switch should be in the Local or Both
position. NOTE: Most modern flash packs have low voltage, low current sync terminals. Some
older packs have as much as 400 volts applied across the sync terminals. The PocketWizard Plus
is designed to work with voltages as high as 300 volts, and may not work with higher voltage
packs. If you have an older flash unit, check with the manufacturer to make sure your pack will
 Loading...