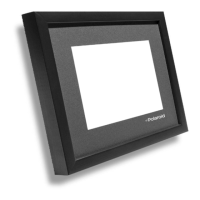
This document describes the Polaroid 8" Digital Picture Frame (PDF-800DB), a device designed for displaying digital photos.
Function Description
The Polaroid 8" Digital Picture Frame allows users to easily view photos directly from digital camera memory cards or USB flash drives. It supports creating slideshows with multiple transition effects and offers various picture enhancements, including photo rotation. The frame can be used in either horizontal or vertical orientation and also features a wall mount hole for flexible placement.
Important Technical Specifications
- Display: 7.9-inch IPS digital high-resolution display
- Screen Aspect Ratio: 4:3
- Display Resolution: 1024 x 768 pixels
- Supported Image Formats: JPEG, BMP, TIF, GIF, PNG
- Supported Memory Cards: SD, SDHC, SDXC, and MMC cards up to a maximum of 32 GB
- USB Slot: USB 2.0, supports most USB flash drives up to 128 GB
- File System Compatibility (USB): FAT32 (NTFS or exFAT not recognized)
- File Size Limit: 64MB (8000 x 8000 pixels)
- Power Adapter: Input: 100~240VAC, 50/60Hz; Output: 5VDC 1500mA
- Operating Temperature: 40° - 95° F (5° - 35° C)
- Internal Memory: The frame has internal memory for copying selected images.
Usage Features
Getting Started:
- Attach the included stand for horizontal or vertical placement, or use the wall mount hole.
- Insert a memory card (SD/MMC) or USB flash drive into the respective slot.
- Connect the power adapter to the DC IN 5V jack on the frame and then to an electrical outlet.
- Press and hold the Power/Menu Button to turn the frame on or off.
Display Source:
Upon powering on, the frame will typically start a slideshow if a card/drive is read. Pressing the Exit Button multiple times allows access to the File Browser mode, Main Menu, and Source Mode. In Source Mode, users can select the input source (Internal Memory, Memory Card, or USB Flash Drive) using the Left and Right Arrow Buttons and confirm with the Play/Pause button.
Main Menu:
The main menu offers options for Photo, Calendar, Browser, and Setting. Navigation is done using the Left and Right Arrow Buttons, with confirmation via the Play/Pause button.
Browser Mode:
Displays a list of photos on the left side of the screen with a thumbnail of the selected image on the right. Users can select photos using the Up and Down Arrow Buttons.
Photo Mode:
From the main menu, selecting "Photo" displays a thumbnail image gallery. Users can select an image using the arrow buttons and then press Play/Pause to begin a slideshow with that image. Pressing Play/Pause again pauses/resumes the slideshow.
Working with Photos (during slideshow):
Pressing the Menu Button during a slideshow brings up an on-screen menu with options:
- Slideshow Interval: Adjusts the display duration for each image (3, 5, 15, 30 seconds; 1, 5, 15, 30 minutes; 1 hour).
- Delete: Deletes the currently selected image.
- Information: Displays file name, resolution, file size, and creation date.
- Gamma Correction: Adjusts gamma values, similar to brightness but affecting images non-linearly. Options include Channel (RGB, Red, Green, Blue), GrayScale (-100 to +100), Brightness (-100 to +100), and Contrast (-100 to +100).
- Rotation: Pressing the Up or Down Arrow Buttons during a slideshow rotates the photo 90 degrees with each press.
Copy to Internal Memory:
From the Browser mode, select an image, press the Right Arrow Button to access the on-screen menu, select "Copy" using the Up and Down Arrow Buttons, and confirm with Play/Pause.
Delete Photo:
From the Browser mode, select an image, press the Right Arrow Button, select "Delete," and confirm.
Calendar Mode:
From the main menu, selecting "Calendar" displays a small slideshow of photos on the left, along with the time, and a monthly calendar on the right. Up and Down Arrow Buttons change the year, and Left and Right Arrow Buttons adjust the date.
Setup Menu:
Accessed from the main menu, the setup menu includes Photo Setup, Calendar Setup, and System Setup.
- Photo Setup:
- Icon Action: Choose between "Thumbnail" (gallery display) or "Slideshow" (automatic slideshow start) when "Photo" is selected from the main menu.
- Display Ratio: Options include "Auto Fit," "Optimal," or "Full Screen." "Auto Fit" is recommended for most images.
- Slideshow Repeat: "Repeat" (restarts slideshow) or "No Repeat" (returns to main menu).
- Slideshow Mode: "Single Window" (one image), "Two Windows" (two images side-by-side), "Three Windows," or "Four Windows" (multiple images simultaneously).
- Slideshow Order: "Sequential" (in order) or "Random" (random order).
- Calendar Setup:
- Set Date: Sets date, month, and year.
- Set Time: Sets the time of day.
- Set Time Format: 12-hour or 24-hour display.
- System Setup:
- Language: Choose from English, French, German, Italian, Spanish, Portuguese, Swedish, Dutch.
- Gamma, Brightness, Contrast: Adjust display values from 1-100.
- Auto Power Off/On: Set specific times for the frame to power off or on automatically.
- Auto Power Frequency: Select when auto power settings activate (Weekend, Weekdays, Daily, Once).
- Start Up Mode: Choose whether to start with a slideshow ("Photos") or the main menu ("Off") when powered on.
- Version: Displays firmware revision number.
- Reset Settings: Returns all settings to factory defaults.
Maintenance Features
- Cleaning: Always turn off the unit and remove the power adapter before cleaning. Use a soft, dry cloth. Do not spray or pour liquids directly onto the screen or casing. Avoid abrasive materials or chemical cleaners (alcohol, benzene, etc.).
- Handling: Do not drop the device or subject it to harsh impacts. Handle the LED panel with care as it is made of glass and sensitive to excessive force and sharp objects.
- Storage: Keep the frame away from heat sources, dirty, humid, or wet places. Keep out of direct sunlight.
- Ventilation: Do not block the ventilation holes on the back of the frame.
- Overheating Prevention: Unplug the product when not in use for long periods to prevent overheating and screen damage.
- Data Loss Prevention: Do not insert or remove memory cards or USB devices when the power is on.
- Repair: Do not attempt to repair or disassemble the unit yourself. Refer servicing to qualified personnel only.
- Power Adapter: Use only the supplied DC 5V power adapter. Do not unplug the adapter while viewing pictures.