is still hot.
• Do not try to unscrew the safety cap when the appliance
is in use.
• Check the safety cap and that the related inner gasket is
present, replace them with original spare parts if neces-
sary.
CC
CC
OO
OO
RR
RR
RR
RR
EE
EE
CC
CC
TT
TT
UU
UU
SS
SS
EE
EE
OO
OO
FF
FF
TT
TT
HH
HH
EE
EE
PP
PP
RR
RR
OO
OO
DD
DD
UU
UU
CC
CC
TT
TT
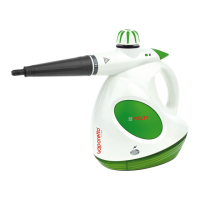
This appliance is intended for home use as a steam gene-
rator as described and in accordance with the instructions
provided in this manual. Please read these instructions
carefully and keep them, as you may find them useful in
future.
Polti declines liability for any damage or accident deri-
ved from any use of EASY STEAM which is not in con-
formity with the instructions contained in this booklet.
AA
AA
TT
TT
TT
TT
EE
EE
NN
NN
TT
TT
II
II
OO
OO
NN
NN
Directive 2002/96/EC (Waste Electrical and Electronic
Equipment - WEEE): information for users
This product complies with EU Directive 2002/96/EC.
The crossed-out wastebasket symbol on the appliance
means that at the end of its useful lifespan, the product
must be disposed of separately from ordinary household
wastes.
The user is responsible for delivering the appliance to an
appropriate collection facility at the end of its useful life-
span.
Appropriate separate collection to permit recycling, treat-
ment and environmentally compatible disposal helps pre-
vent negative impact on the environment and human health
and promotes recycling of the materials making up the pro-
duct. For more information on available collection facilities,
contact your local waste collection service or the shop
where you bought this appliance.
II
II
MM
MM
PP
PP
OO
OO
RR
RR
TT
TT
AA
AA
NN
NN
TT
TT
Before leaving our factory all our products are rigorously
tested. Your Easy Steam may contain some residual water
in the boiler from the factory testing.
PP
PP
RR
RR
EE
EE
PP
PP
AA
AA
RR
RR
AA
AA
TT
TT
II
II
OO
OO
NN
NN
FF
FF
OO
OO
RR
RR
UU
UU
SS
SS
EE
EE
1. Unscrew the patented safety cap (A) (fig.1) and fill the
boiler with not more than 1.2 litres of water. You may
use the jug (10) (fig.2).
2. Carefully screw on the safety cap to hand tight. Make
sure the patented safety cap (A) is fully and correctly
screwed on, otherwise you may experience very hot
steam escaping from around the cap.
3. Connect the power supply cable (F) into an earthed
power supply of the correct voltage.
II
II
NN
NN
SS
SS
TT
TT
RR
RR
UU
UU
CC
CC
TT
TT
II
II
OO
OO
NN
NN
SS
SS
FF
FF
OO
OO
RR
RR
UU
UU
SS
SS
EE
EE
1a. Press down the generator on/off switch (B); the fun-
ction indicator light (C) lights up.
2a. Wait for the steam pressure indicator (E) to go out
(about 10 minutes). EASY STEAM is now ready for
use.
3a. The steam gun (2) is equipped with a safety switch (3)
which when engaged prevents the accidental start of
the steam jet by children or people who do not know
how to operate the appliance. With the switch (3) in the
“OFF” position, the lever controlling the steam jet is loc-
ked. Should the hose be left unattended for a moment
whilst the appliance is connected to the mains, put the
safety switch in the “OFF” position. To start the steam
jet, move the switch (3) backwards (ON) and activate
the steam request lever (4) (Fig. 3).
The first jet of steam may contain some water droplets, due
to imperfect thermic stabilisation inside the flexible hose.
We would therefore advise that the first jet of steam is pla-
yed onto an old cloth until a constant steam flow is obtai-
ned.
Note: The steam pressure indicator (E) may go on and
off from time to time during use of EASY STEAM, this
is quite normal
WARNING: If you press the steam request lever (4) when
the appliance is still under pressure, even if it is off and not
connected to the wiring system, you may still experience
steam escaping from the flexible hose. So when you switch
off the appliance, before storing it, we advise to press the
lever (4) till the steam flow is exhausted.
CC
CC
OO
OO
NN
NN
NN
NN
EE
EE
CC
CC
TT
TT
II
II
OO
OO
NN
NN
OO
OO
FF
FF
AA
AA
CC
CC
CC
CC
EE
EE
SS
SS
SS
SS
OO
OO
RR
RR
II
II
EE
EE
SS
SS
All the accessories of EASY STEAM can be connected to
the handle or to the extension tubes as per the following
instructions:
• Couple the handle or the extension tubes with your cho-
sen accessory till the accessories locking button (11)
engages (fig. 4).
• To unhook the accessories and separate the tools, press
the switch (11).
• before using the accessories, always check they are fully
connected
PP
PP
AA
AA
TT
TT
EE
EE
NN
NN
TT
TT
EE
EE
DD
DD
SS
SS
AA
AA
FF
FF
EE
EE
TT
TT
YY
YY
CC
CC
AA
AA
PP
PP
//
//
““
““
WW
WW
AA
AA
TT
TT
EE
EE
RR
RR
OO
OO
UU
UU
TT
TT
””
””
Your Easy Steam is equipped with the unique Polti paten-
ted safety cap, which prevents opening of the boiler as long
as there is any pressure remaining inside. This is an impor-
tant and indispensable safety device, and it is necessary to
follow certain procedures when re-filling the boiler.
Lack of water in the boiler is shown by a warning light (D).
When no more steam comes out of the appliance, do as fol-
lows:
• Switch off the machine at the generator on/off switch (B)
• Disconnect the power supply cable (F) from the mains.
• Wait for a few minutes to allow the generator boiler to
cool down.
• Unscrew anti-clockwise the patented safety cap (A).
• When cool, proceed to carefully refill the boiler as descri-
bed in paragraph 1 of the section “Preparation for Use”.
If refilling the generator when not completely cooled, we
recommend that you CAREFULLY pour only very small
quantities of water at each pouring, so as to avoid spit-
ting from the boiler. Cover exposed skin whilst filling.
 Loading...