15
Setting up the Polycom HDX Ceiling Microphone Array Series
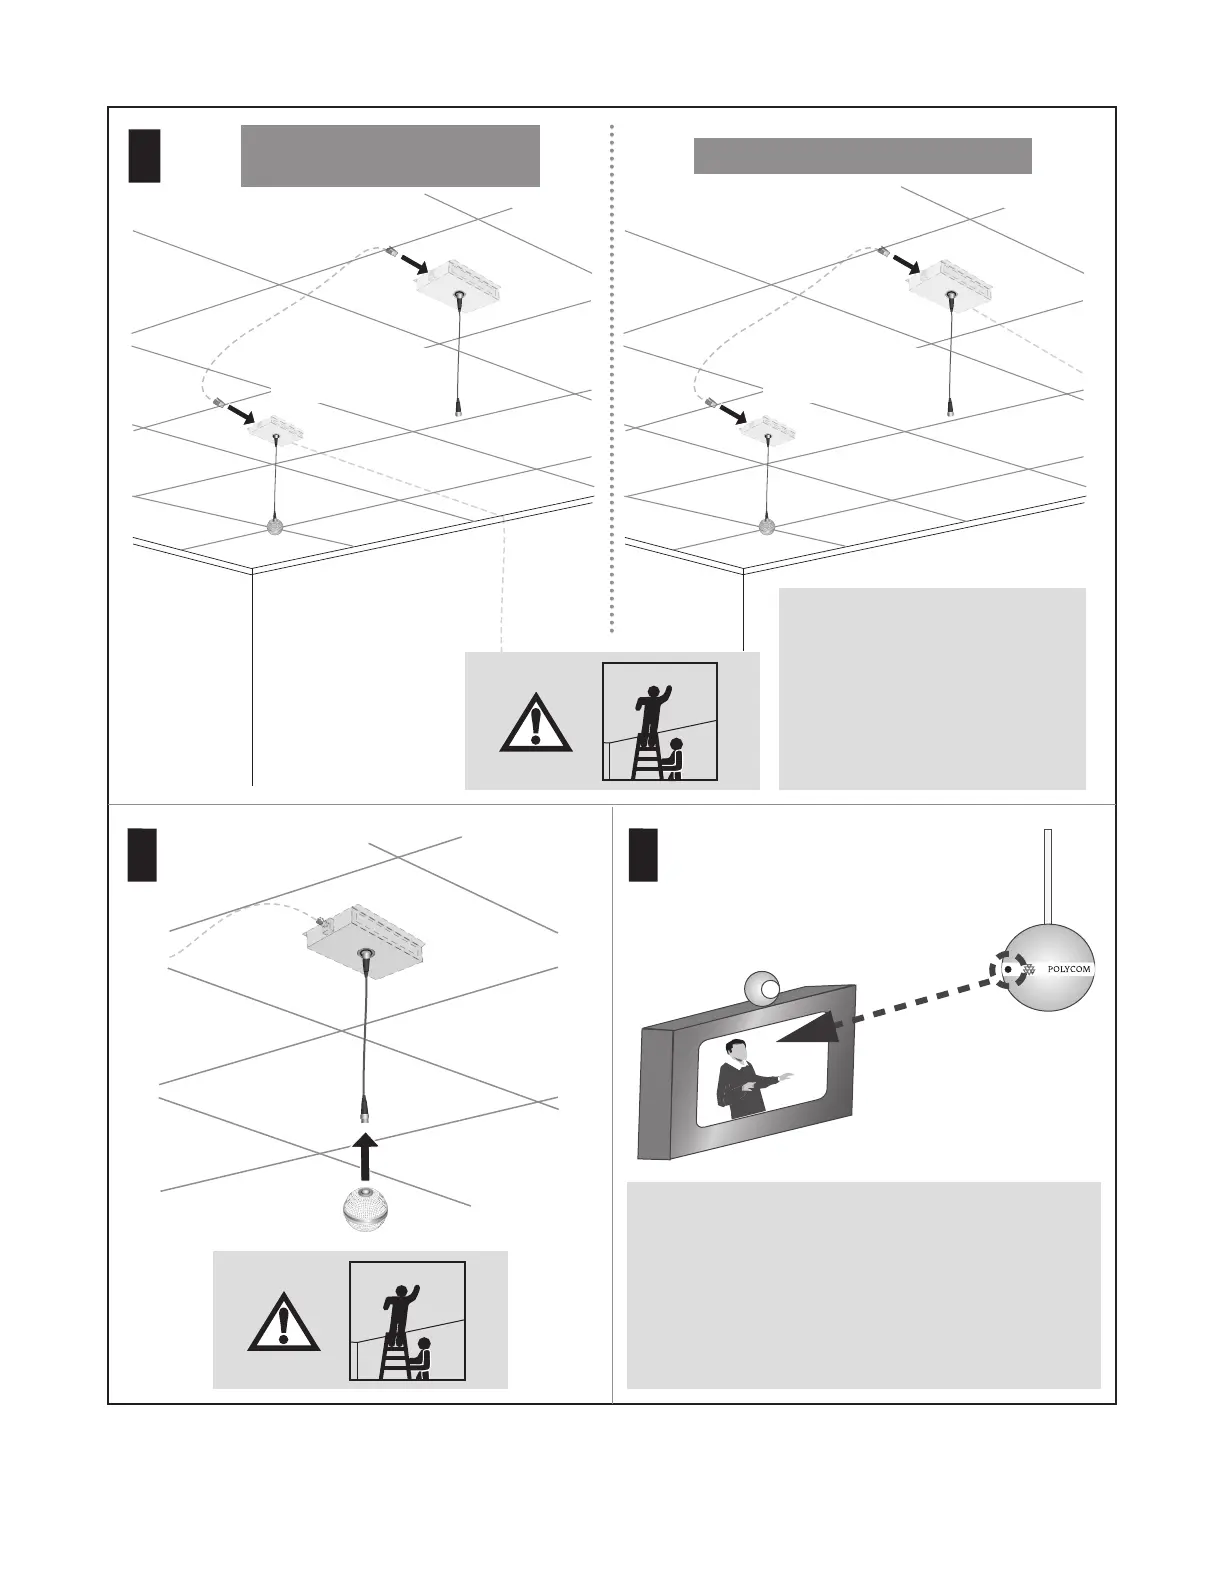
4
25’ (7.6 m)
5
(Do not use the non-plenum
straight-through
10 ‘ (3.1 m) cable)
For Polycom HDX Systems and for SoundStructure C-Series
Systems that are being used with a video conferencing
system: You must point the dot (located on the band around
the middle of the microphone ball) towards the main display.
For Polycom SoundStructure C-Series Systems that are not
being used with a video conferencing system and for TPX HD
306M Systems: You must point the dot (located on the band
around the middle of the microphone ball) towards the front
of the room.
6
For Polycom TPX HD 306M Systems
IMPORTANT: For TPX HD 306M
installations, the Ceiling Microphone
Arrays must be cabled as follows:
Use the 25 ft (7.6 m) cable to connect
the Ceiling Microphone Array on the
left (when facing the credenza) to the
Ceiling Microphone Array on the right.
Use the 50 ft (15.2 m) cable to connect
the Ceiling Microphone Array on the
right to the codec.
25’ (7.6 m)
(Do not use the non-plenum
straight-through
10 ‘ (3.1 m) cable)
For Polycom HDX Systems and
SoundStructure C-Series Systems