EasyManua.ls Logo

Polycom HDX Ceiling Microphone Array Series

Polycom HDX Ceiling Microphone Array Series
16 pages
To Next Page IconTo Next Page
Loading...
Setting up the Polycom® HDX
Ceiling Microphone Array Series
1725-27017-002/A
©2007, Polycom, Inc. All rights reserved. Polycom® and the Polycom logo are registered trademarks
and HDX™, SoundStructure™, and TPX™ are trademarks of Polycom, Inc.
November 2007
Before you begin, make sure that your ceiling can support up to 2 lbs (.9 kg).
If you are setting up a Polycom HDX Ceiling Microphone Array with a Polycom HDX
System or a Polycom SoundStructure C-Series System, begin on page 2.
If you are setting up a Polycom HDX Ceiling Microphone Array Extension Kit with a
Polycom HDX System or a Polycom SoundStructure C-Series System, begin on page 12.
If you are setting up a Polycom TPX HD 306M System, install the first Ceiling
Microphone Array by beginning on page 2, and install the second Ceiling Microphone
Array by beginning on page 12.
Question and Answer IconNeed help?

Do you have a question about the Polycom HDX Ceiling Microphone Array Series and is the answer not in the manual?

Polycom HDX Ceiling Microphone Array Series Specifications

General IconGeneral
Microphone TypeCeiling microphone array
Polar PatternOmnidirectional
ConnectivityWired
Microphone ArrayYes
MountingCeiling mount
Connector TypeRJ-45
Power RequirementsPowered by the HDX codec
Operating Temperature0°C to 40°C

Summary

Polycom HDX Ceiling Microphone Array Setup

Step 1: Initial Cable Connection

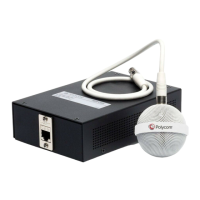
Connect the appropriate Polycom microphone array cable to the system.

Step 2 a: Suspended Ceiling Installation Start

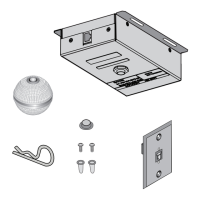
Begin installation for suspended ceiling microphone arrays.

Non-Suspended Ceiling Installation Guide

Step 3 a-b: Non-Suspended Ceiling Attachment and Alignment

Attach enclosure and align array for non-suspended ceilings.

General Installation Steps and Orientation

Step 6: General Installation Safety Warning

General safety warning during installation.

Step 7: Microphone Array Orientation Guidelines

Properly orient the microphone ball for optimal audio pickup.

Optimal Microphone Placement for Stereo Audio

Ceiling Microphone Array Extension Kit Setup

Extension Kit Step 1: Initial Cable Connection

Connect the extension kit cable to the microphone array.

Extension Kit Step 2 a: Suspended Ceiling Installation Start

Begin extension kit installation for suspended ceilings.

Extension Kit: Non-Suspended Ceiling Installation

Extension Kit Step 3 a-b: Non-Suspended Ceiling Attachment and Alignment

Attach extension kit enclosure and align array in non-suspended ceilings.

Additional Resources and Guides

Related product manuals