10 15
DVD PLAYER SETUP INSTRUCTION
SETUP is used to set up the player configuration. Consist of : GENERAL, AUDIO, VIDEO and PREFERENCE.
1. Press “SETUP” button to enter to SETUP main menu.
2. Press “ / ” naviagtor button to select the one of SETUP menu that
will be set (GENERAL / AUDIO / VIDEO / PREFERENCE).
3. Press “ / ” button on the remote control to enter to the selected
setup menu (GENERAL / AUDIO / VIDEO / PREFERENCE) and press “ /
” navigator button to select the one of submenu (TV Display / Angle
Mark / Captions / Screen Saver).
4. Press “ / ” button on the remote control to enter to the selected
submenu and press “ / ” navigator button to select (Pan Scan /
Letter Box / Wide), then press “ / ” button on the remote control.
5. Press “SETUP” button again to exit from SETUP menu.
General
GENERAL setup menu consist of : TV DISPLAY, ANGLE MARK, CAPTIONS and SCREEN SAVER.
TV Display
1. Pan Scan : Select this if the player connected to normal ratio TV screen (4:3), picture will fulfill the screen
but will sliced on the right and left of the picture.
2. Letter Box : Select this if the player connected to normal ratio TV
screen (4:3), you will watch the picture’s source aspect ratio with
black border on the top and bottom.
3. Wide : Select this if the player connected to wide screen (16:9).
Notes :
- Picture’s aspect ratio is depends to the disc recording format, not all
DVD disc can display the picture on the selected aspect ratio.
- You should select TV Display setting according with the TV type.
Angle Mark
Only can perform if the DVD disc recorded in many camera angle.
1. ON : When playing DVD disc, OSD will display the angle mark on the right top corner of the TV screen.
2. OFF : The angle mark not be displayed.
Captions
1. ON : To displaying text on the TV screen.
2. OFF : Captions not displayed on the TV screen.
Screen Saver
When the player without activity or does not receive signal for 4 minutes, Screen Saver will appear. This
facility is used to prevent the damage of the display screen.
1. ON : To activate the Screen Saver option.
2. OFF : Screen Saver is not active.
Another function : Another function like VOLUME control, PAUSE, FAST FORWARD, FAST REVERSE, NEXT,
PREVIOUS and others, also can be used during playing MPEG4/MP3 disc.
Additional functions while playing JPEG disc : “ / ” on the remote control or “ ” button on the front
panel of the unit used to display the next picture continuously. “ ” / “ ” button used to go to the next
or previous picture. “ZOOM” button used to enlarge/shrinking the picture, for ZOOM IN (enlarge the picture)
press “ ” (fast forward) button and for ZOOM OUT (shrinking the picture) press “ ” (fast reverse)
button. “ / / / ” navigator buttons used to seeking certain part of the picture on ZOOM IN function, also
can be used to rotate picture position.
Playing MP3/MPEG4/JPEG files through USB, SD/MMC/MS or DOCKING terminal
You can playing MPEG4/MP3/JPEG/certain files that storage previously on the USB Flashdisk, SD/MMC/MS
card or MP3/MP4 player through USB connector, SD/MMC/MS card slot or DOCKING terminal of the unit. Plug
the storage media that you used to stored MPEG4/MP3/JPEG files to the according terminal.
1. USB terminal :
a. Plug the USB Flashdisk/MP3/MP4 player contains MPEG4/MP3/JPEG files to USB terminal. For MP3/
MP4 player with mini USB data cable connector, connect the cable that connected with MP3 player/
MP4 player to the USB terminal.
b. Press “DVD/M.MEDIA” button on the front panel or “FUNCT” (function) button on the remote control
several times to select DVD function, then press “MULTIMEDIA” button on the front panel or on the
remote control to select USB input, VFD screen will displayed USB LOAD. The unit will read the attached
equipment for a moment.
c. For next operational, please refer to the “Playing MPEG4/MP3/JPEG disc” topic.
2. SD/MMC/MS card terminal :
a. Insert SD/MMC/MS card contains MPEG4/MP3/JPEG files to the SD/MMC/MS card slot of the unit.
b. Press “DVD/M.MEDIA” button on the front panel or “FUNCT” (function) button on the remote control
several times to select DVD function, then press “MULTIMEDIA” button on the front panel or on the
remote control to select CARD input, VFD screen will displayed CRD LOAD. The unit will read the
attached equipment for a moment.
c. For next operational, please refer to the “Playing MPEG4/MP3/JPEG disc” topic.
3. DOCKING terminal :
a. Set MP3/MP4 player contains MPEG4/MP3/JPEG files to the DOCKING terminal of the unit.
b. Press “DOCKING” button on the front panel or press “FUNCT” (function) button on the remote control
several times to select DOCKING function. The unit will read the attached equipment for a moment.
c. For next operational, please refer to the “DOCKING OPERATING INSTRUCTION” topic.
Note : For the safety of the data that is stored inside the USB Flashdisk or SD/MMC/MS card, you are
suggested to change the function to the DVD function firts before unplug the USB Flashdisk or SD/MMC/MS
card from its terminal.
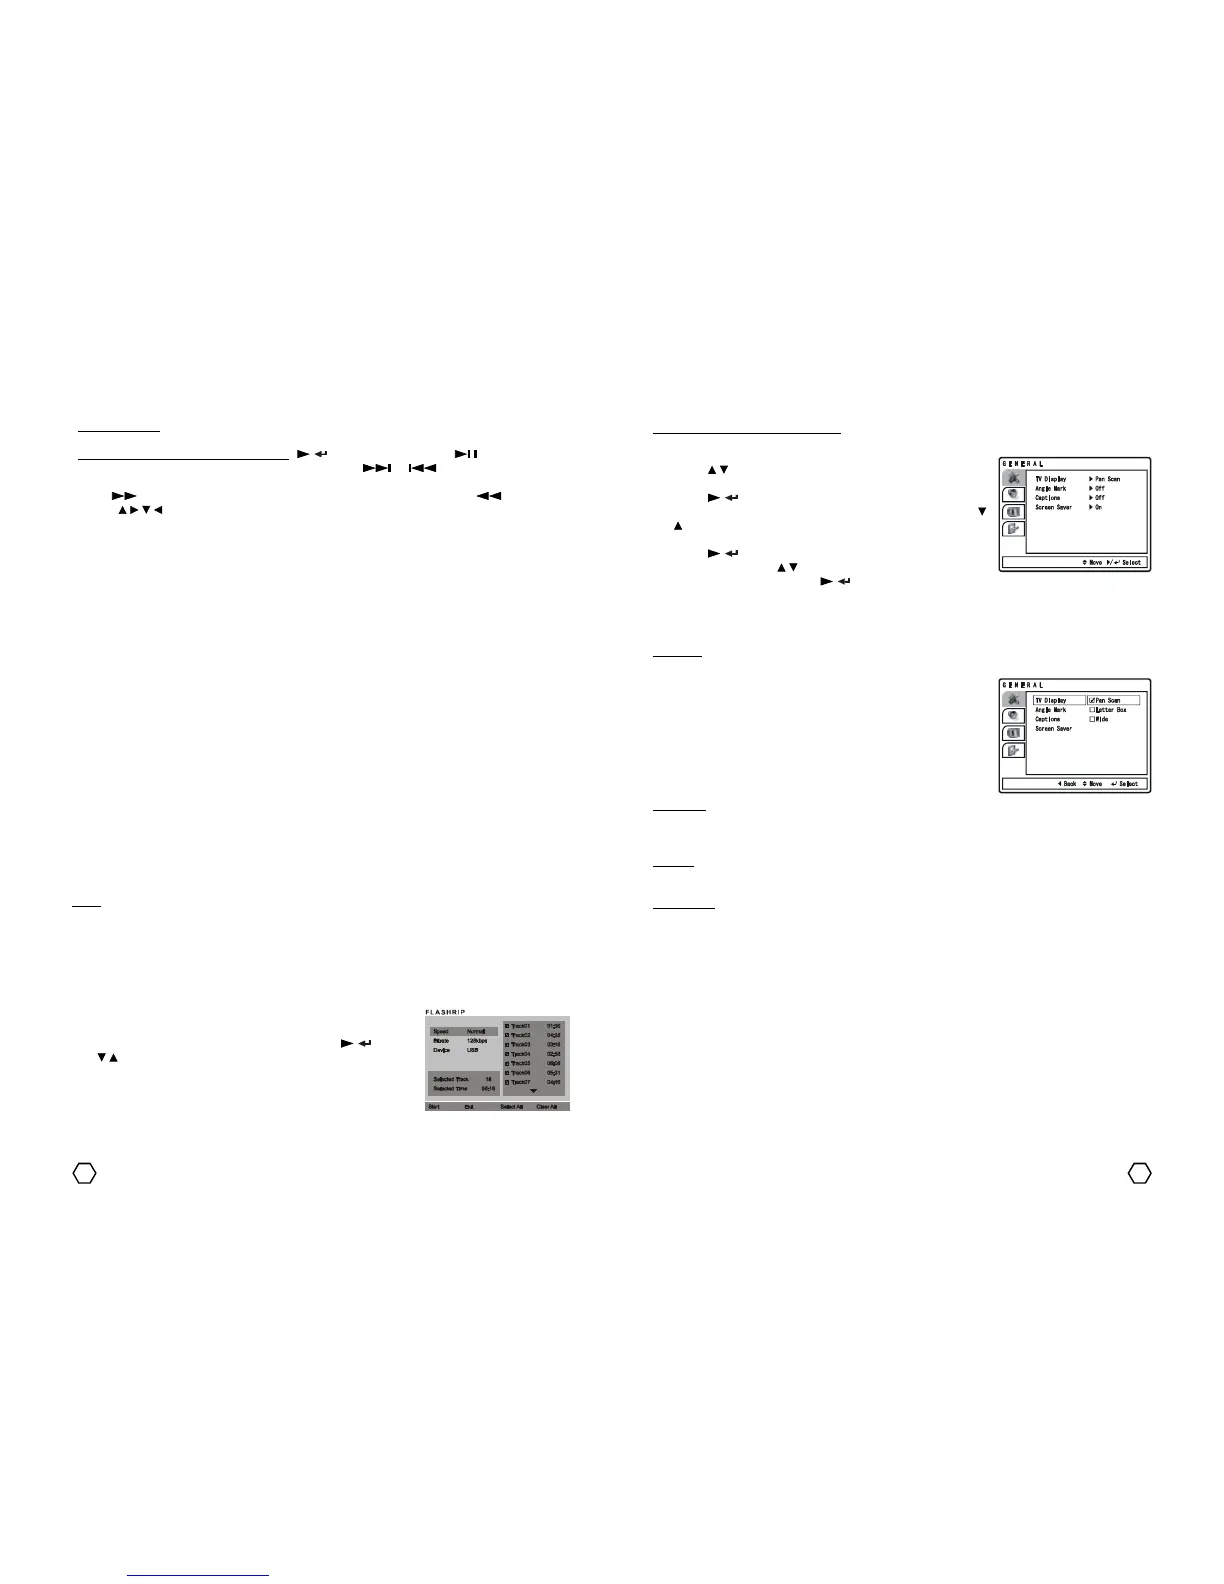
CDDA rip using the FLASHRIP function
With this features, enable you to rip the CDDA to be MP3 file format that is stored to the USB Flashdisk.
1. Plug the USB Flashdisk to the USB terminal.
2. Insert the CDDA disc to be converted to the disc tray.
3. After CDDA had read, press “FLASHRIP” button on the remote control.
On the TV screen will displayed FLASHRIP menu.
4. Set the SPEED and BITRATE by entering them using “ / ” and use
“ / ” button to confirm the desired SPEED and BITRATE.
 Loading...