EasyManua.ls Logo

Polywood NCC2280 User Manual

Polywood NCC2280
2 pages
To Next Page IconTo Next Page
Page #1 background imageLoading...
Page #1 background image
05/25/2017
20-Year Warranty
To view our full warranty, please visit
polywoodoutdoor.com/warranty
Easily register your product using
one of the methods below:
Cleaning Tips
Even POLYWOOD gets dirty — here
are some ways to help keep it clean:
For a quick clean:
Simply wipe down with soap and water.
For a deeper clean:
You’ll need:
» ⅓ bleach and ⅔ water solution
» clean cloth
» soft bristle brush
Wipe on solution with your cloth
and let it sit on the lumber for a few
minutes (this will not aect the color).
Then, loosen any dirt and debris that
may catch in surface grooves with a
soft bristle brush; hose down to rinse.
Text POLYWOOD to 71403
Receive a link to register online
Register on our website
register.polywoodoutdoor.com
Send a Picture
Take a photo of the icon below and
text it to 71403 (US only)
polywoodoutdoor.com
Watch & Learn
For assembly videos and more,
visit youtube.com/polywood
— or —
— or —
Having Trouble?
If you have questions or concerns regarding
assembly instructions or missing parts, please
contact us at (877) 457-3284 or email
support@polywoodoutdoor.com
Share your space
We love to see where our furniture
ends up — snap a pic and share it on
Instagram or Facebook!
#polywood
Assembly Instructions
SKU
Furniture Name
NCC2280
Nautical Chaise w/ Arms
Question and Answer IconNeed help?

Do you have a question about the Polywood NCC2280 and is the answer not in the manual?

Polywood NCC2280 Specifications

General IconGeneral
CategoryOutdoor Furnishing
Weather ResistantYes
Product NamePolywood NCC2280
MaterialRecycled Plastic
ColorWhite

Summary

Troubleshooting and Support

Product Warranty Information

Cleaning and Maintenance

Quick Clean Method

Simple wipe-down with soap and water for routine cleaning.

Deep Clean Method

Use bleach/water solution, cloth, and brush for tougher dirt and grooves.

Assembly Preparation

Tools Required for Assembly

Lists the necessary tools for assembly, including hex keys.

Parts Identification

Details all components included in the package for assembly.

Assembly Steps

Step 1: Frame Assembly

Connect side frames using screws.

Step 2: Attach Backrest Supports

Attach backrest supports to the side frames.

Step 3: Secure Seat Slats

Secure seat slats to the frame assembly.

Step 4: Attach Leg Support

Attach the leg support structure.

Step 5: Final Assembly

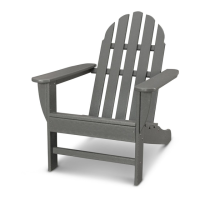
Final assembly showing the completed chaise.

Related product manuals